
1.2 Console Debug System Service Using USB
This example application demonstrates the USB based console and debug system service.
Description
- The application example demonstrates console and debug system service using two instances of console, each connected to an instance of the USB CDC function driver
- These will appear as two COM ports on the host PC
- The example first demonstrates the various debug system service APIs/macros
- It then demonstrates the console related APIs
- The application asks the user to enter a character on one console which is echoed back on the second console (and vice versa), using the console system service read/write APIs
Downloading and Building the Application
To clone or download this application from GitHub, go to the main page of this repository and then click Clone button to clone this repository or download as zip file. This content can also be downloaded using content manager by following these instructions.
Path of the application within the repository is apps/system/console_debug/sys_console_debug_usb_read_write/firmware.
To build the application, refer to the following table and open the project using its IDE.
| Project Name | Description |
|---|---|
| sam_e54_xpro.X | MPLAB X project for SAM E54 Xplained Pro Evaluation Kit |
Setting Up the Hardware
The following table shows the target hardware for the application projects.
| Project Name | Description |
|---|---|
| sam_e54_xpro.X | SAM E54 Xplained Pro Evaluation Kit |
Setting Up SAM E54 Xplained Pro Evaluation Kit
- Connect the Debug USB port on the board to the computer using a micro USB cable
Running the Application
- Build and program the application using its IDE.
- Attach the device to the host. If
the host is a personal computer and this is the first time the user has plugged
this device into the computer, the user may be prompted for a
.inffile.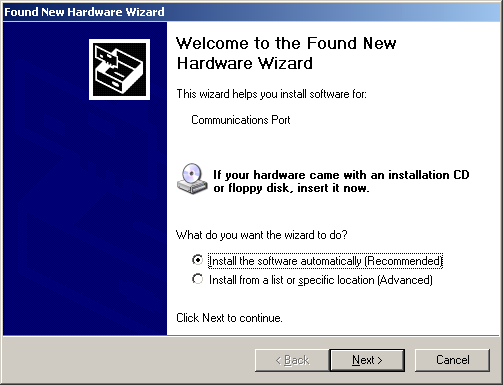
- Select the
Install from a
                        list or specific location (Advanced)
option. Specify the<install-dir>/core_apps_sam_d5x_e5x/apps/system/console_debug/sys_console_debug_usb_read_write/infdirectory.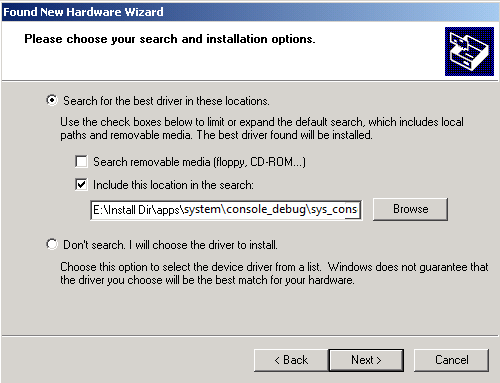
Note:
- As an option, to specify
the driver, the user may open the device manager and expand the Ports
(COM & LPT) tab, and right click the
Update Driver
                                Software…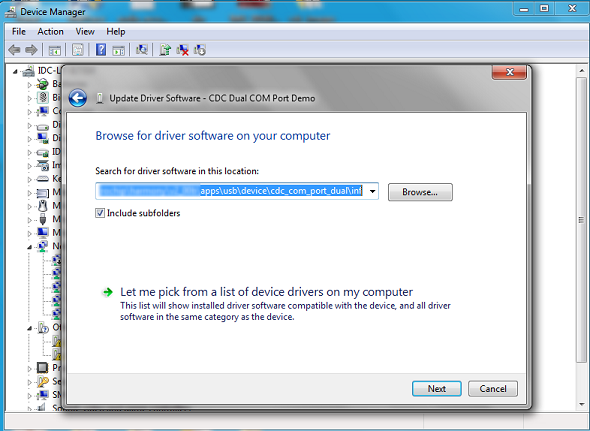
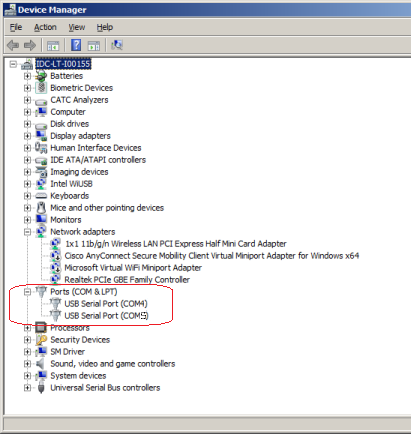
- Verify that the
enumerated USB device is seen as a virtual USB serial comport in Device
Manager
- As an option, to specify
the driver, the user may open the device manager and expand the Ports
(COM & LPT) tab, and right click the
- Once the device is successfully
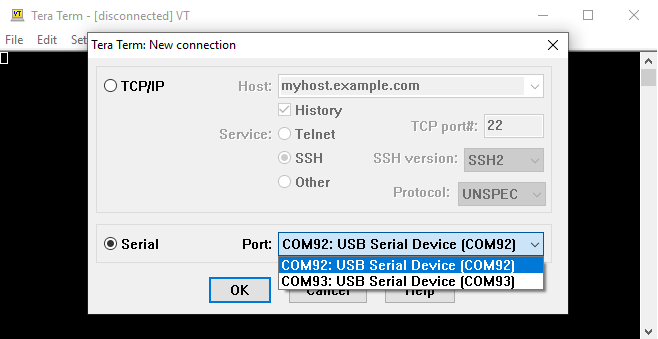
installed, open up two instances of a terminal program, such as Tera Term.
Select the appropriate COM port for each of these terminal instances. The
following figure shows the COM port selection for the Tera Term terminal
program.
- Once the USB is enumerated:
- The LED on the demonstration board will be turned on
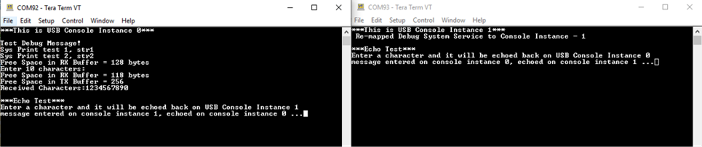
- Press the switch on the development board and observe the following output on the terminals
- The output on the console instance 0 prints the messages using the debug system service
- It then prints the size
of the receive buffer and asks the user to enter 10 characters on the
terminal

- Once, 10 characters are entered
on console instance 0:
- The demonstration prints the free space available in the receive and transmit buffers
- Since the receive buffer contains 10 unread characters, its free space will be reduced by 10
- The received characters are read and echoed on the terminal
- After this, the
demonstration enters in echo test mode, where a character entered on
console instance 0 will be echoed on console instance 1 and vice
versa

- Enter a character on console
instance 0 terminal and observe it getting echoed on console instance 1 terminal
and vice versa.
Refer to the following table for Switch and LED names:
| Board | Switch Name | LED Name |
|---|---|---|
| SAM E54 Xplained Pro Evaluation Kit | SW0 | LED0 |