
1.3.2 Programming AVR477 Remote Board
To program AVR477 Remote board with the ZLLDemo_AVR477QTouchRemote_ATmega256RFR2_Remote.hex image follow the below steps. The appropriate .hex file is available in the attachment associated with this document.
- Open the back cover of AVR477 board
and connect the JTAG header of any of Atmel AVR Programmer/Debugger like Atmel ICE
as shown in the following figure.
Figure 1-5. Connection between AVR477 and Atmel AVR Programmer/Debugger 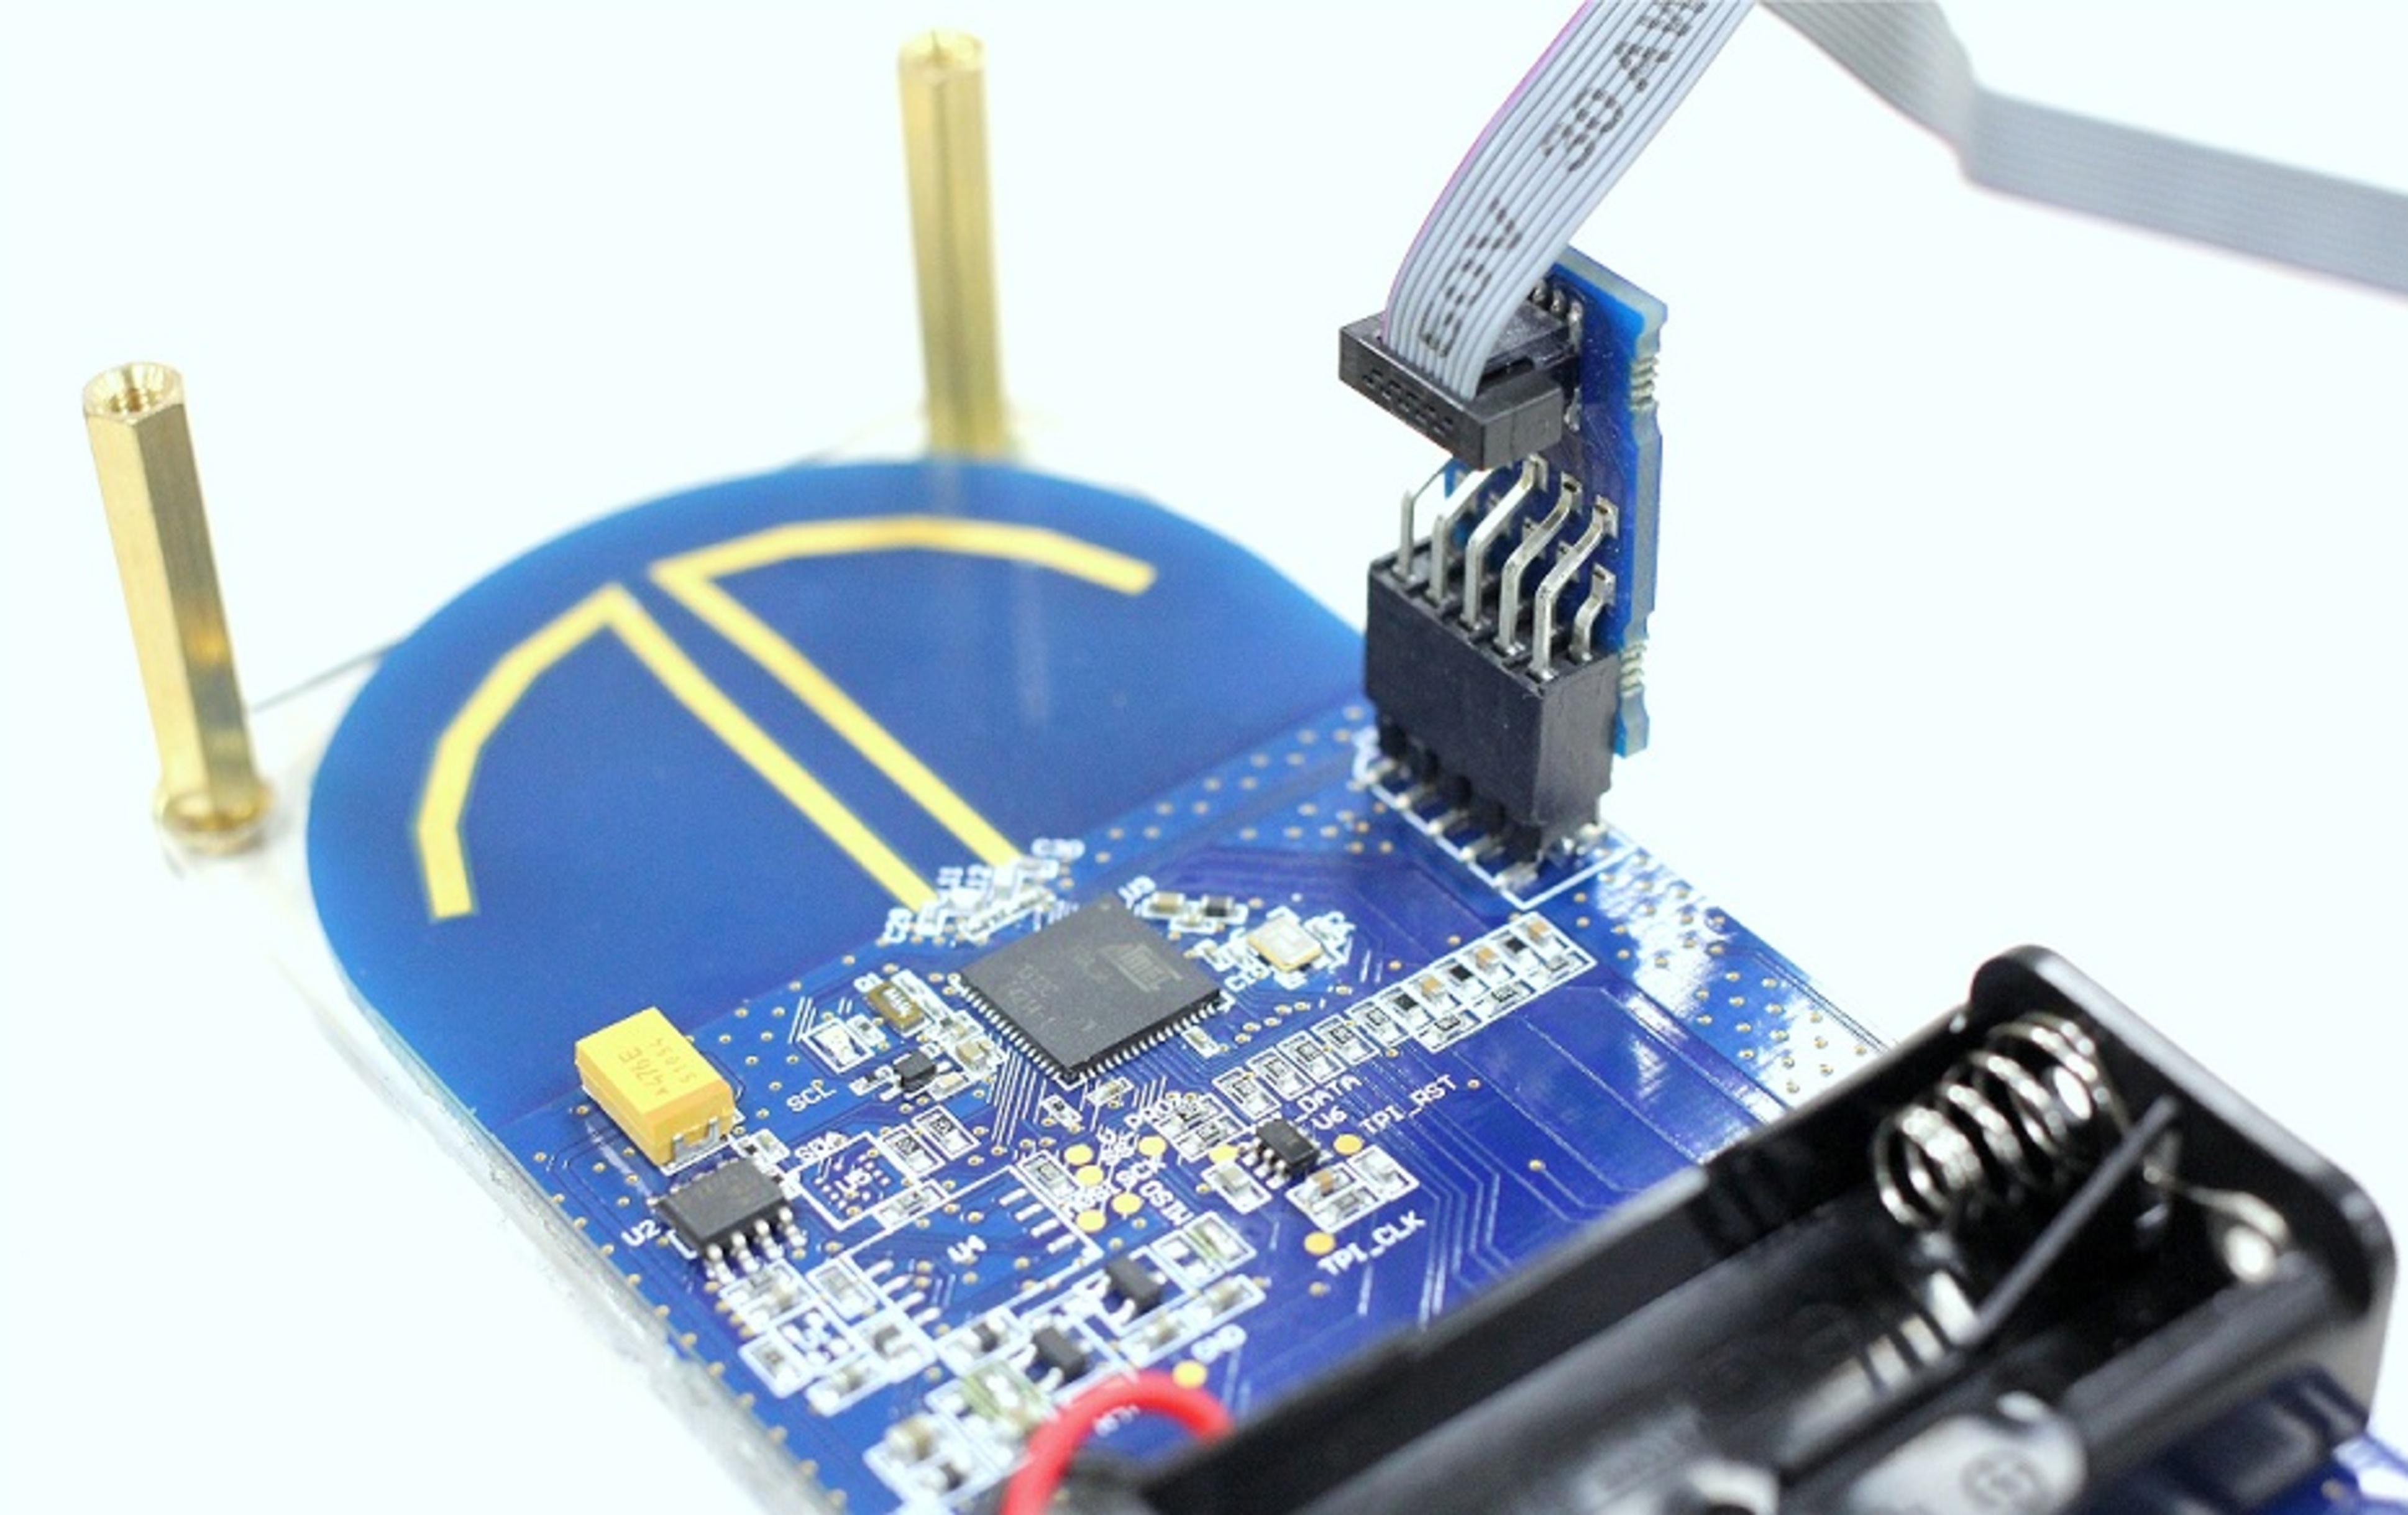
- Mount two fully charged AAA batteries in the battery holder in the AVR477 board.
- Open Atmel Studio.
- Open Tools->Device Programming.
- Select the Tool used from the Tool dropdown menu.
- Select ATmega256RFR2 from the Device dropdown menu.
- Select the Interface as JTAG.
- Click Apply.
If you are asked to upgrade the firmware for the Programmer/Debugger, click
Yes and wait until Firmware upgrade
successful message is displayed. The following figure shows the
settings to be configured in the Device programming window.
Figure 1-6. Settings – Device Programming – ATmega256RFR2 
- Read the Device Signature and Target Voltage from the Device Programming window.
- In the Device Programming window move to Memories tab and choose the location of ‘ZLLDemo_AVR477QTouchRemote_ATmega256RFR2_Remote.hex’ file, in the Flash section.
- Click the Program button.
- After successful programming of the AVR477 Remote board, open Fuses tab from the Device Programming window.
- Program the Fuse registers of
ATmega256RFR2 device with the following values: Extended - 0xFE, High -
0x99, Low - 0x62. Correct fuse settings for ATmega256RFR2 device is
shown in the following figure.
Figure 1-7. Fuse Settings - ATmega256RFR2 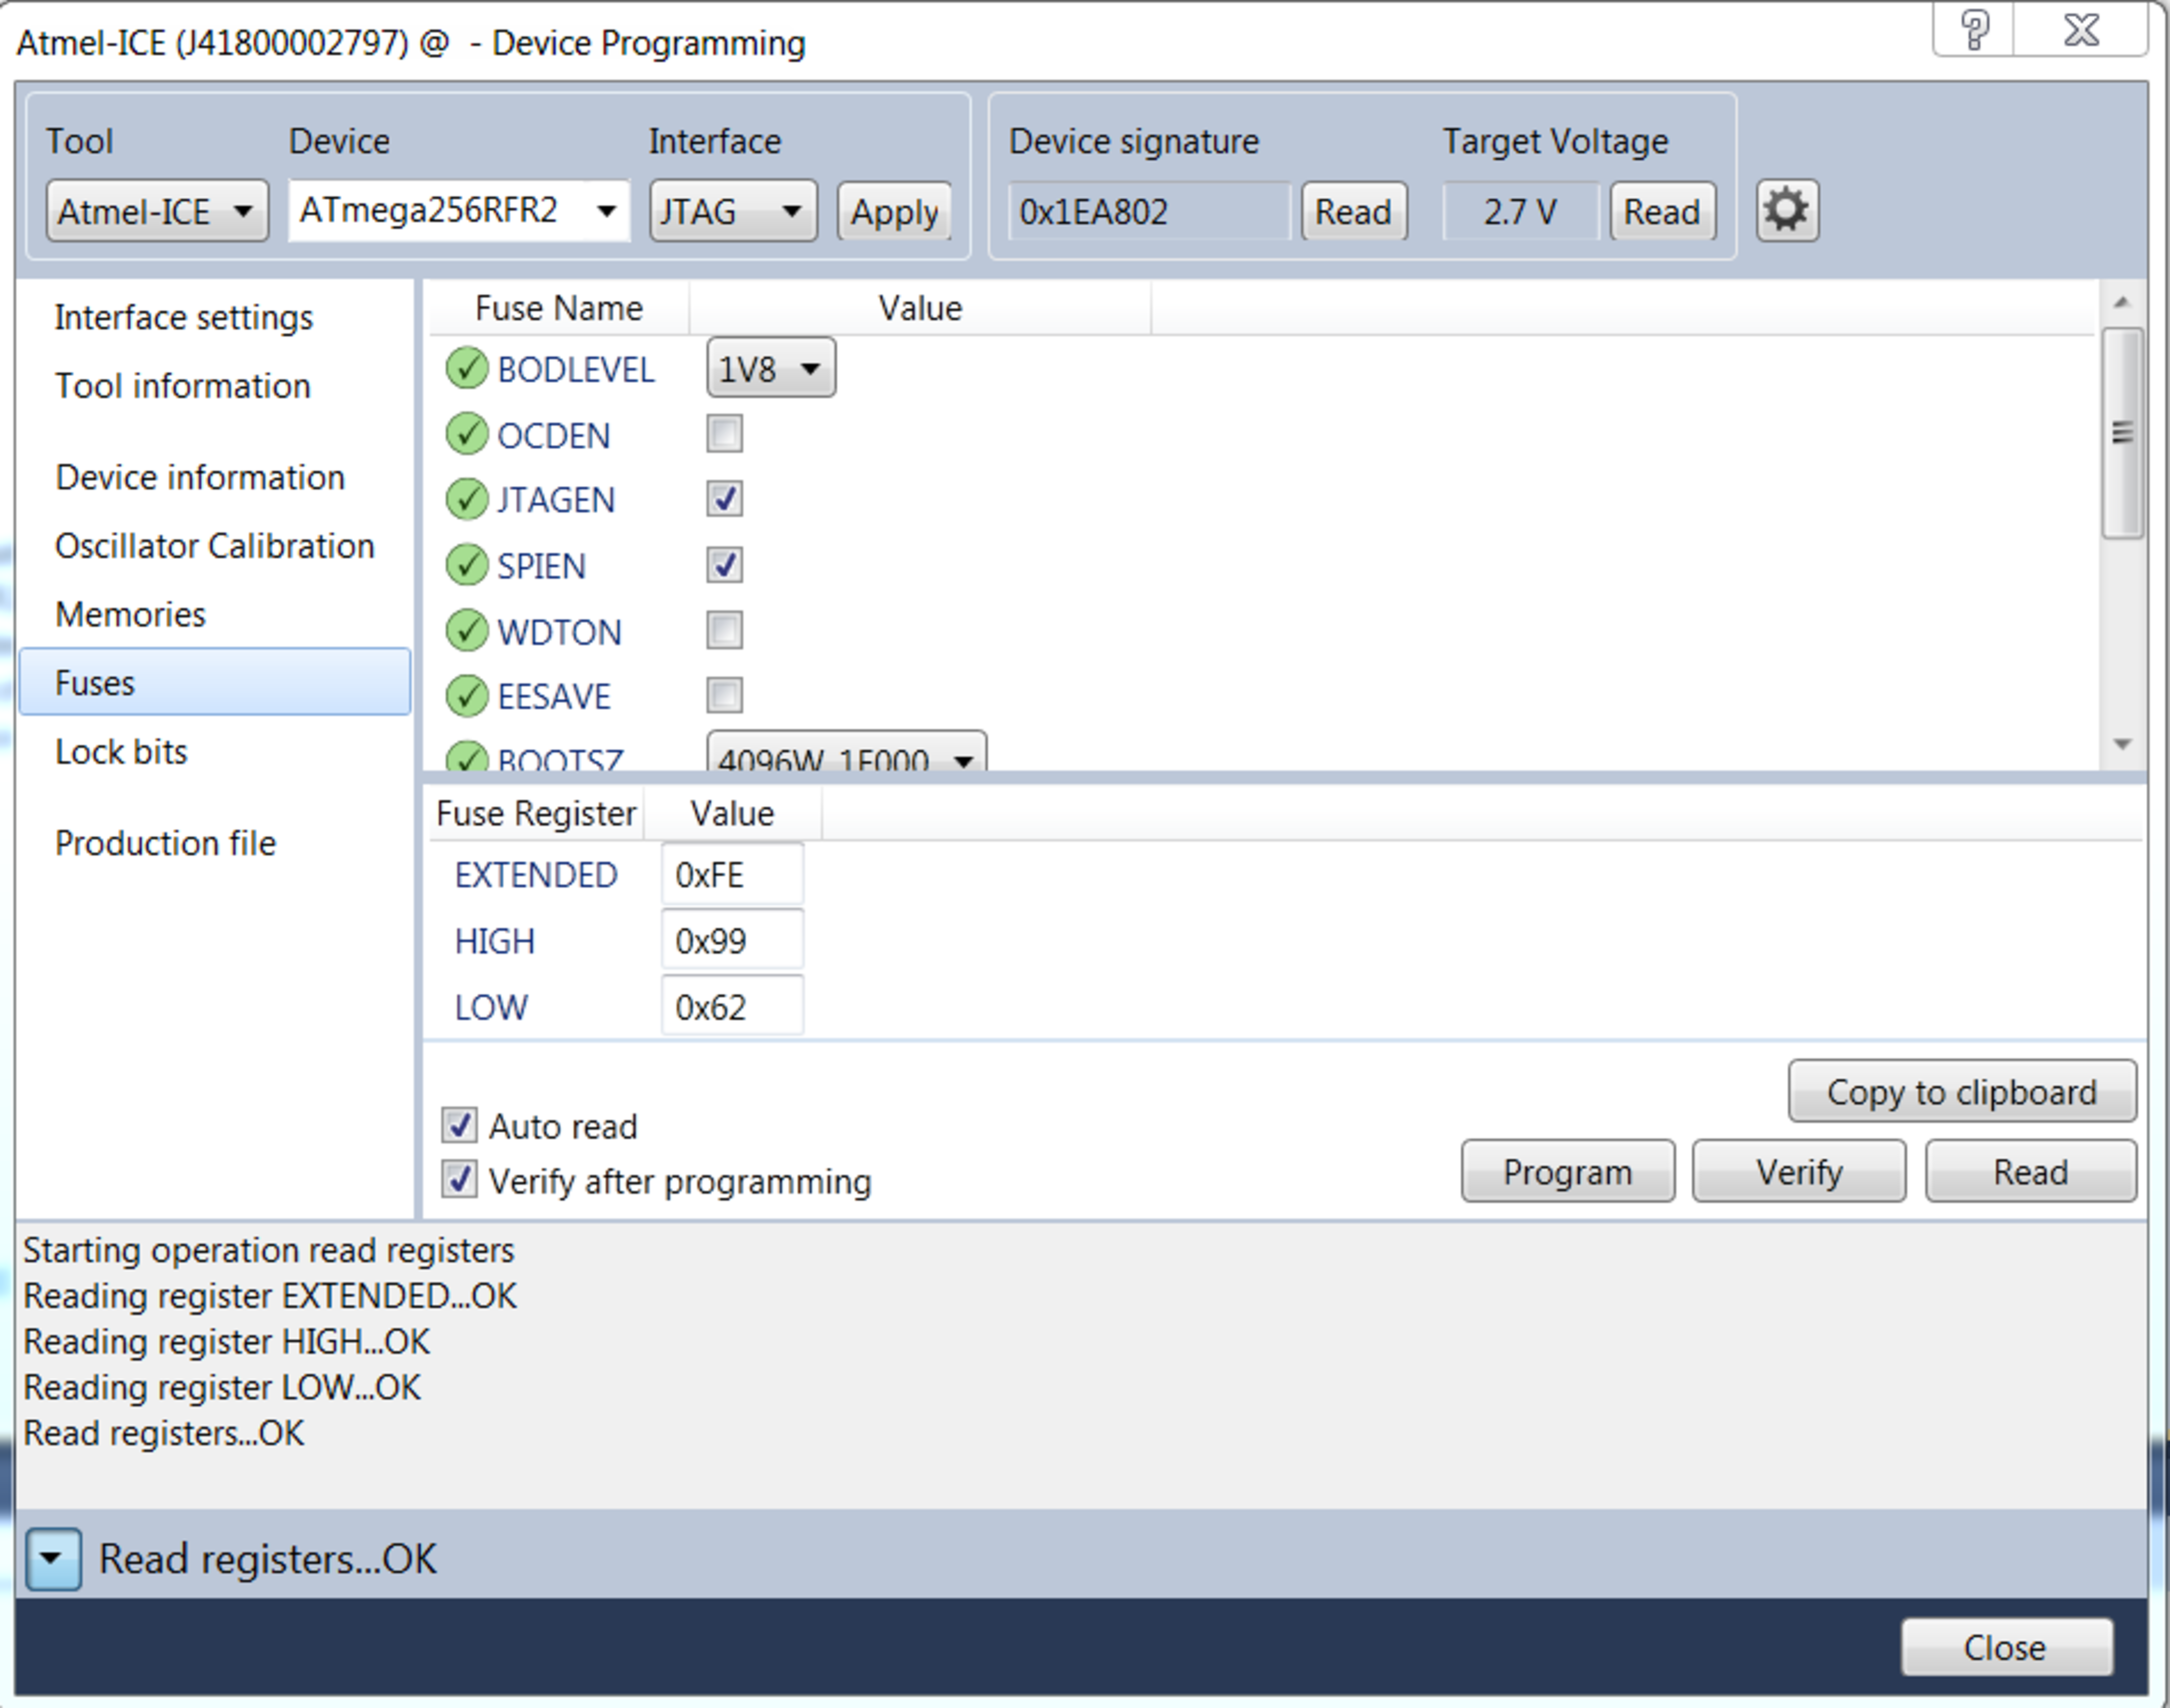
Note: After flashing ATmega256RFR2 with
the ZLLDemo_AVR477QTouchRemote_ATmega256RFR2_Remote.hex image,
the device enters sleep mode and it will not be re-programmable. To re-program the
device, ensure that Use external reset check box is checked
from the Interface settings tab of Device
Programming window.