
4.5 Programming the Device
First, download a copy of the source code. Unzip the files to a location with a short file path, such as C:/ or Documents.
Plug in the Curiosity Nano. Open MPLAB X IDE, then go to File and click Open Project… and
select the folder ending in .X (fusa-ammonia.X). Select the
configuration (see Changing Configurations for more information), and then press
the programming button in the top toolbar in the figure below.

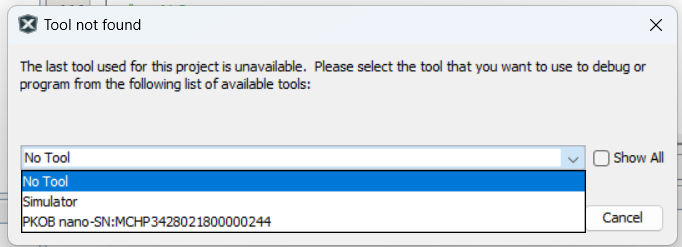
When reminded, select the Curiosity Nano in the tools window (see the figure below). The project will build and program the Curiosity Nano once the tool is selected.
develop_no_cksm can be built
for debug. Building any other configuration for debug will result in an error at the end
of compilation. Then, press the Data Visualizer (DV) icon in the top toolbar. On the left side of the screen, select the COM port associated with the Curiosity Nano and press the gear icon. Change the baud rate to 115200 and then close the menu. Press the play button, then send to terminal. Output from the Nano will now be redirected to the serial terminal, as shown in the figure below.
