4 Running the Examples
Examples are available for each diagnostic test. Users can generate these examples if the options are enabled in the user interface. For instance, to add the PIC16/18 CPU register diagnostic example:
- In the MCC window, navigate to the PIC16/18 IEC60730 Class B Diagnostic Library module and enable a diagnostic test (e.g., CPU).
- Switch to the CPU tab and
enable the Generate Example box of the CPU Registers test (see Figure 4-1).
Figure 4-1. Enabling the Registers Test Example 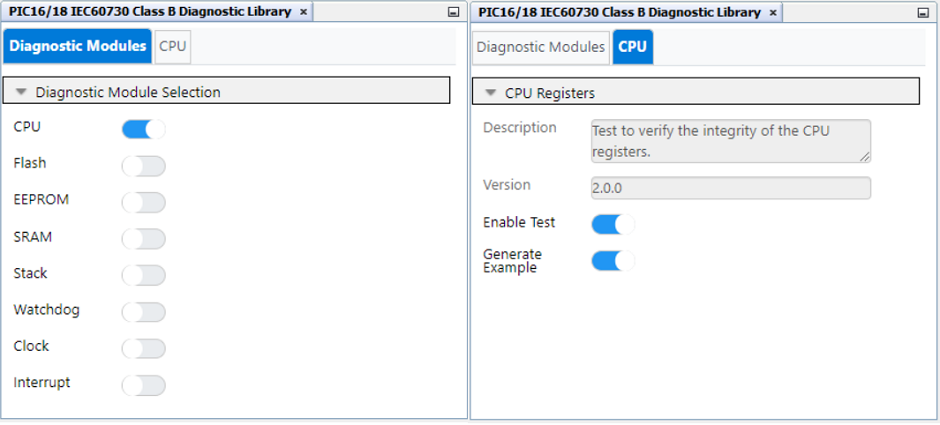
- The examples use
printfto report the result after running the diagnostic. Select the UART driver under Drivers in the Device Resources panel to print the result over the Universal Asynchronous Receiver and Transmitter (UART). - In the UART(None) tab, select the desired UART Peripheral Library (PLIB) from the drop-down. Note that the tab name will change to the selected UART PLIB.
- Enable Printf support for AVR
devices, or Redirect Printf to UART for PIC® devices.
Configure the other options to match the preferred serial terminal settings (see
Figure 4-2).
Figure 4-2. Configuring the UART in PIC18F57Q43 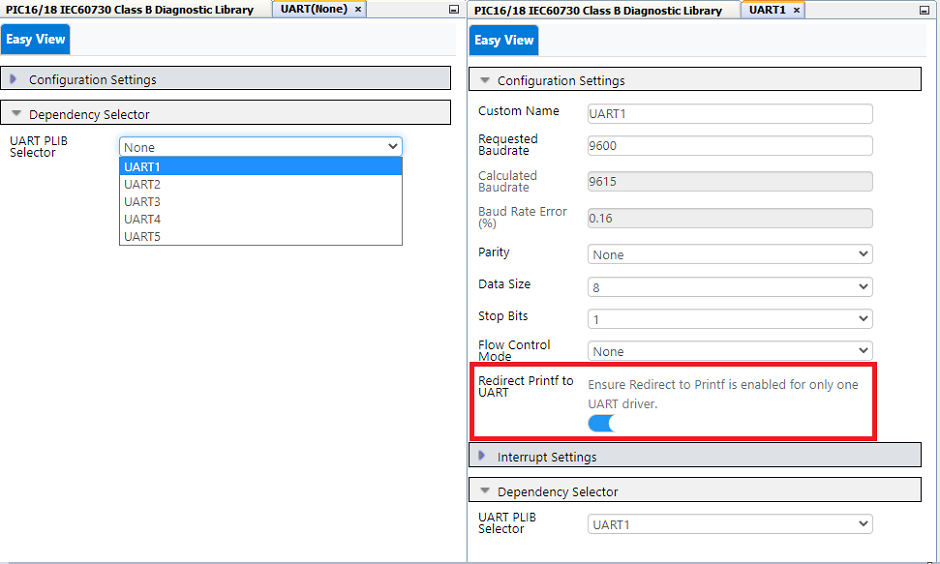
- Click the Generate button.
- Include the
diag_common_example.h, located in the example folder in themain.cfile. This header file contains all the generated example functions. - Call the example function
DIAG_CPU_RegistersExample()inmain()(see Figure 4-3).Figure 4-3. Adding the Diagnostic Example to main.c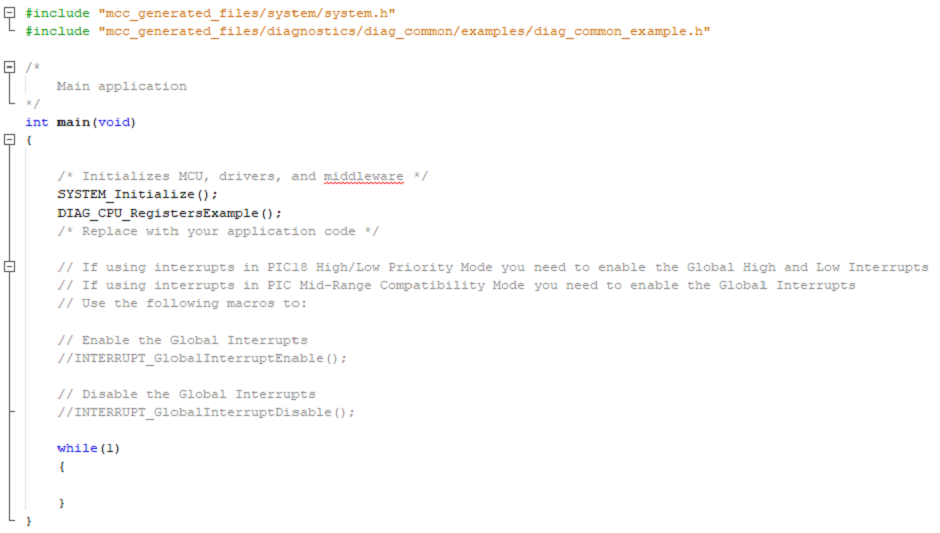
- Connect a board with the selected device to the PC (e.g., a PIC18F57Q43 Curiosity Nano).
- Build and program the board.
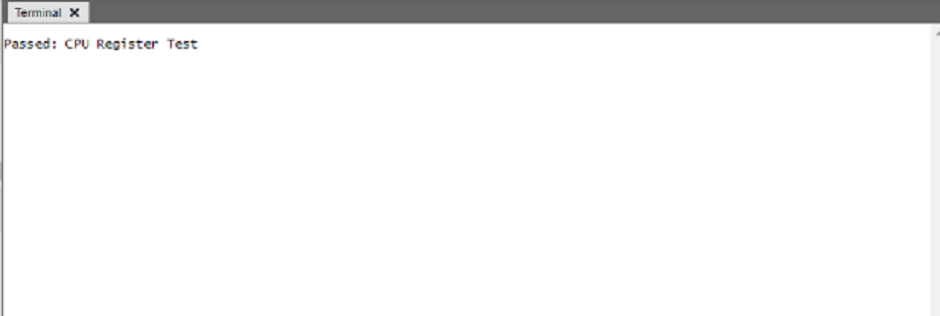
- Open and configure a serial
terminal to view the example output (see Figure 4-4). Do this by using MPLAB Data Visualizer. To use Data
Visualizer, click the
 icon. For more information on how to use Data
Visualizer, refer to the MPLAB Data Visualizer user’s guide.
icon. For more information on how to use Data
Visualizer, refer to the MPLAB Data Visualizer user’s guide.Figure 4-4. Registers Test Output in the Serial Terminal