3 Adding Diagnostic Tests
This section describes adding diagnostic tests using MCC Melody and the IEC60730 Class B Diagnostic Libraries in MPLAB X projects.
- Open a new or existing project in
the MPLAB X IDE for any device specified in the library release notes. Click the
 icon next to the library name to view the release
notes.
icon next to the library name to view the release
notes. - Open MCC by clicking Tools
→ Embedded → MPLAB Code Configurator v5, or click the
 icon.
icon. - In the Device Resources panel
under the Libraries → Functional Safety Libraries drop-down menu,
add the PIC16/18 IEC60730 Class B Diagnostic Library by clicking the
 icon and adding the Class B Diagnostic Library to Project Resources. These
instructions also apply to the AVR IEC60730 Class B Diagnostic Library.
icon and adding the Class B Diagnostic Library to Project Resources. These
instructions also apply to the AVR IEC60730 Class B Diagnostic Library. - Enable the desired modules to be
added from the Diagnostic Modules tab selection (e.g., CPU). This step
will open the specific module tab containing the available diagnostic tests (see
Figure 3-1 ).
Figure 3-1. Enabling the CPU Module 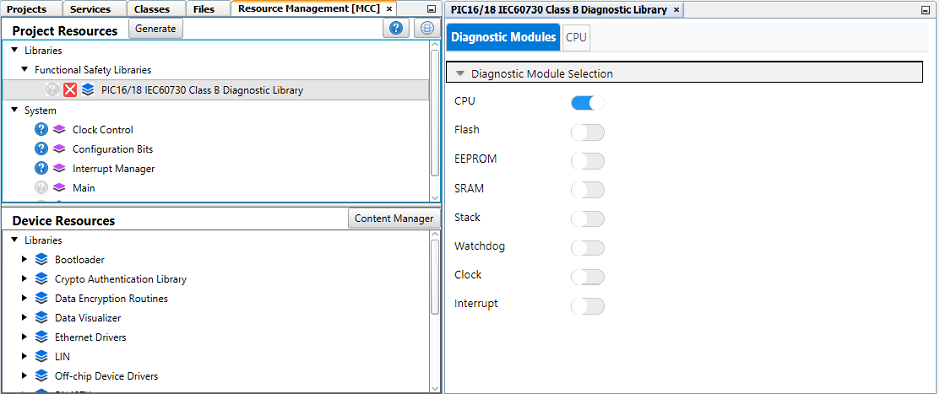
- Switch to the CPU tab, and
the available diagnostic test is enabled by default (see Figure 3-2).
Figure 3-2. Available CPU Diagnostic 
- Some diagnostic tests have
configurable parameters for modifying the tests as needed. In Figure 3-3, the Flash CRC diagnostic can test
the entire Flash memory or just a user-defined section of the Flash.
Figure 3-3. Configuring the Flash CRC Diagnostic 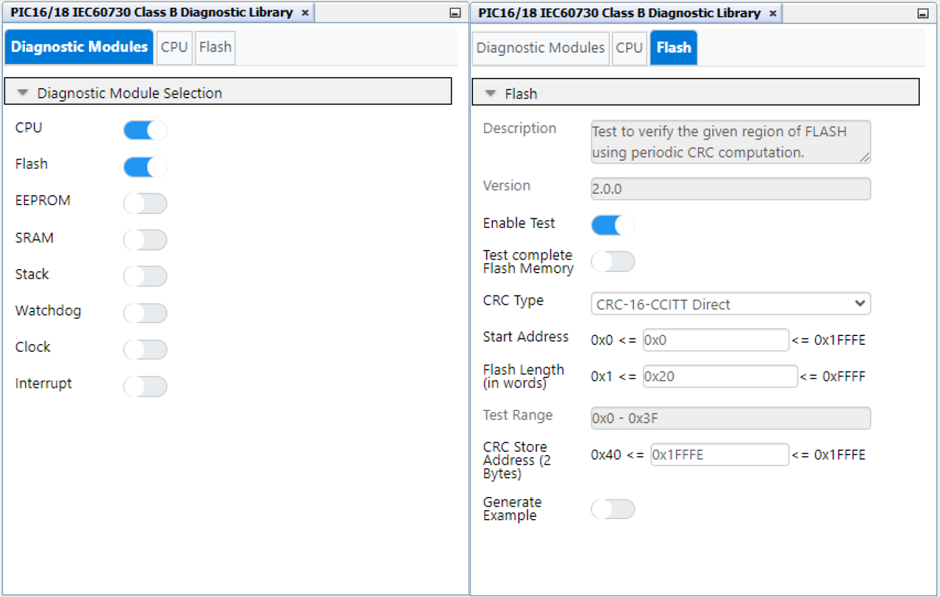
- Depending on their configuration,
some AVR IEC60730 Class B Diagnostic Library diagnostic tests require additional
linker options to ensure correct operation. If required, these linker options
can be obtained under General Settings of the Diagnostic Modules tab (see
Figure 3-4). Note that additional
linker options are autonomously handled in the PIC16/18 IEC60730 Class B
Diagnostic Library as it does not contain the General Settings feature.
Figure 3-4. Obtaining the Required Linker Options 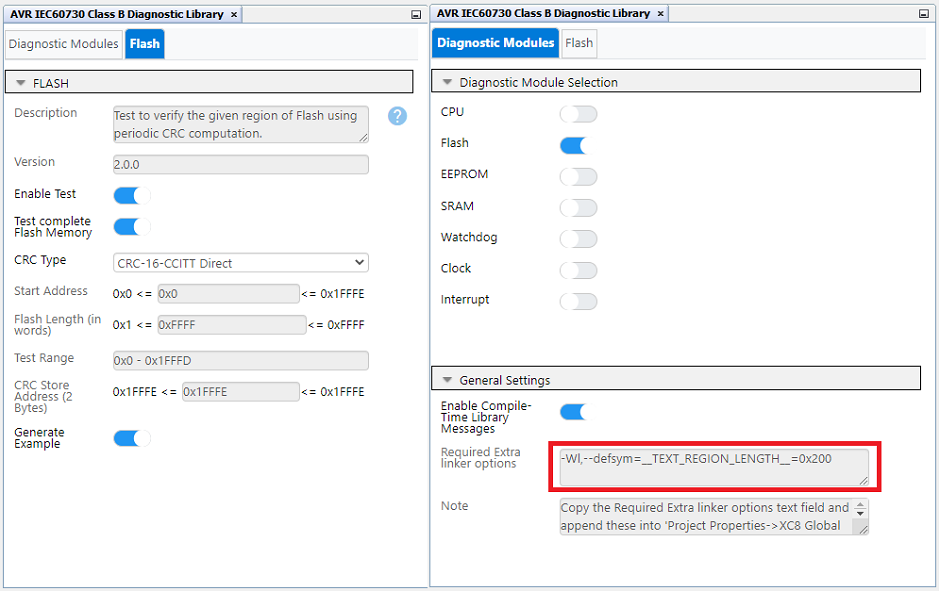
- To add the required linker options to the project, copy the text in the Required Extra Linker options box.
- In MPLAB X, right-click the
active project → Properties → XC8 Global Options → XC8 Linker →
Additional options category → Extra linker options. Append the
copied linker options into the text field next to the Extra linker options (see
Figure 3-5). After appending, click
Apply and OK.
Figure 3-5. Appending Extra Linker Options in the Project Properties 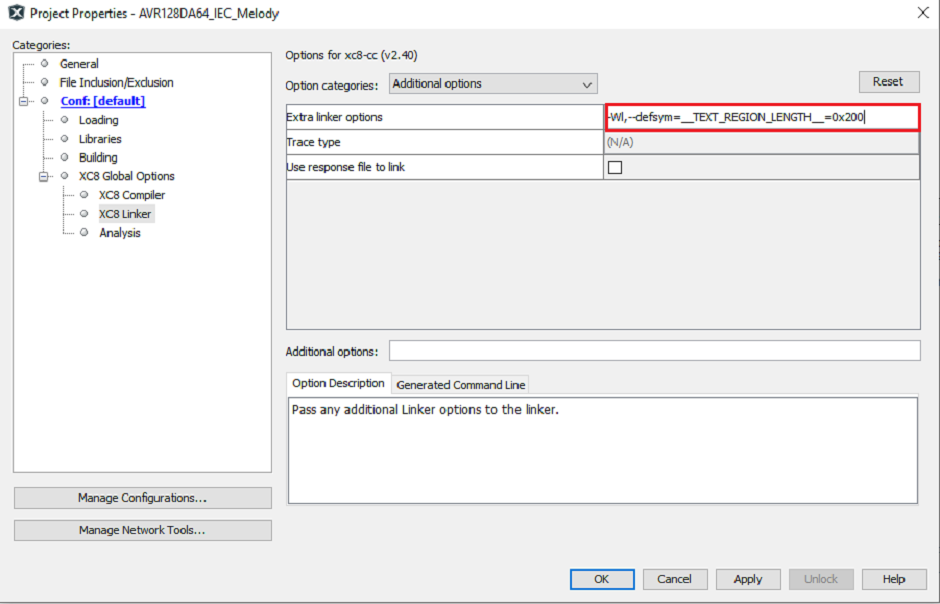
- Warnings may be generated in the
Notifications [MCC] tab depending on the diagnostic tests’
configuration. They may also be sourced from the diagnostic library or other MCC
drivers used by a particular diagnostic, as seen in Figure 3-6. To ensure correct operation, it is recommended
to resolve notifications with the WARNING type by following the prompts in the
Description column. Note that HINT-type notifications are for information
purposes, to aid with diagnostic configuration and usage, or to explain how to
use an API.
Figure 3-6. MCC Notifications 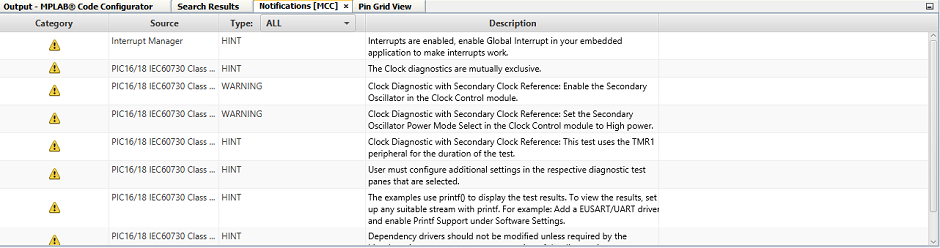
- Once all preferred diagnostic
tests are enabled and configured, click the Generate button to add the
tests, drivers, example source code files and supporting API documentation into
the MPLAB X project (see the figures below).
Figure 3-7. File Generation 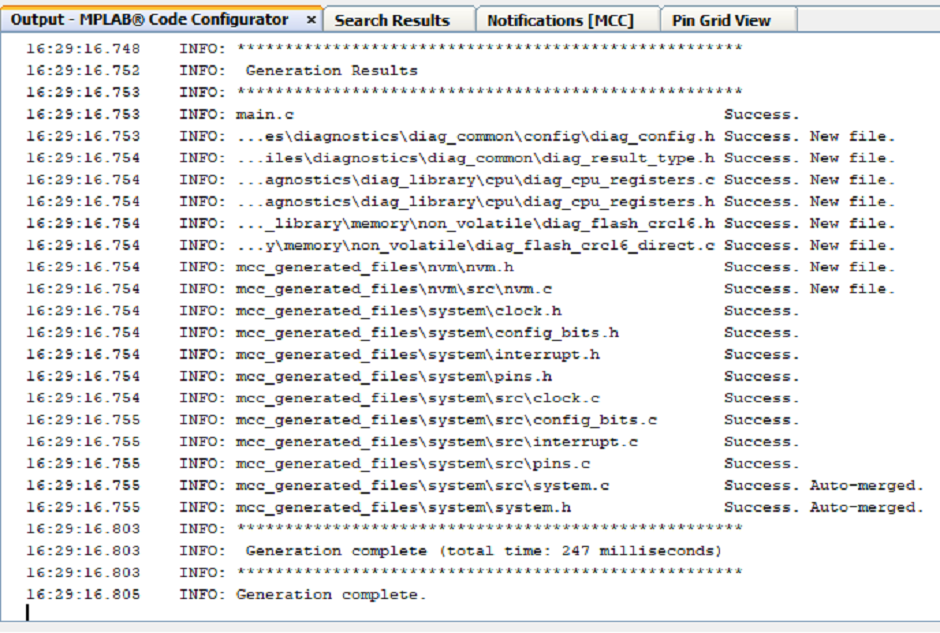
Figure 3-8. Project Files Including Source Code and API Documentation 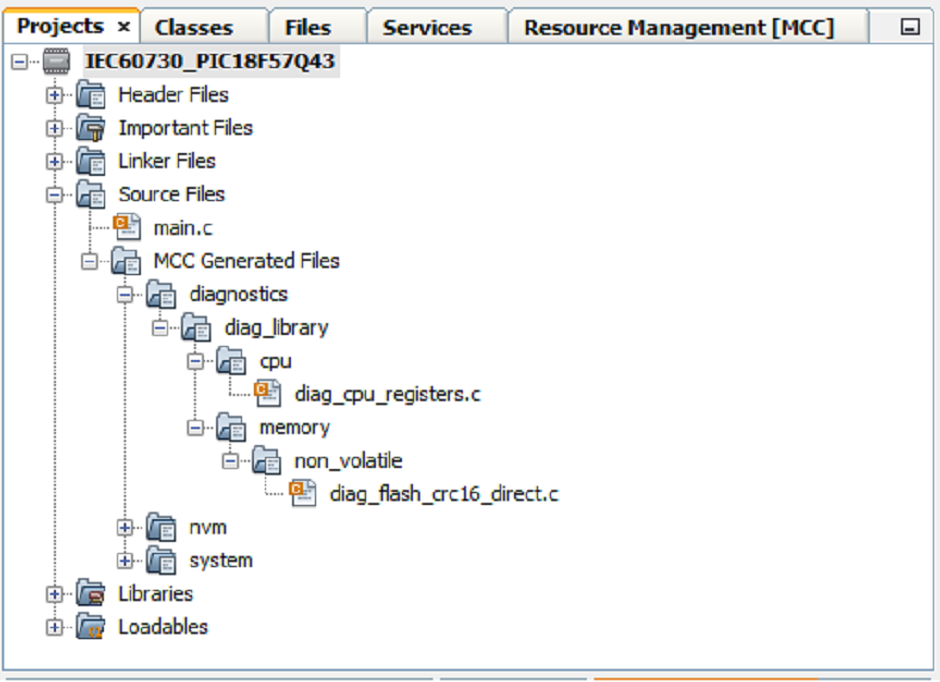
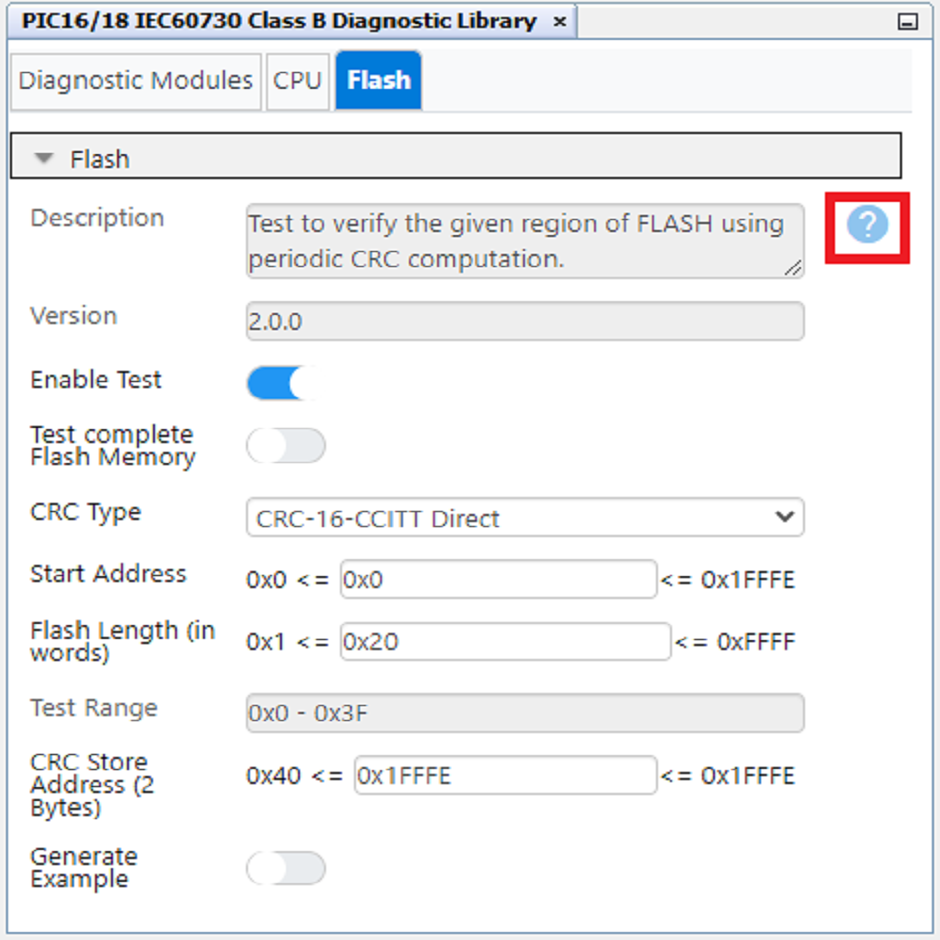
- API documentation is available
for each diagnostic. These documents contain detailed descriptions and
Assumption of Uses (AoUs) for each diagnostic implementation to ensure correct
usage of the generated APIs. To access the API documents, click the question
mark icon next to the diagnostic description in the respective diagnostic tab.
Clicking this icon will open the online API documentation in the browser.
Figure 3-9. Accessing API Documentation