
3.3.7 Application Migration from 8-bit AVR to 32-bit SAM D21 on SAM D21 Curiosity Nano
Description
This Applications acts as reference for migrating applications from 8-bit AVR Microcontroller (MCU) to 32- bit MCU. This example shows how to migrate an application from ATmega4809 MCU to SAMD21G17D MCU.
This application uses the AVR ATMega4809 application which helps in Getting Started with UART on ATMega4809.
The AVR ATMega4809 application shows how to implement a command line interface. This way, the microcontroller can receive control commands via the USART. In this use case, an LED is controlled using commands sent from the MPLAB Data Visualizer.
The application shows steps to get started migrating to SAMD21 and later extend the functionality by adding more peripherals.
The migration application makes use of SAM D21 Curiosity Nano Evaluation Kit and MPLAB Harmony v3 framework. The application sends "Hello World" message to serial terminal using (SERCOM) USART and utilizes STDIO library to receive the command from the serial terminal to control the LED0 on SAMD21 Curiosity Nano Evaluation Kit. Switch SW0 is configured with External Interrupt controller (EIC) to toggle the LED0, when switch is pressed. It allows demonstrates Serial Peripheral Interface(SPI) self loop back mode and Direct memory Address (DMA) to send SPI self loopback status to the serial terminal.
Modules/Technology Used
- Peripheral Modules
- PORT
- EIC
- SERCOM(SPI)
- SERCOM(USART)
- DMA
- Systick
Hardware Used
- SAM D21 Curiosity Nano Evaluation Kit
- Connection wires
Software/Tools Used
This project has been verified to work with the following versions of software tools:
Refer Project Manifest present in harmony-manifest-success.yml under the project folder firmware/src/config/sam_d21_cnano.
- Refer the Release Notes to know the MPLAB X IDE and MCC Plugin version.
- Any Serial Terminal application, such as Tera Term terminal application.
Because Microchip regularly updates tools, occasionally issue(s) could be discovered while using the newer versions of the tools. If the project does not seem to work and version incompatibility is suspected. It is recommended to double-check and use the same versions that the project was tested with. To download original version of MPLAB Harmony v3 packages, refer to document How to Use the MPLAB Harmony v3 Project Manifest Feature (DS90003305).
Setup
- Connect the SAM D21 Curiosity Nano Development Board to the Host PC as a USB Device through a Type-A male to micro-B USB cable connected to Micro-B USB (Debug USB) port.
- Connect a wire from PA16 to
PA19 on SAM D21 Curiosity Nano Development Kit for SPI Self Loopback
testing.


Programming Hex File
The pre-built hex file can be programmed by following the below steps.
- Open MPLAB X IDE
- Close all existing projects in IDE, if any project is opened.
- Go to File -> Import -> Hex/ELF File.
- In the Import Image File
window,
- Create Prebuilt Project,
- Click the Browse button to select the prebuilt hex file.
- Select Device as ATSAMD21G17D.
- Ensure the proper tool is selected under Hardware Tool and click on Next button.
- Select Project Name and Folder,
- Select appropriate project name and folder and click on Finish button
- Create Prebuilt Project,
- In MPLAB X IDE, click on Make and Program Device button to program the device.
- Follow the steps in Running the Demo section below.
Programming/Debugging Application Project
- Open the project (atmega4809_to_samd21_migration/firmware/atmega4809_to_samd21_migration.X) in MPLAB X IDE
- Ensure On-Board Nano Debuggers selected as hardware tool to program/debug the application
- Build the code and program the device by clicking on the Make and Program button in MPLAB X IDE tool bar
- Follow the steps in Running the Demo section below
Running the Demo
- Open Tera Term and configure it to 9600 baud rate and the standard 8-N-1 frame format.
- Enable Local echo and select carriage return + line feed for transmit.
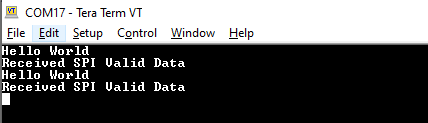
- In Tera Term the user should see Hello World message displayed.
- Below the user will see a message
Received SPI Valid Data indicating SPI self loopback test success.
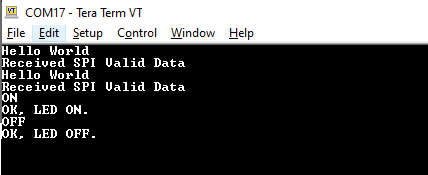
- Type ON in serial terminal and press Enter to turn on LED0 on SAMD21 Curiosity Nano kit.
- Type OFF in serial terminal
and press Enter to turn off LED0 on SAMD21 Curiosity Nano kit.
- Press Switch SW0 on the SAMD21 Curiosity Nano kit to toggle the LED0 twice with 500ms of delay.
Comments
- Reference Migration Guide: Application migration from 8-bit AVR to 32-bit SAM D21 on SAM D21 Curiosity Nano
- Reference Training Module: Getting Started with Harmony v3 Peripheral Libraries on SAM D21 MCUs
- This application demo builds and
works out of box by following the instructions above in Running the Demo
section. If the user needs to enhance/customize this application demo, should use the
MPLAB Harmony v3 Software framework. Refer links below to setup and build the
applications using MPLAB Harmony.
- How to Setup MPLAB Harmony v3 Software Development Framework (DS90003232).
- How to Build an Application by Adding a New PLIB, Driver, or Middleware to an Existing MPLAB Harmony v3 Project (DS90003253).
- Video - How to Set up the Tools Required to Get Started with MPLAB® Harmony v3 and MCC
- Create a new MPLAB Harmony v3 project using MCC
- Update and Configure an Existing MHC-based MPLAB Harmony v3 Project to MCC-based Project