The demo captures live stream from a camera on a PolarFire SoC Video kit and performs
H.264 compression using the FPGA fabric logic. A webserver application, running on the
MSS, allows user to connect to the PolarFire SoC Video kit through Ethernet. To view the
webserver, enter the IP address of the kit in a web browser. The webpage on the browser
allows you to control streaming of the live video from the Video kit to the connected
system. After the stream is initiated on the webpage, the application running on the MSS
reads a compressed stream of data from the fabric and sends the encoded H.264 RTP
Ethernet packets to the IP address of the system which initiated the stream. To play the
video stream on a computer, use applications such as VLC Media Player, Gstreamer, or
FFPlay. The webpage allows you to download an SDP file that can be passed on to the
video player after the streaming is initiated.
To run the H.264 demo using GUI, perform the following steps:
Insert the dual-camera sensor module in
J10 on the PolarFire SoC Video kit. Ensure to remove the camera lens cap.
Note: Do not connect any Ethernet cable from the host to
the Video kit.
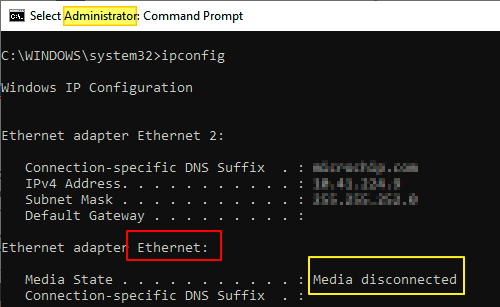
On the windows host, open command prompt in Admin
mode and type ipconfig.Figure . Executing the
ipconfig CommandNote down the name of the Ethernet adapter displayed against the Media
disconnected interface. It is Ethernet in this case
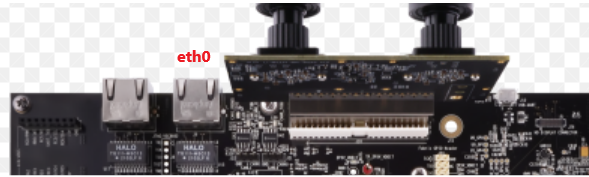
Power on the kit, connect an an Ethernet cable
from Video kit eth0 port to the PC Ethernet port. There are two Ethernet
ports on the Video kit. The Ethernet port eth0 is next to the camera
mount.Figure . etho Port
Connect the HDMI cable between J14 and Monitor to view the video.
Login to Linux. (username is “root”, password is not required).
On the Video kit Linux COM port, type
ifconfig. It must report some IP, which indicates that the
Ethernet port is working, see the following figure.Figure . Fetching the Ethernet Port
Status
Set the host IP address to 192.168.2.X, where X
is any integer from 2 to 255 and the Subnet mask to 255.255.255.0 using the
following command. This is a one-time process and need not be done every time the
Video kit is
connected.
netsh interface ip set address "Ethernet" static 192.168.2.100 255.255.255.0
Figure . Setting the Host IP
Address
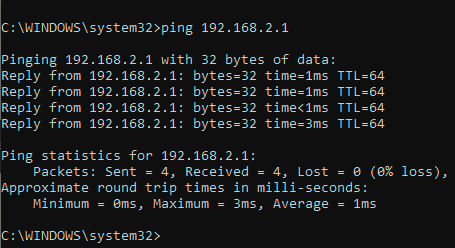
Check if the connection is successful by pinging
the Video kit, see the following figure.Figure . Pining the SEV Kit
Connect the RJ45 Ethernet cable between any one
of the Ethernet ports (connector J6 or J7) of the board and the host PC.
Default IP address of the board are 192.168.2.1
(J6) and 192.168.2.2 (J7) based on the interface (depends on the GEM port user is
connected to). Ensure that the host PC is in the same network.
Power ON the board and wait for the system boot
sequence to complete. The LED highlighted (LED 3) in the following figure glows
green once the Linux boot up sequence is completed. Restart the board if LED 3 does
not glow.Figure . PolarFire® SoC Video
Kit—LED Indication
From the host PC, open the web browser. Enter the
IP address of the PolarFire SoC Video Kit, depending on the Gigabit Ethernet MAC
(GEM) you are connected to (J6: 192.168.2.1 or J7: 192.168.2.2), in the address bar
and press Enter. The H.264 demonstration GUI loads in the browser, see the following
figure. Figure . H.264 GUI
Click the Start Video to initiate the
video streaming. The GUI creates a Session Description Protocol (SDP) file. VLC
player uses this to accept streaming packets from the Ethernet cable.
Click Download SDP
file to download the SDP file.
Windows: Open the SDP file
with the VLC player to play the video stream.
Linux: Open the SDP file with
the VLC player or execute the vlc command in the
terminal, with the SDP file as argument, for example, vlc
video.sdp.
Observe a live stream video captured from one of
the cameras in the PolarFire SoC Video Kit. This is a scaled and H.264 compressed
video of 1280 x 720 resolution. To change the resolution, select the resolution as
shown in the following figure and click Update.Figure . Select Resolution
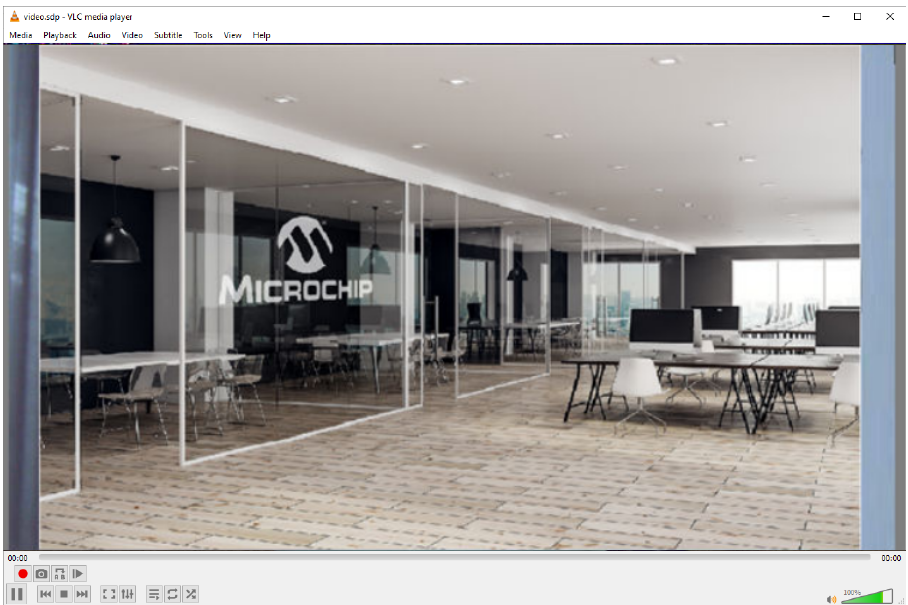
Observe the live stream video in the VLC player,
as shown in the following figure. Figure . Live Stream Video
This concludes the demo.
To get back from static to DHCP (dynamic), execute the following command in the
Windows CMD:
netsh interface ip set address name="Ethernet" dhcp
Note: The demo is created with the evaluation version of H.264 I-frame
encoder IP that expires after one hour, hence your video stops streaming after one hour.