7 Creating a Custom Display Module in MPLAB Harmony
FreeMarker Template Language (FTL) templates and configuration files were developed to
automatically generate the custom display configuration for the Raspberry Pi Touch
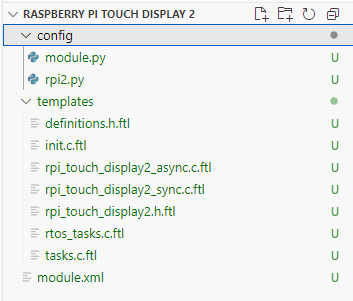
Display 2. The module.py and rpi2.py files are
modified to define symbol options and inter-component dependencies (see the screen shot
below). This enables easy reconfiguration from the MCC Graphical User Interface (GUI)
with no manual editing required, resulting in a display module.
The display driver written in disp.c is rewritten in asynchronous and
synchronous formats in the FTL files to generate the display driver automatically when
configuring the module in the project graph.
- Create a new folder inside the display directory for your custom display.
- Copy the contents of an existing similar display folder as a base.
- Modify the following files as per
the custom display specifications to create a custom display module:
module.py<your_display_name>.py- FTL files used for driver and configuration generation
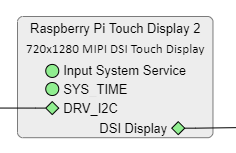
Ensure that the structure and metadata of the module meet Harmony requirements so that it is correctly recognized and loaded by MCC. MCC will load the following Raspberry Pi Touch Display 2 module under Project Resources: