
2.6 Adding and Configuring PRIME Stack
1. Add PRIME Stack Component.
- On Device Resources, navigate to SmartEnergy → PRIME Stack and click on
+ sign next to PRIME Stack.
Figure 2-40. Add PRIME Stack 
- This triggers the Auto Activation of auxiliary services and PAL module.
Figure 2-41. Auxiliary Services Auto Activation 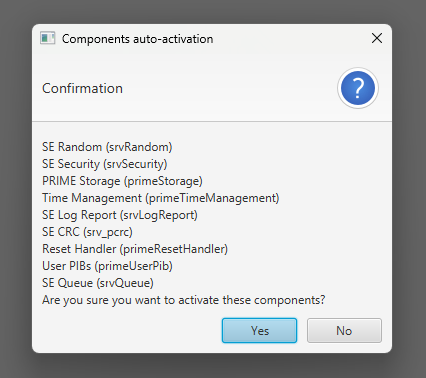
Figure 2-42. Firmware Upgrade Service Auto Activation 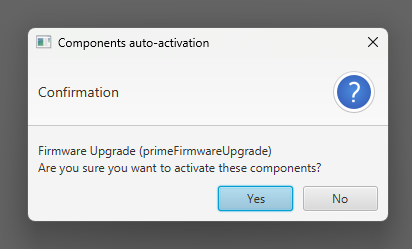
Figure 2-43. PAL Module Activation 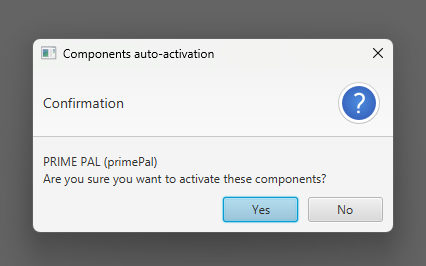
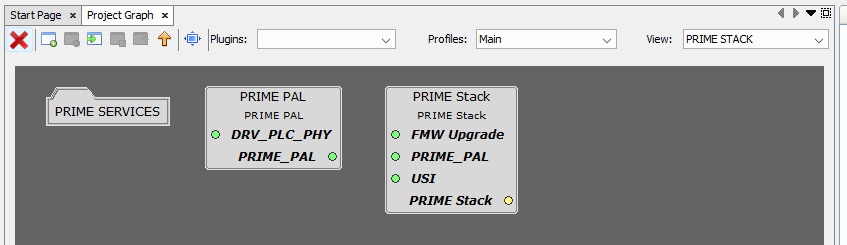
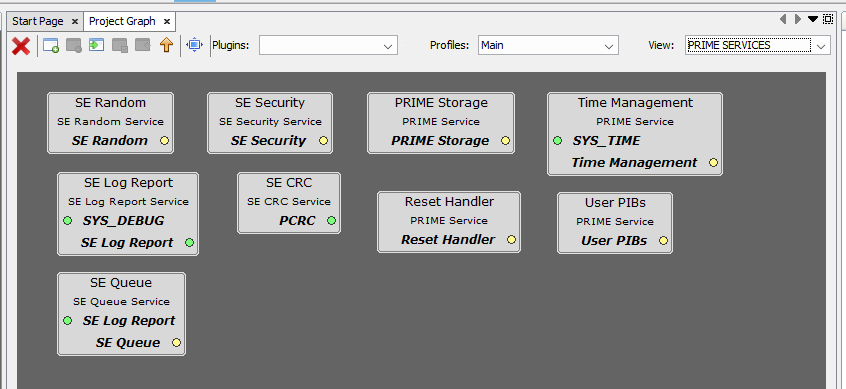
3. Double-Click on PRIME Stack folder just added, or select PRIME STACK on the View Selector in Project Graph window. This opens a new Project Graph view, where PRIME Stack components have been added.
3. Connect PRIME Firmware Upgrade Service to Memory Component in Project Graph window.
- Right-Click on DRV_MEDIA dependency and select Satisfiers → MEMORY
(drv_memory).
Figure 2-46. Connect FU 
4. The PRIME Stack is configured by default with PRIME Mode set to SN and Type of PRIME project set to application project.
5. Configure PRIME PAL Component. Follow the indications in section Configuring The PRIME PAL Module. It is important to enable the PVDD Monitor in the PLC PHY interface.
6. Every other component configuration will use their default values.