
1.1.7 How to Create a Low-Power Sensor
Overview
This section provides step-by-step information for generating low-power sensor using the Touch Configurator in MCC.
Creating a Low-Power Sensor
Step 1: Open Touch Configurator
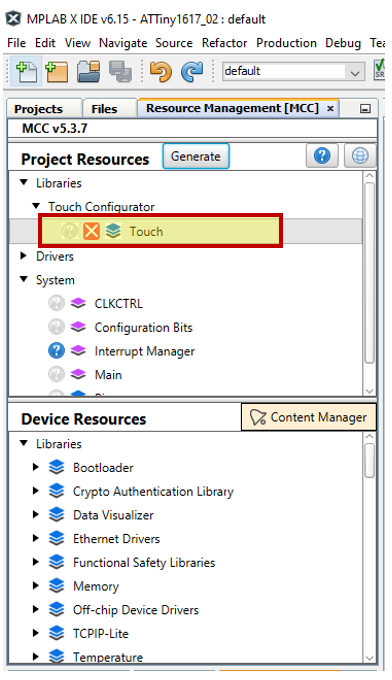
Select MCC and open Touch Configurator in the Resource Management [MCC] tab.
Step 2: Create a Low Power Sensor
Once the Touch Configurator is opened, go in the Create tab and add the required number of buttons, sliders and wheels. Select the required sensor and click Configure as Low power.

Step 3: Creating a Low-Power Sensor
- Event System Driven Low-Power
To create Event System Driven Low Power, once the sensor is configured as low power, open Touch Configurator>Configure>Low power and the Configure Event System option will be checked by default.
Note: Event System Driven Low Power can be configured with only one low-power sensor. Note: In case multiple sensors are selected while enabling Low Power, upon enabling “Configure event system”, a dialog box appears indicating that only one sensor can be configured as a low-power sensor and provides an option to select the low-power sensor from a drop down.
The following animation shows how to configure event system based low-power sensor.
- Configuring Low-Power Without
Event System
To create a low-power sensor without Event System, open Touch Configurator>Configure>Low power and uncheck Configure Event System.
To configure low-power parameters, select the Low power option in the Configure tab, and the following parameters can be configured according to user requirements:
- Low Power Measurement Period
- Touch Inactivity Timeout
- Low Power Drift Wakeup Period
The details of each parameter can be seen by hovering the mouse over the parameter value drop downs in the configurator.

The following animation shows how to configure low power sensor without event system.

- Configuring Lump as
Low-Power
Initially, the required sensors are selected and lump is configured. A detailed description on creating a lump sensor is given in How to Create a Lump Sensor section.
Select the Lump Sensor and click Configure as Low Power.

Once the lump sensor is configured as a low-power sensor, it can be set up with either Event System enabled or disabled, as given in Section 2 and 3.
Update the specified hints in the Project files and the Devices Resources tab.
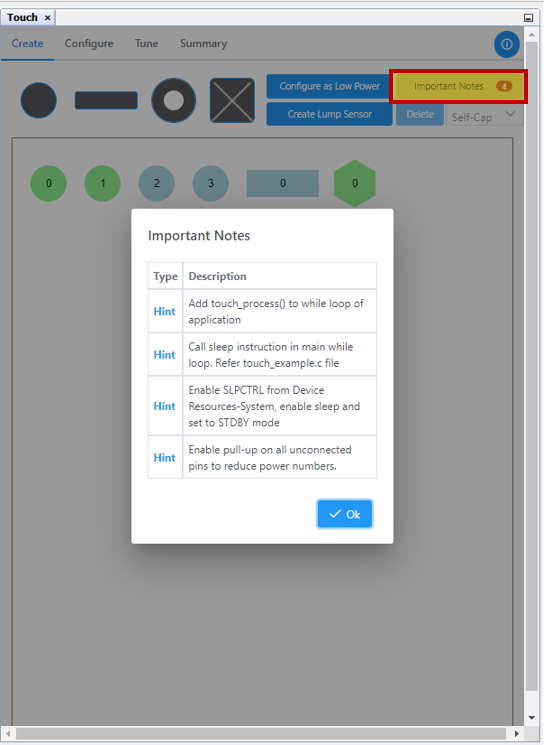
Enable SLPCTRL From Device Resources
Add the SLPCTRL module from Device Resources>System. It will then display in the Builder tab.


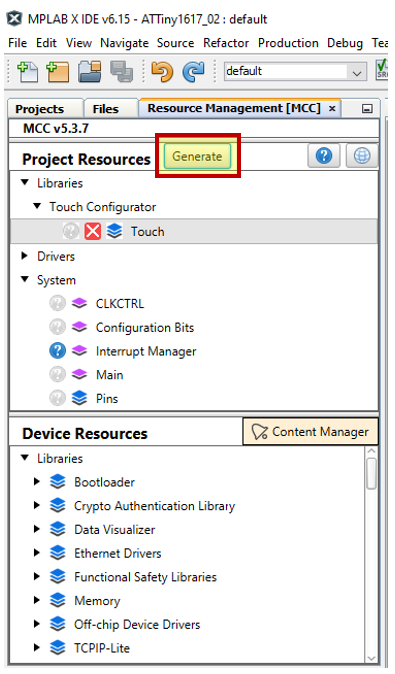
Step 5: Generate Low-Power Sensor Code
Click Generate in the Resource Management [MCC] tab.
Add touch_process() and call
SLEEP instruction in the main →
while() loop, as shown below.
