
5.4 Flashing Linux .wic Image in eMMC Mode
(Ask a Question)The Linux .wic image is packaged with all demo applications. Extract the contents of the.wic file to a folder of your choice. The extracted wic image can be flashed either in an eMMC or a SD card. Irrespective of the flashing device, running the demo user applications remain the same.
Important: If the Linux image has multi-compression extensions such as
wic.gz.zip, continue extracting the file until you obtain the .wic file.This section describes the steps to place the HSS in CLI mode, program the Linux images into eMMC using the Win32 Disk Imager tool, and initiate the Linux boot.
- Do not insert the SD card in the board. If an SD card already exists in the board, the SD card takes the first priority in the bootup sequence.
- Connect the micro USB cable to the board (on Video Kit - J19 port or on ICICLE Kit - J16 port).
- Power ON the board and press the Enter key while booting.
- Execute the
usbdmsccommand at the HSS prompt as shown in the following figure.Figure 5-9. Executing the usbdmsc Command  Important: Ensure to execute the
emmccommand before executing theusbdmsccommand in case of ICICLE Kit.The board switches to eMMC mode once the eMMC is passed.
- Open the Win32 Disk Imager tool with administrative privileges and browse for the
.wicfile to flash the Linux.wicimage.Important: To confirm if the eMMC drive is active, from the taskbar select Safely Remove Hardware and Eject Media. You will notice that the drive letter boot (E:) appears in list of connected devices, as shown in the following figure.Figure 5-10. Drive Eject Options 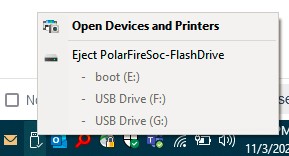
- In the Win32 Disk Imager tool, select the boot device, and click Write. A Confirm overwrite dialog box appears, as shown in the following figure.
Figure 5-11. Confirm Overwrite Dialog Box 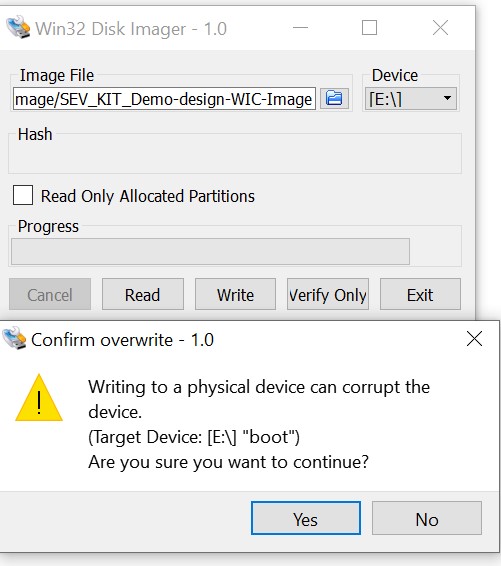
- Click Yes to confirm. After the image gets written, click Exit.
Figure 5-12. Win32 Disk Imager—Image Writing in Progress 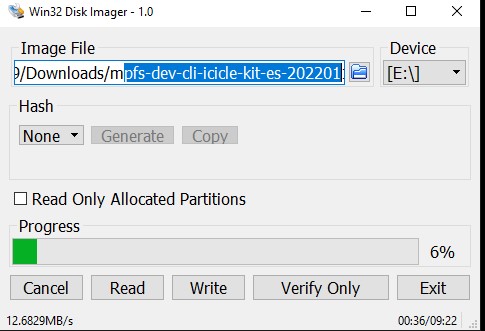
- Disconnect the USB cable from the USB-UART connector on the Kit. Observe the USB host disconnected message.
- At the HSS CLI prompt, execute the
bootcommand. Linux starts-up and enters the user login mode.Figure 5-13. Executing the Boot Command and Entering into User Login Mode 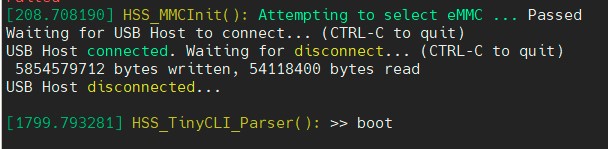
Figure 5-14. User Login Mode 