4 Timer Configuration
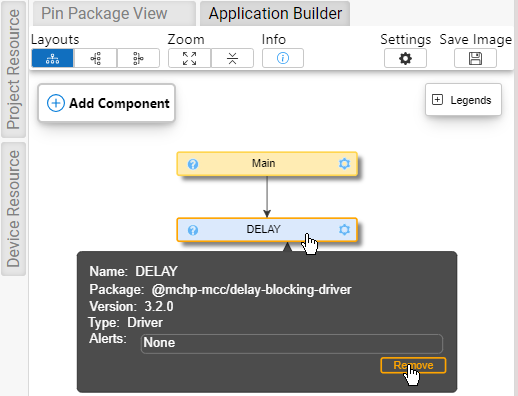
4.1 Builder: Remove Delay (or other Melody Component)
To remove a component from the Application Builder, simply hover over it until an the tooltip, showing the basic information of the the component shows up. You will then be able to click Remove to unload the component.
4.2 Builder: Add Timer Driver
Application Builder: Click 'Add Component'.

Filter on 'Timer' then click the  icon to add the Timer Driver.

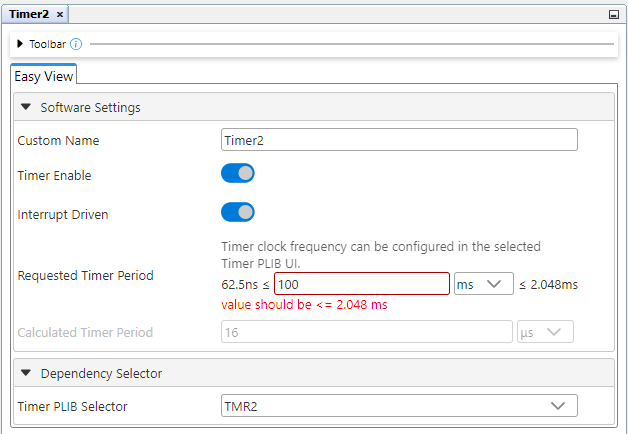
4.3 Timer Driver: Set Period
- Minimum period ≤ Requested Timer Period ≤ Maximum period (see step 4 if not).
- Enter Requested Timer Period.
- Verify that Calculated Timer Period is acceptably close to that requested.
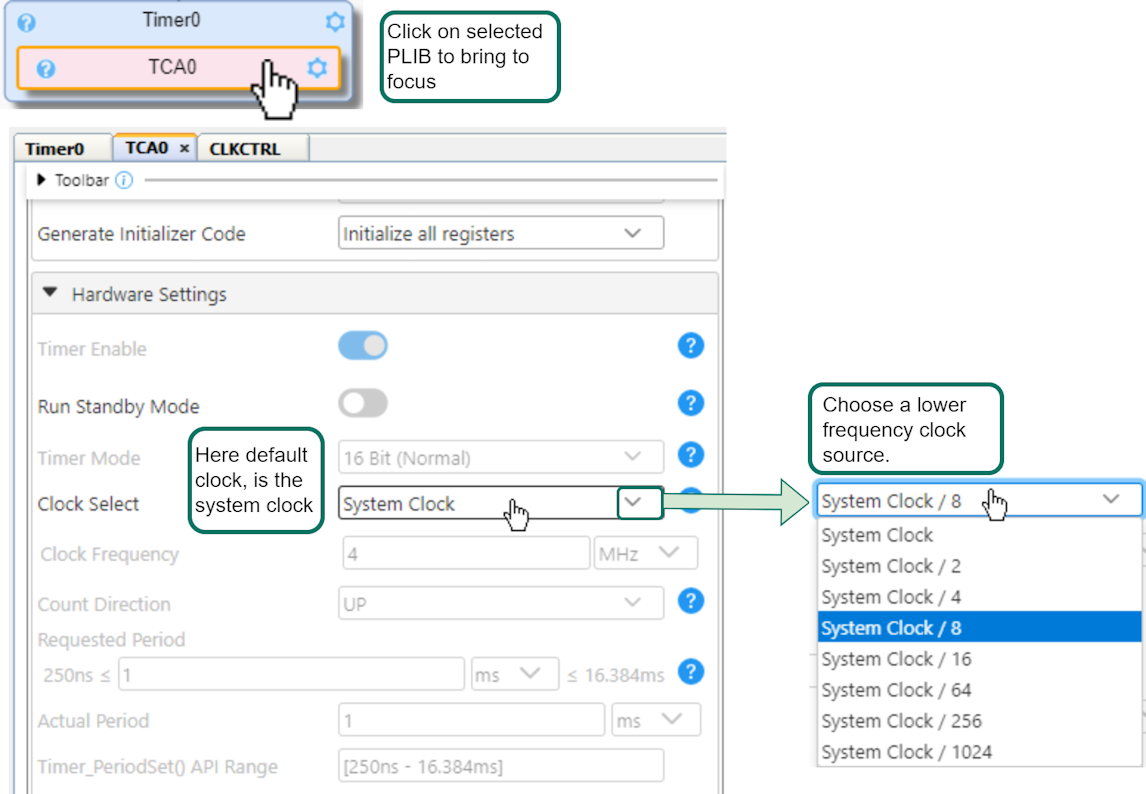
- If necessary, modify Timer clock frenquency in the Timer PLIB.
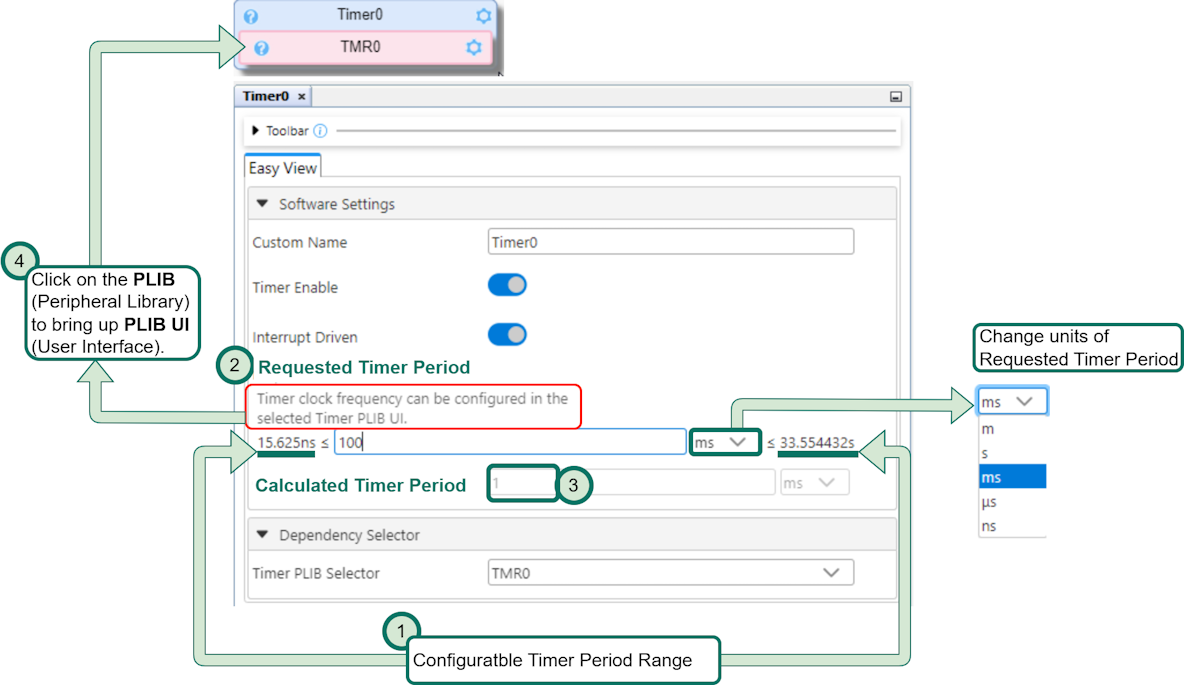
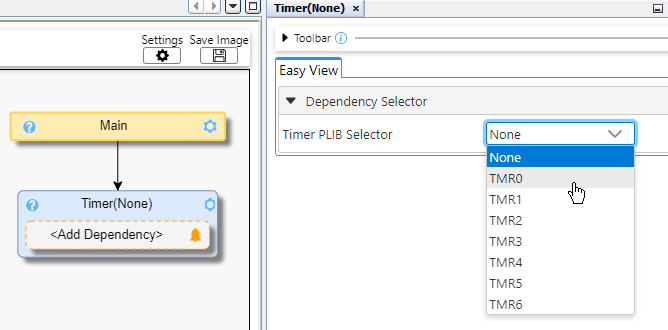
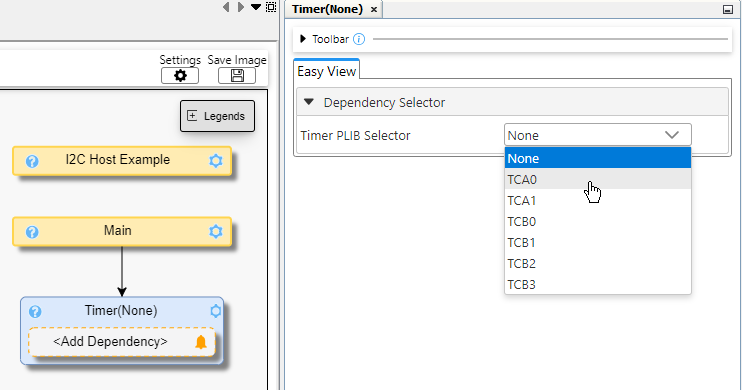
4.4 Timer Driver PLIB Dependency Selection
Once a Timer Driver is added, a Timer PLIB will be selected as a dependency.
Click the Timer (None) component block in MCC Builder to bring the Timer Driver to focus.
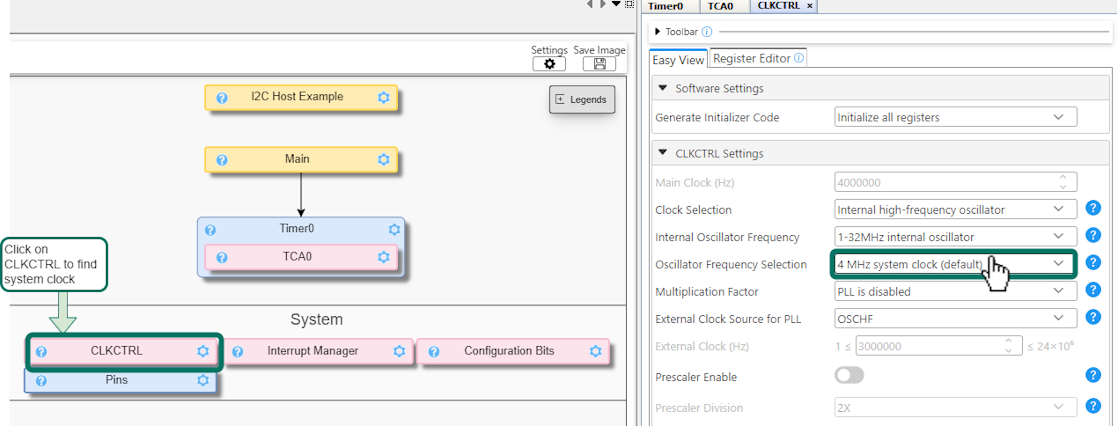
4.5 ERROR: Timer Requested Period
Once a Requested Timer Period is entered, this value may be larger than the maximum value possible with the current Timer Clock Frequency.
In the MCC Builder, click the Timer PLIB to bring it's configuration to focus.

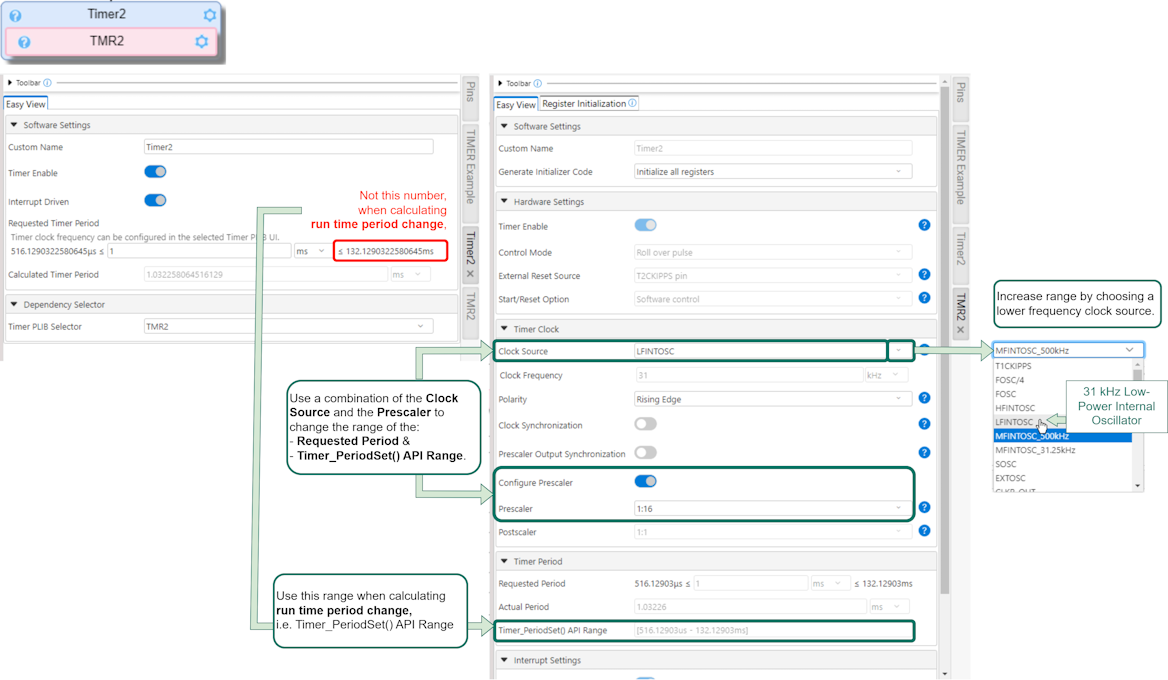
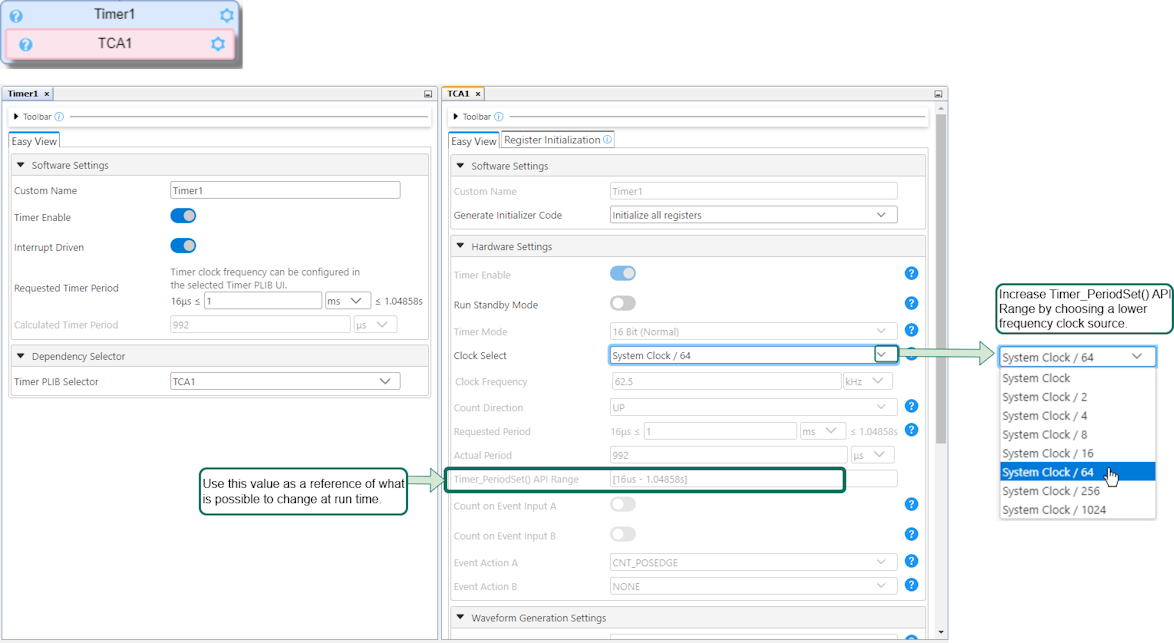
4.6 Changing the Timer Period at Run Time, using PeriodSet() API
A timer period can be changed at run time, using the Timer Driver's PeriodSet() API.
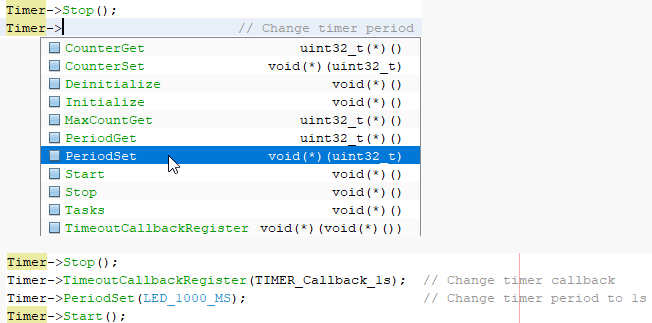
When changing the timer period in this way, it is imporant to check the Timer_PeriodSet() API Range setting.