1.2.3 Terminal Interface Setup
The Demo Meter application includes a communication module that receives and processes commands sent through the USB port. The interaction with the communication module requires a terminal software installed in the computer. This guide describes PuTTY as an example of a serial terminal tool, but users can use any terminal software of their choice, provided it is properly configured.
When the PuTTY software is installed, the user must configure the connection properties before communicating to the demo board as given in the following steps:
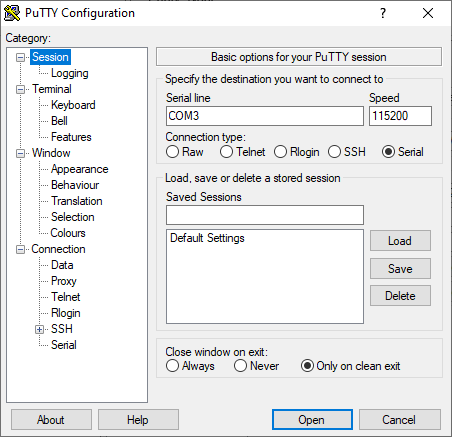
- Start PuTTY and in the PuTTY
configuration window, for Connection type select Serial and then click Open.

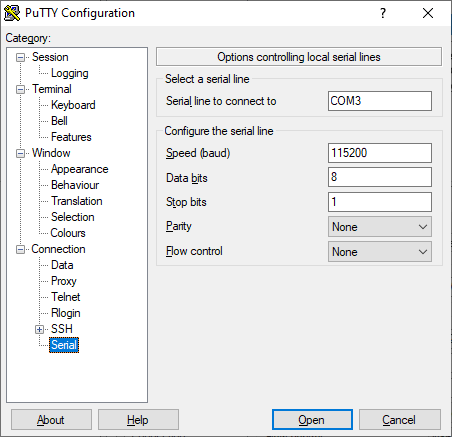
- Under Options controlling local
serial lines, enter these details:
- Serial line to connect to: Enter serial port number. To find out the serial port number assigned to the connection, connect the board to the computer, open the Windows Device Manager, and check the Ports (COM and LPT) tab.
- Speed (baud): 115200
- Data bits: 8
- Stop bits: 1
- Parity: None
- Flow control: None

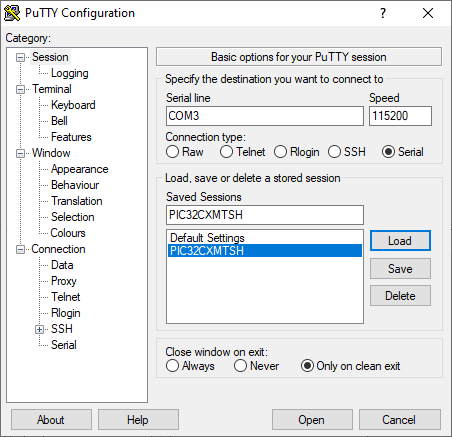
- Click Open.Tip: PuTTY allows sessions to be saved and loaded, so there is no need to repeat the configuration steps each time PuTTY is opened. To save the session, press “Session”, assign a descriptive name in the “Saved Sessions” text box, then press “Save”. To load the saved session, select it from the “Saved Session” list, then press “Load”.

- Pug in the 12V DC adapter to the
power outlet and check the communication entering a command. For example, type
“RTCR” and then press “Enter” to get the real time clock information:

