1 Installing the Library
To use the libraries, install the MPLAB Code Configurator plug-in tool in the MPLAB X IDE. This section describes the installation of MCC and the Diagnostic Libraries.
- To install the MPLAB Code
Configurator plug-in:
- In the MPLAB X IDE, select Plugins from the Tools menu.
- Select the Available Plugins tab.
- Look for the MPLAB Code Configurator and click Install.
Note: The MCC plug-in is included in the IDE installation for MPLAB X IDE versions 6.05 or above. - Installing the Diagnostic Libraries
for MCC Melody can be done using the Content Manager Wizard:
-
Create a new project in the MPLAB X IDE for any supported device specified in the AVR and PIC16/18 release notes (e.g., AVR128DA48).
- Open MCC by clicking
Tools → Embedded → MPLAB Code Configurator v5 or click
the
 icon.
icon. - In the MCC Content Manager
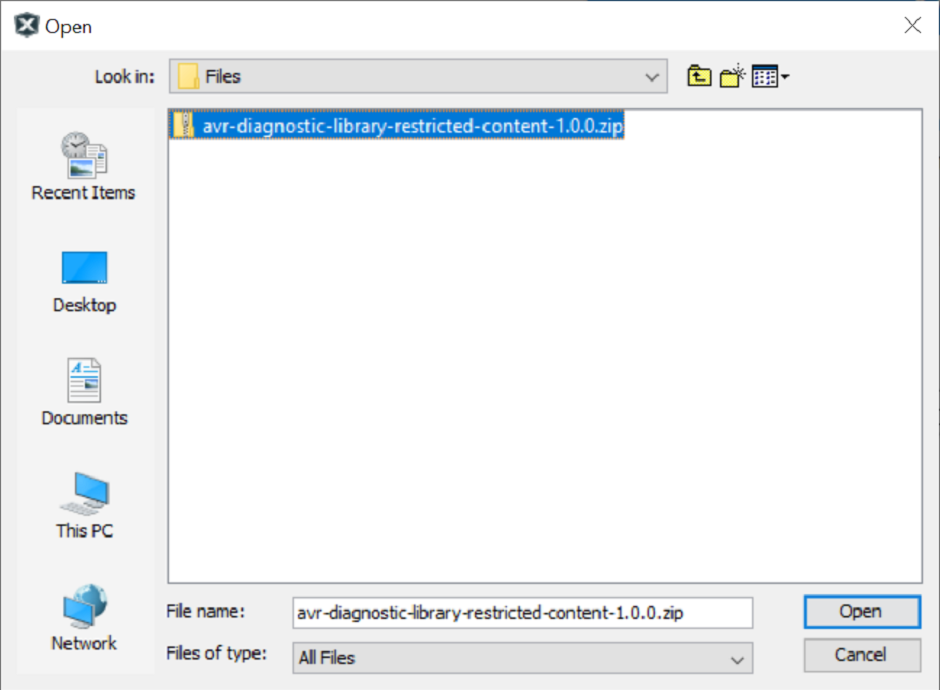
Wizard, import the Diagnostic Library package by clicking Import on
the top right corner. A new file manager window will appear. Navigate and
select the Diagnostic Library and click Open (see Figure 1-1). The import process will take a moment to
complete.
Figure 1-1. Importing the Diagnostic Library into MCC 
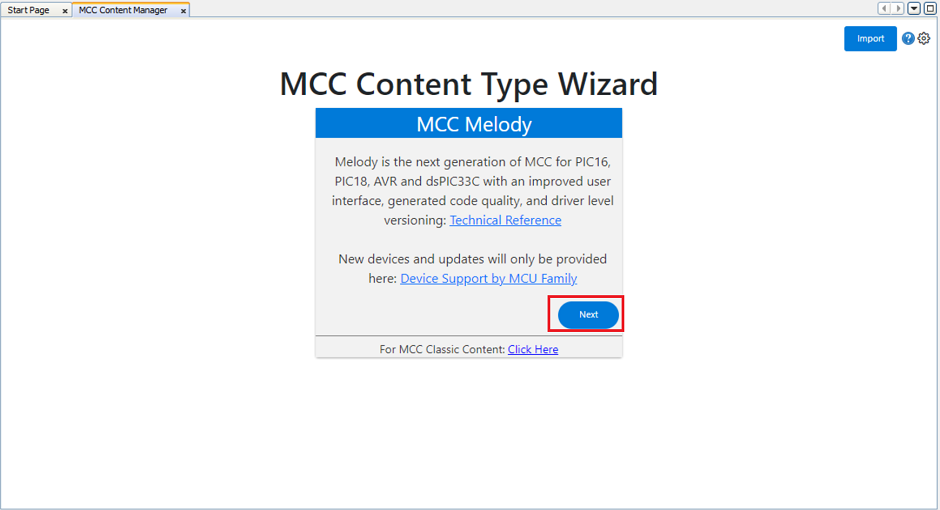
- Click Select MCC
Melody, as shown in Figure 1-2.
Figure 1-2. Selecting MCC Melody from the Content Manager Wizard 
- Click Finish.
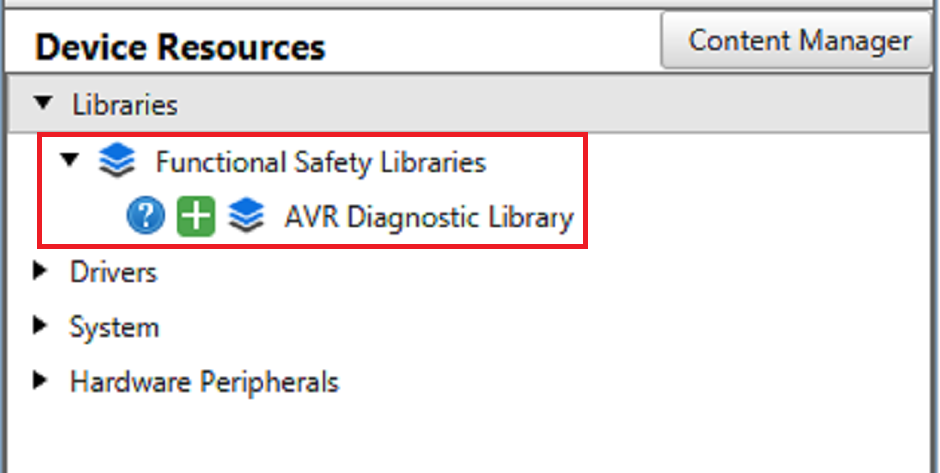
- The Diagnostic Library is now
located in the Device Resources panel in Libraries → Functional Safety
Libraries (see Figure 1-3).
Figure 1-3. Device Resources Panel 
- Alternatively, install the
library by reopening Content Manager in MCC Melody if skipping step 2.c
before clicking Finish.
- In the Device Resources panel, open Content Manager.
- On the top right corner of Content Manager, click Import. Select the Diagnostic Library package from the file system and click Submit.
- Navigate to Libraries → Functional Safety Libraries.
- Select the latest version of the Diagnostic Library of choice, click Apply and wait for the download to finish. The Content Manager tab can then be closed.
-
Note: In the Content Manager Tool (CMT), the
information icon beside the library name leads to the release notes of the selected
version.

