3.2.4 Wi-Fi and Ethernet - Setup and Tool Discovery
Follow the steps in the table to set up the desired Wi-Fi or Ethernet mode and then find the connection.
| Step | Action |
|---|---|
| 1 | Connect the emulator to your PC via the USB cable. |
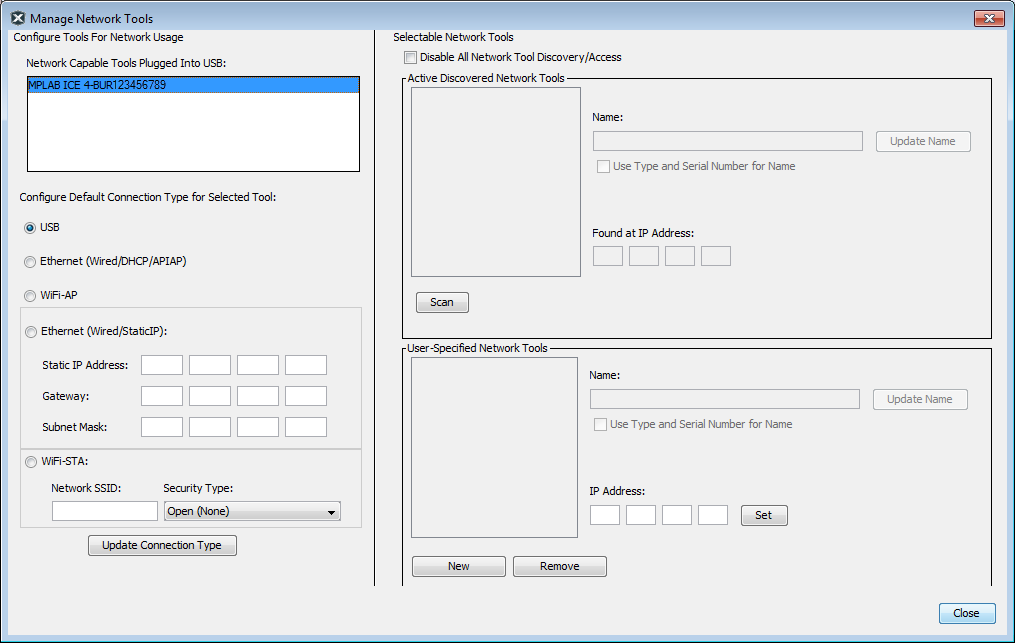
| 2 | Go to in MPLAB X IDE (see figure below). |
| 3 | Under Network Capable Tools Plugged into USB, select your emulator. |
| 4 | Under Configure Default Connection Type for Selected
Tool select the radio button for the connection you
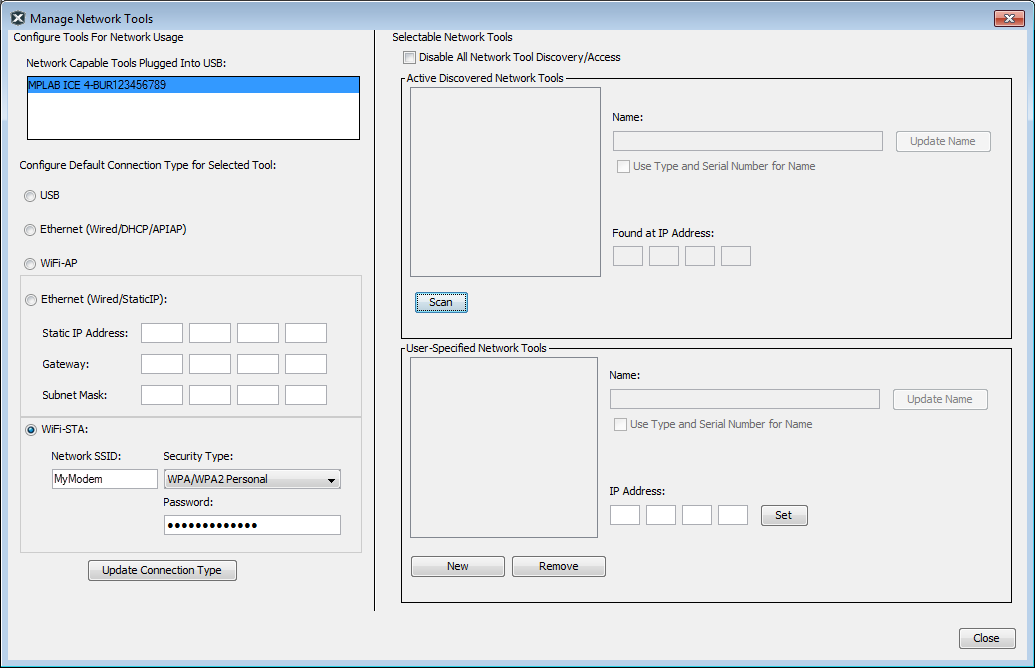
want. Ethernet (Wired/StaticIP): Input Static IP Address, Subnet Mask and Gateway. Wi-Fi STA: Input SSID, Security type and password, depending on the security type of your home/office router. Click Update Connection Type. |
| 5 | Unplug the USB cable from your emulator unit. |
| 6 | The emulator will restart automatically and come up in the connection
mode you selected. Then either: All Except Wi-Fi AP: The LEDs will display for either a successful network connection or a network connection failure/error. Wi-Fi AP: The normal Wi-Fi scanning process of Windows OS / macOS / Linux OS will scan for available Wi-Fi networks on your PC. Find the tool with SSID "ICE4_MTIxxxxxxxxx" (where xxxxxxxxx is your tool unique serial number) and use the password "microchip" to connect to it. |
| 7 | Now go back to the Manage Network Tools dialog
and click on the Scan button, which will list
your emulator under Active Discovered Network
Tools. Select the checkbox for your tool and close the
dialog. Wi-Fi AP: On Windows 10 computers, you may see the message “No Internet, Secured” and yet the button will say Disconnect showing that there is a connection. This message means that the emulator is connected as a router/AP but not by direct connection (Ethernet.) |
| 8 | If your emulator is not found under Active Discovered Network Tools, you can manually enter information in the User Specified Network Tools section. You must know the IP address of the tool (by the way of network admin or static IP assignment). |