
2.2 Adding ATWINC15x0 Solution to MCU without ASF3 Support
This use case is helpful for the user, if the ATWINC15x0 solution is not available as part of the Microchip host MCU in ASF3. The user can follow the procedure below to add support for the ATWINC15x0 with the desired MCU in the Atmel Studio project.
Note:
- This use case is useful if the desired MCU functionality is supported by the ASF3 and if the ATWINC15x0 driver is not available in the ASF3.
- The user can verify the support for the ATWINC15x0 functionality in the ASF3 with MCU by checking "WINC1500(Wi-Fi) Host driver v 19.x.x(service)” under ASF3 > ASF Wizard > Extensions. If the ATWINC1500 driver is not supported, then perform the following:
- Open the Atmel Studio project.
- Navigate to File > New > Example Project to open the MCU basic reference application.
- Navigate to ASF3 > ASF Wizard > Extensions.
- Add “SERCOM SPI – Serial Peripheral Interface (driver) – callback mode”.
- Add “Serial I/O – Host(component)”. This module is required for console output.
- Click Apply to apply the modified modules change.
- Add “WINC1500(Wi-Fi) Host driver v
19.x.x(service)".
- Right click the “common” folder to add ”New Folder” and rename the folder “components”.
- Similarly, create the
following folder structure for adding the ATWINC1500 driver structure, as
shown in the following image.
Figure 2-5. Folder Structure 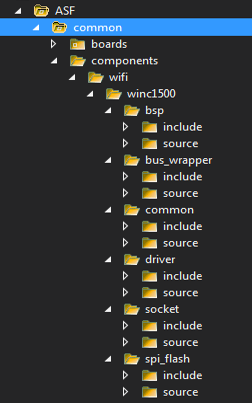
- In Atmel Studio, open a reference demo (from File > New > Example Project) of the ATWINC15x0 “AP scan example” with similar MCU features to a targeted MCU.
- Copy the reference demo ATWINC15x0 driver “<Project
Name>\src\ASF\common\components\wifi” folder files to the user-generated
Wi-Fi driver.
Figure 2-6. Copied Folder 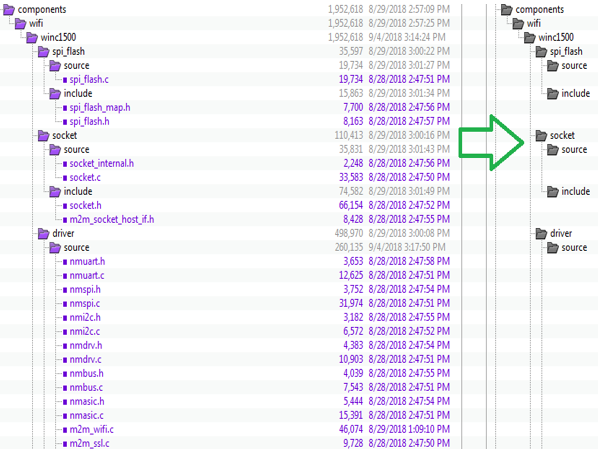
- Modify the bus wrapper source
file name to
nm_bus_wrapper_samxxx.c, wherexxx= the device name. The bus wrapper provides SPI initiation, re-initialization, de-initialization, read and write functionality.
- Modify the bsp source and
header file name to
nm_bsp_samxxx.c/h, wherexxx= the device name. The user needs to modify the functionality based on the hardware bsp.
- Include the following code in
the
nm_bsp_internal.hfile to include the header file base on the MCU.
- Compare the “<Project
Name>\src\config” folder and copy/merge the
conf_winc.h,conf_spi.h,conf_extint.handconf_clock.hfiles.Figure 2-7. Comparing Folders 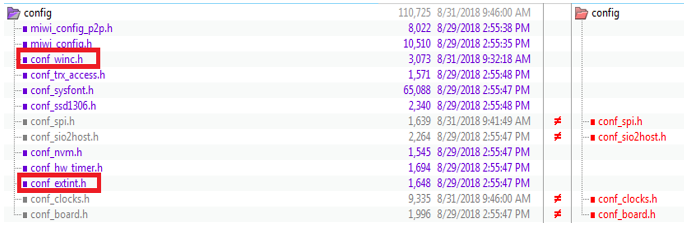
- Debug configuration:
- BSP configuration
- The file “<Project
Name>\src\ASF\common\components\wifi\winc1500\bsp\include\nm_bsp_samrxx.h”
contains debug print mapping for bsp.
Figure 2-8. File containing Debug Print Mapping 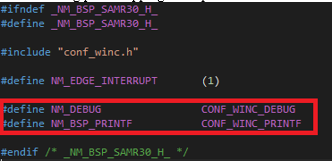
The file “<Project Name>\src\ASF\common\components\wifi\winc1500\common\include\nm_debug.h” contains debug log-level configuration.
Figure 2-9. Debug Log Level Configuration 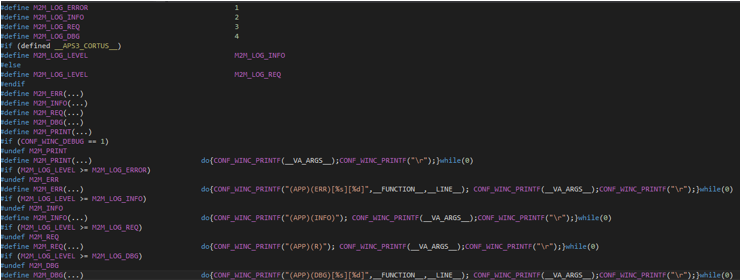 The file “<Project Name>\src\config\conf_winc.h” contains a macro for enabling/disabling the WINC debug log and mapping CONF_WINC_PRINT to system printf.
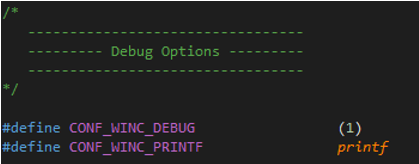
- The file “<Project
Name>\src\ASF\common\components\wifi\winc1500\bsp\include\nm_bsp_samrxx.h”
contains debug print mapping for bsp.
- BSP configuration