
3 Implementing Software Attack Protection on The PIC32CM LS00 Curiosity Nano+ Touch Evaluation Kit using MPLAB Harmony v3 and MCC
To create an MPLAB Harmony v3-based project, follow these steps or download pre-developed demo project here.
- From the Start Menu, launch MPLAB X IDE.
- Once MPLAB X IDE is open, from the File Menu, click New Project or click on the New Project icon.
- In the New Project window, from the left Navigation pane, under Steps select Choose Project.
- In the right Choose Project
Properties Page:
- For Categories, select Microchip Embedded.
- For Projects, select Application Project.
Figure 3-1. New Project Creation 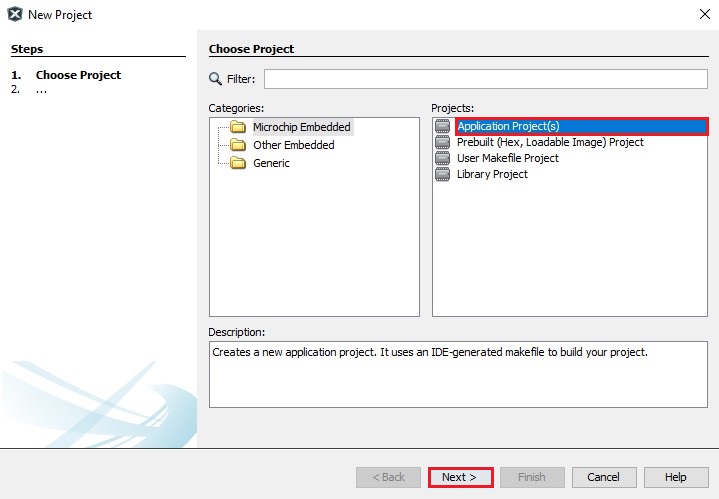
- Click Next.
- Under Steps select Select Device
, and from the right Select Device Properties Page, for Device select
PIC32CM5164LS00048 to create the project on the PIC32CM LS00 Curiosity
Nano+ Touch Evaluation Kit (The device entry will be reflected under the
device).
Figure 3-2. Device Selection 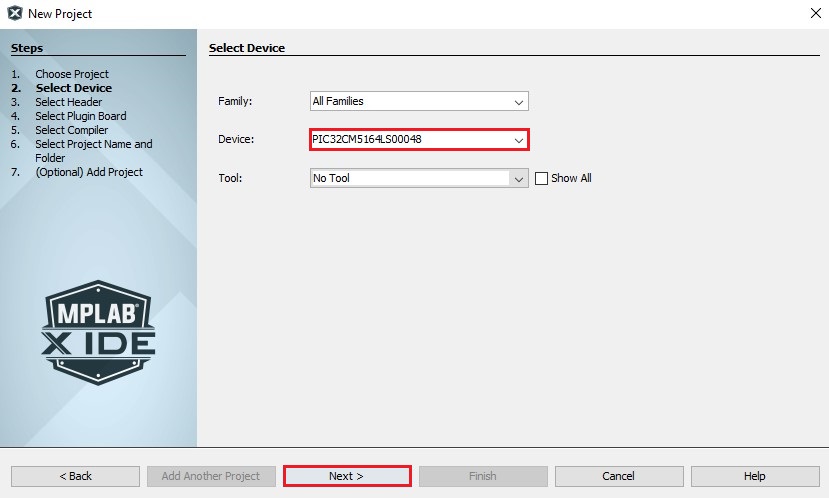
- Click Next.
- Select Select Compiler, and
from the right Select Compiler Properties Page click and expand XC32 and then select
XC32 Compiler.
Figure 3-3. XC32 Compiler Selection 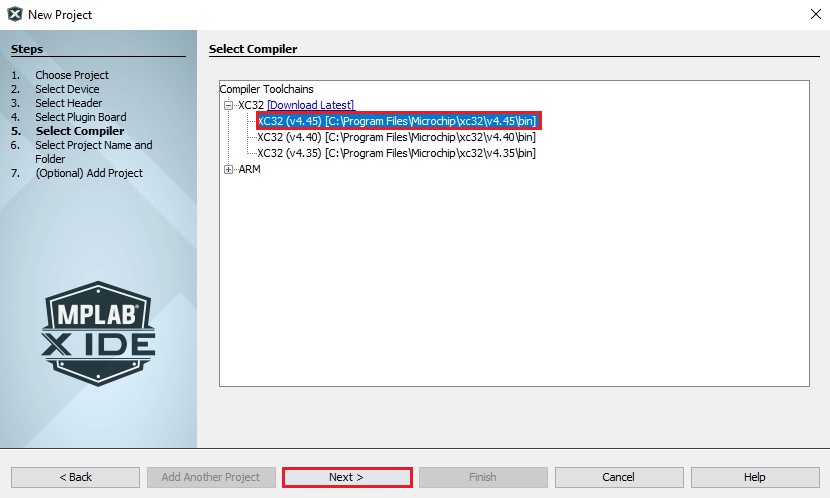
- Click Next.
- Select Select Project Name and
Folder and from the right Select Project Name and Folder Properties Page
enter these details:
- Project Name: Enter tz_pic32cm_ls00_cnano (Indicates the project name that will be shown in MPLAB X IDE to set the project's name).
- Location Project: Enter D:\software_attack_protection\firmware (Indicates the path to the root folder of the new project. All project files will be placed in this folder. The project location can be any valid path).
- Project Folder: Read-only content (Automatically updates when users change the above entries).
Figure 3-4. Project Name and Folder Settings 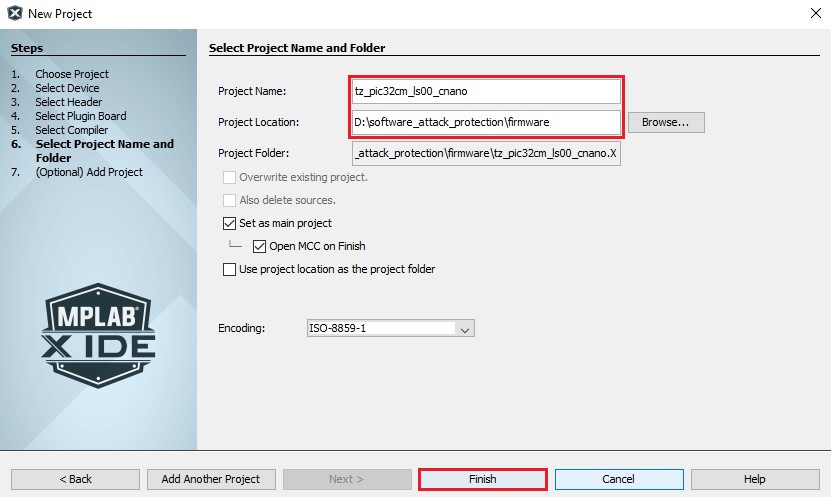
- Click Finish to launch the MCC.
- The MCC plug-in will open in a new
window, as shown in the following figure:
Figure 3-5. MPLAB Code Configurator Window