
7 Appendix 1: Running UserCrypto Sample Projects
(Ask a Question)The GitHub contains sample projects to show how to use User Crypto (CAL) APIs in the user application. You can use the sample projects to evaluate various cryptographic features supported by the User Cryptoprocessor on PolarFire devices. This section provides instructions on how to run UserCrypto sample projects with the provided Libero design.
The following table list the UserCrypto algorithms demonstrated in the sample
projects. For more information about the sample projects, see
README.txt file available in the sample projects.
| Algorithm | Parameters and Modes |
|---|---|
| AES | AES-ECB-256 encrypt |
| AES-ECB-256 encrypt | |
| AES-CCM-128 | |
| GMAC | AES-GCM-256, 128-bit tag |
| HMAC | HMAC-SHA-256, 256-bit key |
| CMAC | AES-CMAC-256 |
| KEY TREE | 128-bit nonce + 8-bit optype |
| SHA | SHA-256 |
| ECC | ECDSA SigGen, P-384/SHA-384, DPA |
| IFC (RSA) | Encrypt, RSA-3072, e=65537 |
| Decrypt, RSA-3072, CRT, DPA | |
| FFC (DH) | SigGen, DSA-3072/SHA-384, DPA |
| Key Agreement (KAS), DH-3072 | |
| NRBG | Instantiate: strength, s = 256, 384-bit nonce, 384-bit personalization string |
| Generate: (no add input, no prediction resistance) s = 256 |
Important: CCM is used to assure the confidentiality and authenticity of computer data by combining the Counter (CTR) mode techniques and the Cipher Block Chaining-Message Authentication Code (CBC-MAC) algorithm.
To run the sample projects, perform the following steps:
- Download the required sample project from GitHub
to a required project folder/location.Important: CCM Services sample project is provided with the design files. Generate other sample projects and import into the SoftConsole workspace.
- To import the sample project into the
SoftConsole, navigate to File and select
Import, see the following figure.
Figure 7-1. Import Options 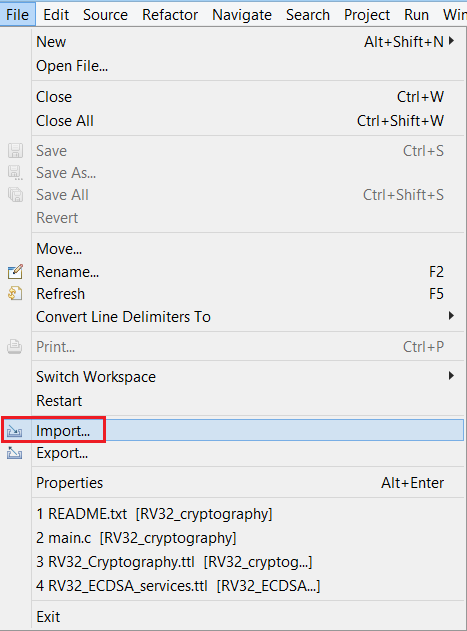
- Select import source as Existing Projects into Workspace and click Next, as shown in the following figure.
Figure 7-2. Select An Import Source 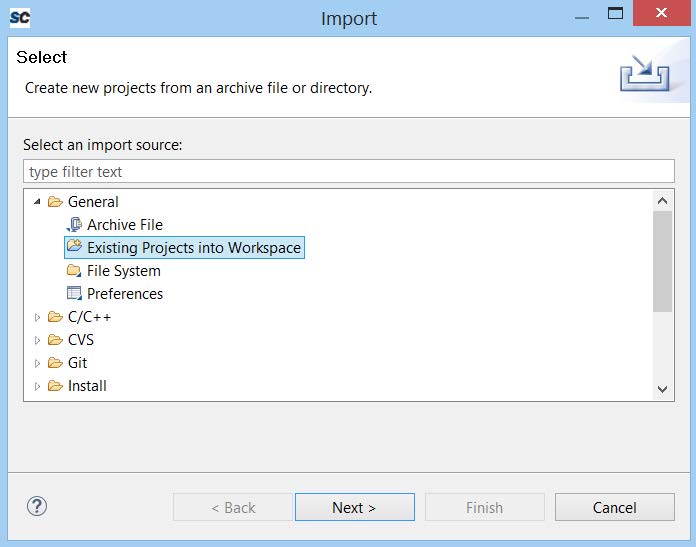
- In the Import dialog, click Browse.. to locate the generated sample project in the local PC folder and click OK.
- Ensure that the sample project is selected and
click Finish to import the generated sample project in a
SoftConsole workspace, as shown in the following figure.
Figure 7-3. Importing RV32_Message_Authentication Project 
- The new sample project is imported in the SoftConsole workspace, as shown in the following figure.
Figure 7-4. SoftConsole Workspace—Sample Projects 
- See Software Implementation to make necessary changes to the imported sample project.
- After making necessary changes, right-click on the imported sample project and click Build Project to build the project.
- Start the SoftConsole debugger to run the project. See Running TeraTerm Macro Script for running the macro script provided in the sample project.