
6 Running the Demo
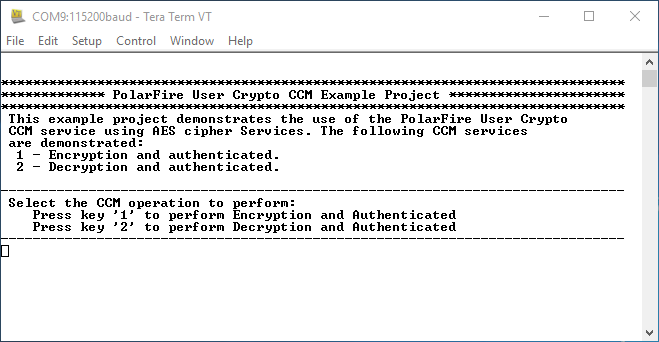
(Ask a Question)After the device is programmed, power cycle the board. The application prints the menu on the Tera Term program through the UART interface, as shown in following figure.
Use the following test vector to verify the AES CCM encryption and decryption operation:
- AES Key = 404142434445464748494A4B4C4D4E4F
- Nonce = 101112131415161718191A1B
- Additional authentication data (AAD) = 000102030405060708090A0B0C0D0E0F10111213
- Input data to Encrypt and authenticate = 202122232425262728292A2B2C2D2E2F3031323334353637
To run the demo, perform the following steps:
- Press '1' to perform CCM AES-128
encryption using the User Cryptoprocessor. The application prompts to enter a 128-bit
key, see the following figure. The application securely stores the AES key into sNVM
using the System Service function call.
Figure 6-2. Application Menu—Enter 128-bit Key 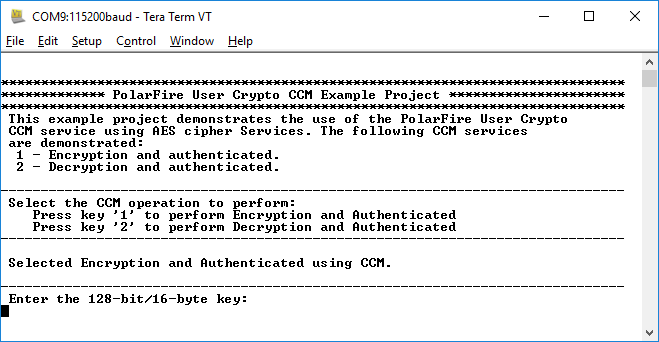
- Enter the AES key provided in the test vector and press Enter. The application prompts for Nonce.
- Enter the Nonce provided in the test
vector and press Enter. The application prompts to enter AAD, as shown in the following
figure.
Figure 6-3. Application Menu—Additional Authentication Data 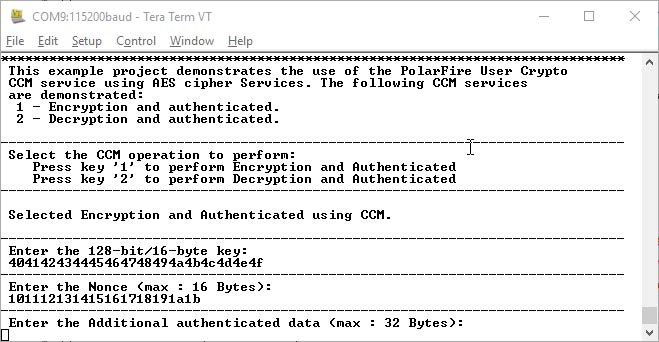
- Enter the AAD provided in the test
vector and press Enter. The application prompts to enter input data to encrypt and
authenticate, as shown in the following figure.
Figure 6-4. Application Menu—Input Data to Encrypt and Authenticate 
- Enter the input data to encrypt and
authenticate provided in the test vector and press Enter. The application prompts to
enter the number of octets in the authentication field, as shown in the following
figure.
Figure 6-5. Application Menu—Number of Octets in authentication Field 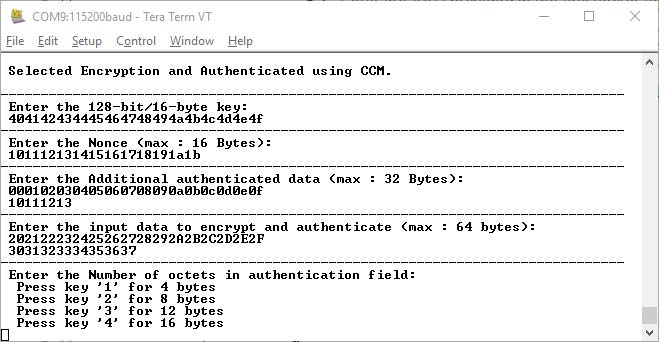
- Press '2' for Encrypted and
Authentication data. The result of the CCM AES encryption is printed on the Tera Term
program, as shown in the following figure. Observe that the result is matched with the
test vector, as shown in the following figure.
Figure 6-6. Application Menu—Encrypted and Authentication Data 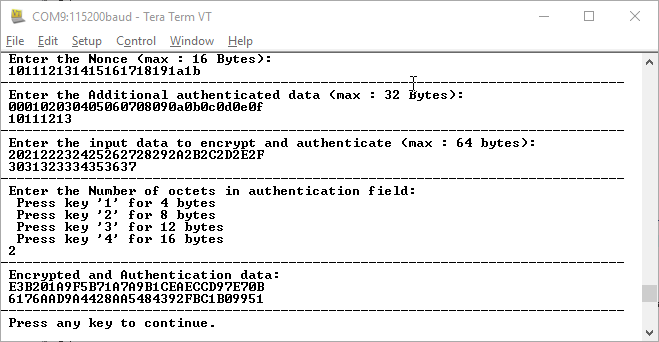
- Press any key to continue to evaluate the AES operation. The application prints the AES encryption/decryption menu again on Tera Term program.
- Press '2' to perform AES CCM decryption using User Cryptoprocessor. The application prompts to enter 128-bit key.
- Enter the key provided in the preceding
test vector and press Enter. The application prompts for Nonce.
Figure 6-7. Application Menu Decryption—Nonce 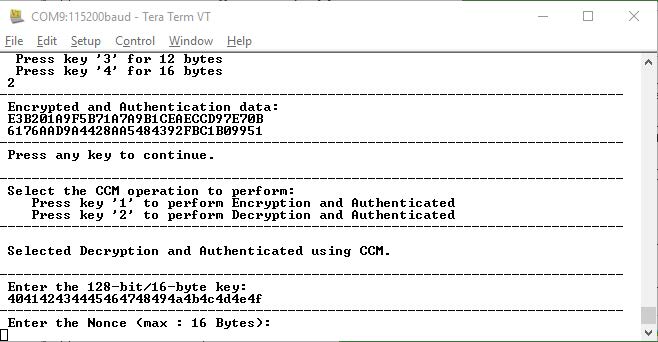
- Enter the Nonce provided in the test
vector and press Enter. The application prompts to enter AAD, as shown in the following
figure.
Figure 6-8. Application Menu—Additional Authentication Data 
- Enter the AAD provided in the test
vector and press Enter. The application prompts to enter the encrypted and authenticated
message, as shown in the following figure.
Figure 6-9. Application Menu—Encrypted and Authenticated Data 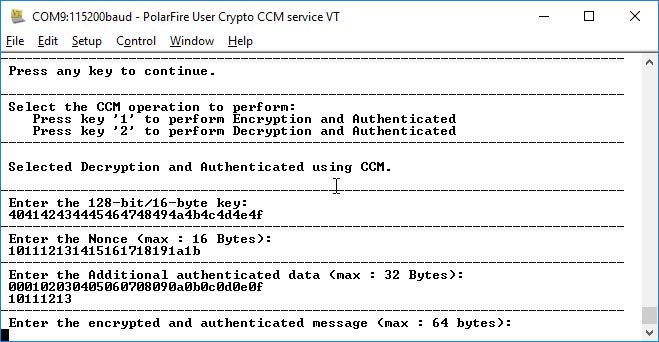
- Enter the encrypted and authentication
data provided in the test vector and press Enter. The application prompts to enter the
number of octets in authentication field, as shown in the following figure.
Figure 6-10. Application Menu—Encrypted and Authentication Data 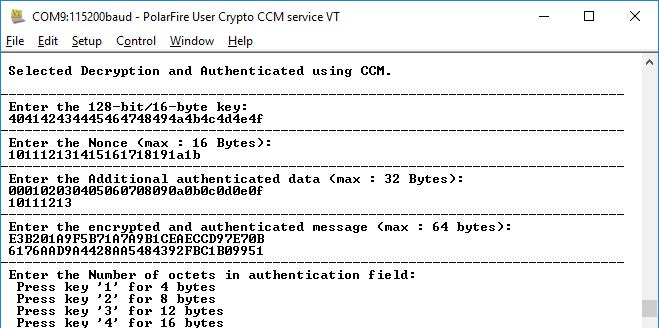
- Enter '2' to proceed. The result of the
AES CCM decryption is printed on the Tera Term program, as shown in the following
figure. Observe that the result is matched with the test vector.
Figure 6-11. Application Menu—AES CCM Decryption Result 
- There are other sample firmware projects available on GitHub. The user can download and execute them on this hardware. To run the sample projects, see Appendix 1: Running UserCrypto Sample Projects section.