3.2 Configuring the SAM-ICE J-Link Debugger
The SAMA7D65 MPU supports the following probes:
- ICD 4, ICD 5
- PICkit 4, PICkit 5
- ICE 4
- Snap
- PICkit Basic
The SAM-ICE J-Link debugger is a JTAG-based tool used to debug the SAMA7D65 on the Curiosity board. Configuring it in MPLAB X IDE ensures seamless programming and debugging of the project firmware.
To configure the SAM-ICE J-Link debugger:
- Open the project properties.
- In MPLAB X IDE, locate your project in the Projects window.
- Right-click the project name and select Properties or go to File > Project Properties. This opens the Project Properties window, a central hub for configuring project settings as shown in the figure below.
- Select the SAM-ICE J-Link debugger.
- In the Project Properties window, under the Categories panel on the left, locate the Conf: [default] configuration (or the active configuration for your project). See the figure below.
- Under this configuration, locate the Hardware Tool dropdown menu.
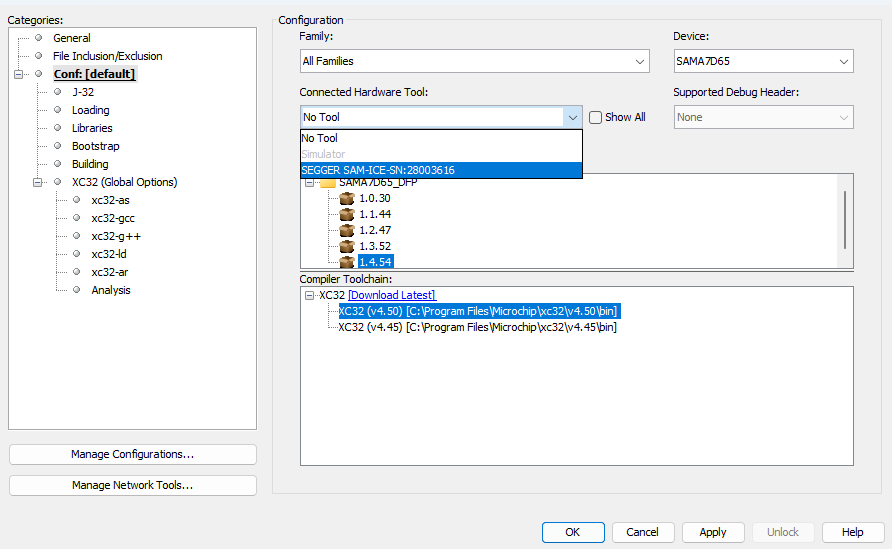
- Configure the J-Link debugger settings.
- In the Project Properties window, under the Categories panel on the left, locate the J-Link configuration.
- Under Option categories: Communication, change the JTAG method to 4-wire JTAG and the JTAG speed to 12 MHz.
Note: The SEGGER SAM-ICE debugger only supports 4-wire JTAG, so this configuration is required.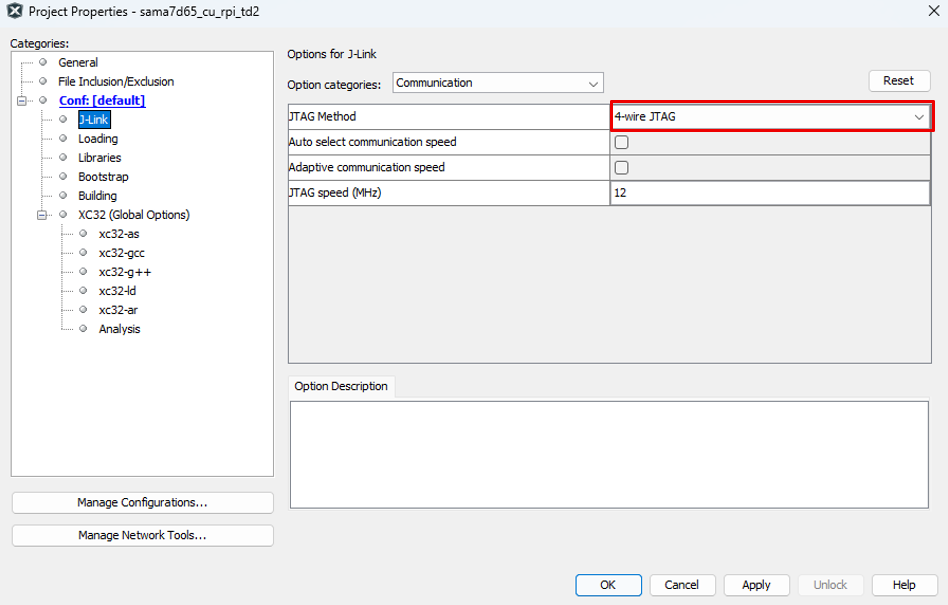
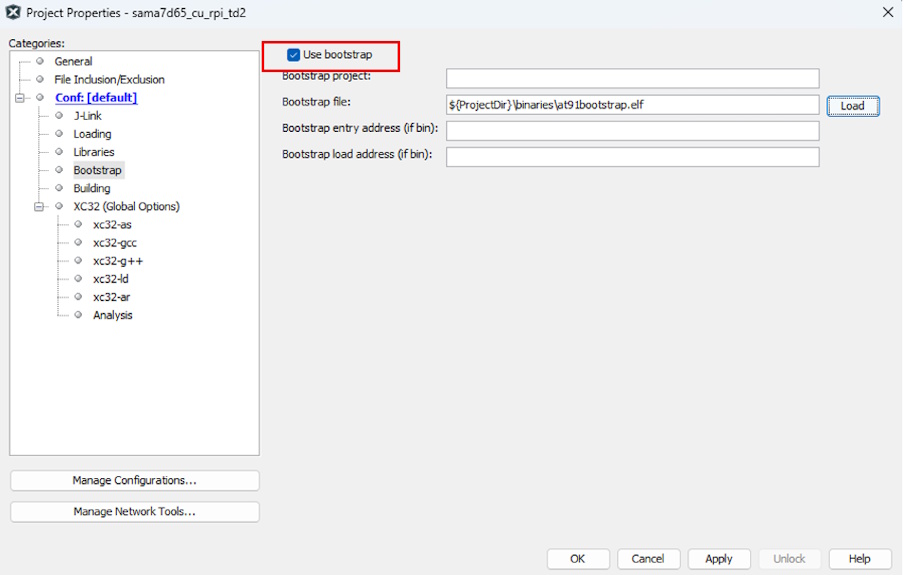
- Load the bootstrap file.
- Select the Use bootstrap checkbox
and load the at91bootstrap.elf file.
The bootstrap's main purpose is to read the third-stage binary (bootloader, operating system, or application) located in the external non-volatile memory (NVM) and store it in the external DRAM. For more details, refer to “Second-Stage Bootloader” on the SAMA7D6 Series Boot Process page.
- Select the Use bootstrap checkbox
and load the at91bootstrap.elf file.
- Launch MPLAB Code Configurator (MCC).
- Open MCC from the MPLAB X IDE toolbar.
- Ensure the MPLAB Harmony framework is installed (MPLAB Harmony v3).
- Add peripherals (such as a timer, I2C or XLCDC) to the project graph in the MCC Resource Management window.
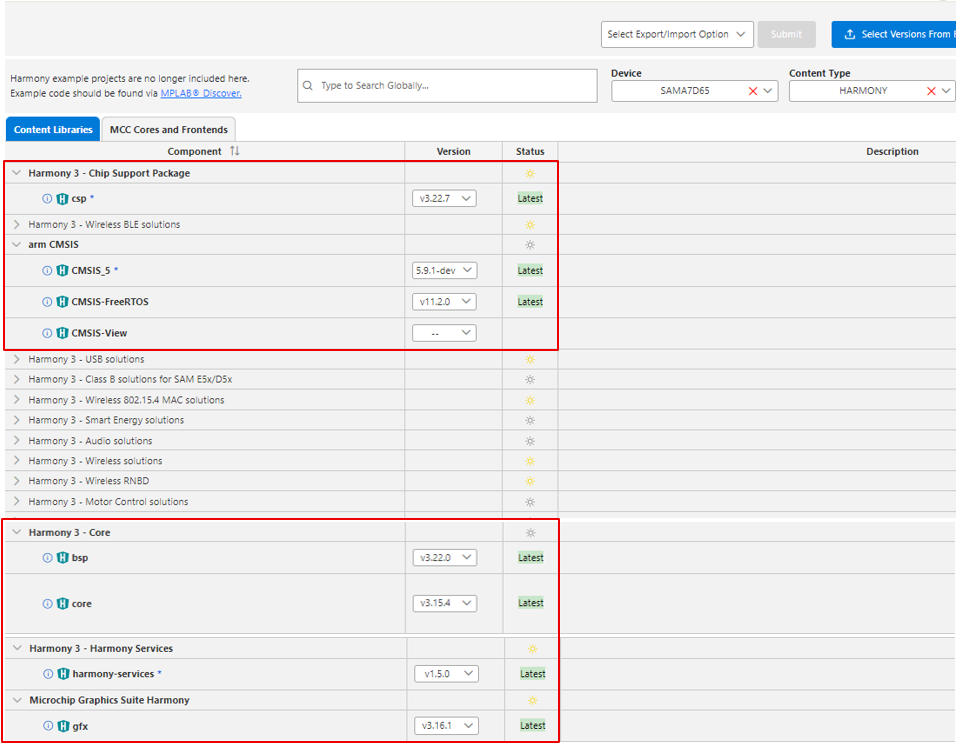
- Chip Support Package (CSP)
- Harmony 3 Core – Board Support Package (BSP), Core
- Harmony Services
- Microchip Graphics Suite Harmony – Graphics (GFX)
These libraries are essential for a successful project configuration and build. Note that the download may take some time. Once all libraries have been downloaded, click Finish.