
9.1.1 Provisioning Control Flow
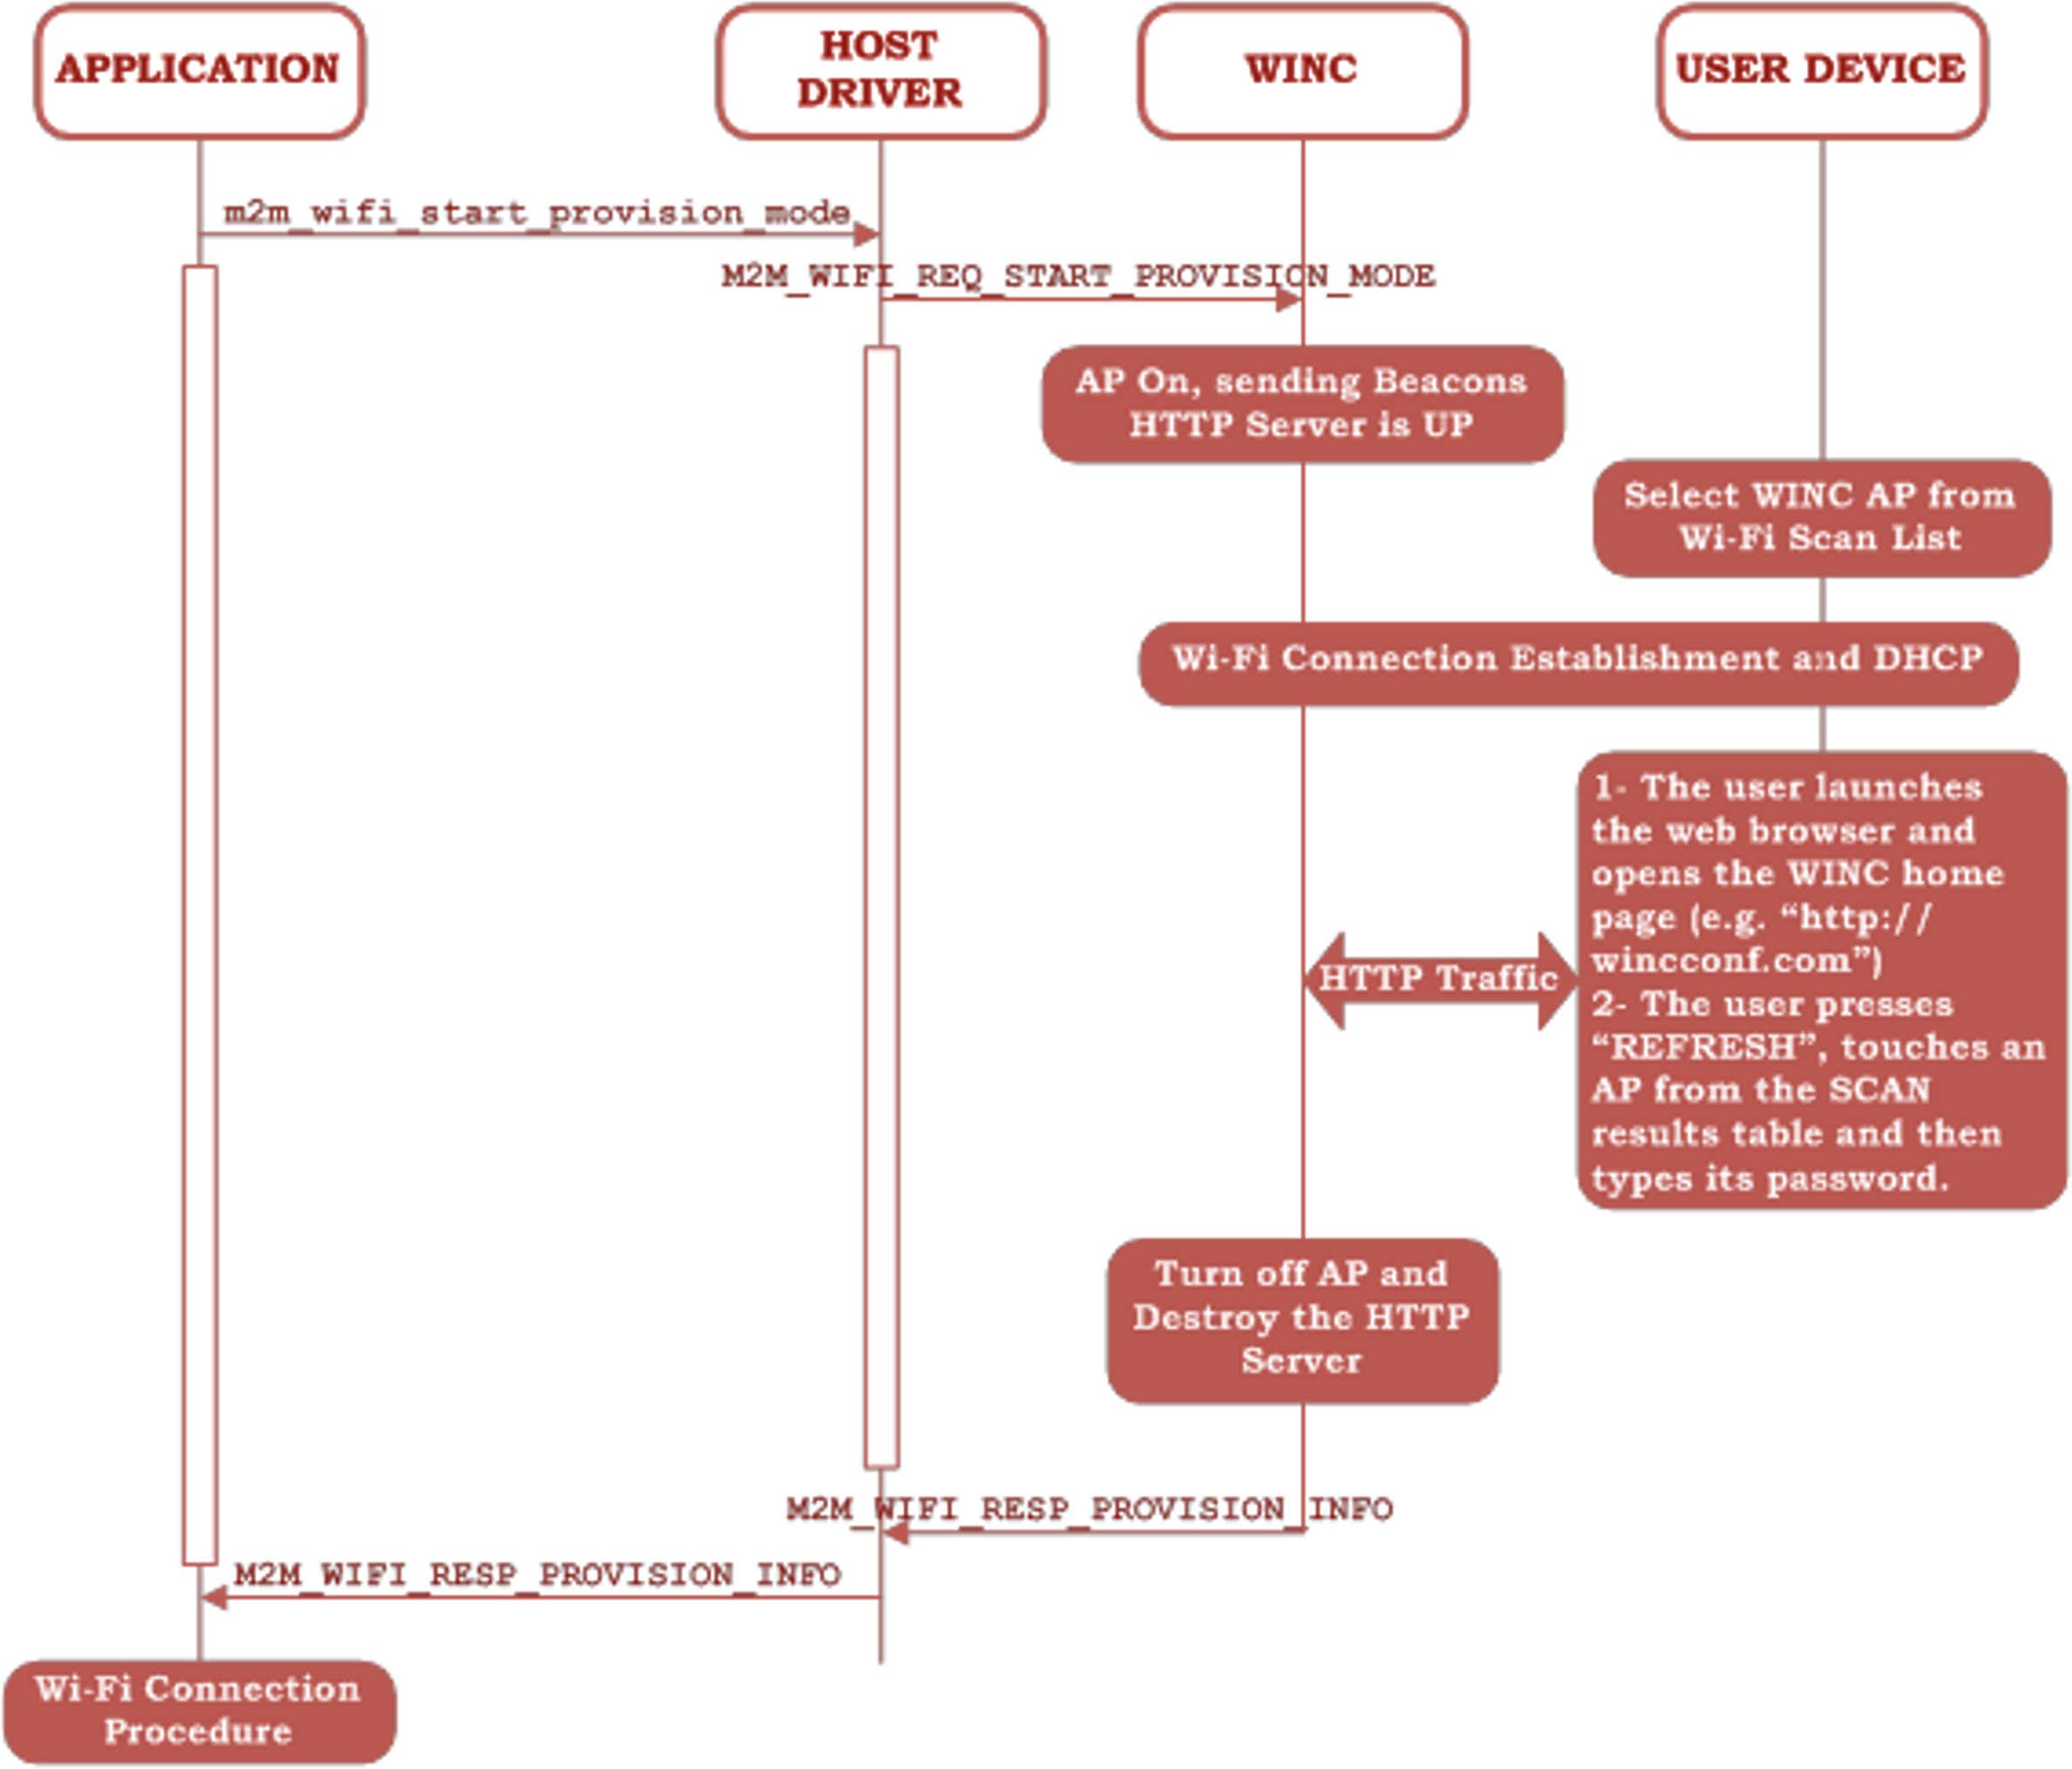
The preceding figure shows the provisioning operation for a WINC device. The detailed steps are described as follows:
- The WINC device starts the HTTP Provisioning mode.
- A user with a smartphone finds the WINC AP SSID in the Wi-Fi search list.
- The user connects to the WINC AP.
- The user launches the web browser and writes the WINC home page in the address bar.
- If the HTTP redirect bit
(
bEnableHttpRedirect) is set inm2m_wifi_start_provision_modeAPI, then all http traffic (http://URL) from the associated device (Phone, PC, and so on) are redirected to the WINC HTTP Provisioning home page. Some phones display a notification message “sign in to Wi-Fi networks?” which, when accepted, automatically loads the WINC home page. The WINC home page, as shown in Figure 10.1, appears on the browser. - To discover the list of Wi-Fi APs in the area, the user can press “Refresh”.
- The desired AP is then selected from the search list (by one click or one touch) and its name automatically appears in the “Network Name” text box.
- The user must then enter the correct AP passphrase (for WPA/WPA2 personal security) in the “Pass Phrase” text box. If the desired AP uses open security, (M2M_WIFI_SEC_OPEN) then the Pass Phrase field is left empty.
- A WINC device name may be optionally configured, if desired, by the user in the “Device Name” text box.
- Then, the user must press Connect.
The WINC turns off AP mode and start connecting to the provisioned AP.