
3.5 Mapping Firmware Drivers and the Linker Script
(Ask a Question)At this stage, the drivers and the MIV_RV32 HAL files are
not mapped. Therefore, the corresponding header files in the main.c file
are unresolved, as shown in the following figure.

To map the drivers and HAL files, perform the following steps:
- Right-click MiV_uart_blinky project, and select Properties.
- Expand C/C++ Build, and select Settings.
- Set the configuration to All Configurations, as shown in the
following figure. This setting applies the upcoming tool settings to both release and
debug modes.
Figure 3-14. C/C++ Build Settings 
- In the Tool
Settings tab, expand Target Processor, and ensure
to select the following settings.
- Architecture: RV32I (-march=rv32i*)
- Integer ABI: ILP32(-mabi=ilp32*)
- Multiply extension: Enabled
Figure 3-15. Target Processor Tool Settings 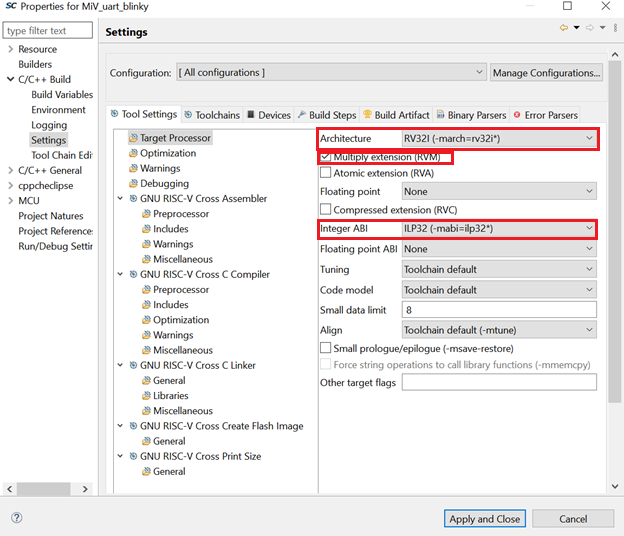
- Expand GNU RISC-V Cross C Compiler, and select Includes.
- Click the Add
icon to add the driver and MIV_RV32 HAL directories, as shown in the following
figure.
Figure 3-16. GNU RISC-V Cross C Compiler Tool Settings  Important: This application does not require including system paths and other files.
 - In the Add directory path dialog box, click
Workspace, as shown in the following figure.
Figure 3-17. Add Directory Path Dialog Box 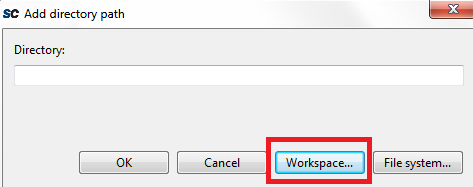
- In the Folder
selection dialog box, expand , select the CoreGPIO folder, and click
OK, as shown in the following figure.
Figure 3-18. CoreGPIO Folder Selection 
- In the Add directory path dialog box, click
OK.
The CoreGPIO folder path is added, as shown in the following figure.
Figure 3-19. Tool Settings Tab with CoreGPIO Path Added 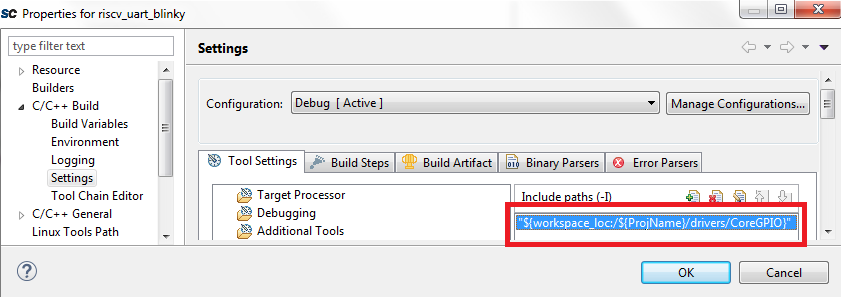
- Repeat the preceding steps to add the CoreUARTapb,
CoreSPI, hal,
MIV_RV32_HAL, and MiV_uart_blinky
(ProjName) folder paths.The drivers and MIV_RV32_HAL files are successfully mapped, as shown in the following figure.
Figure 3-20. Tool Settings Tab After Successful Mapping 
- Select the to map the linker script.
- Click Add icon as shown in Figure 3-16, and in the Add file path dialog, click Workspace as shown in Figure 3-17.
- In the File
selection dialog box, expand MiV_uart_blinky and
select the linker script, as shown in the following figure.
Figure 3-21. Selecting the Linker Script 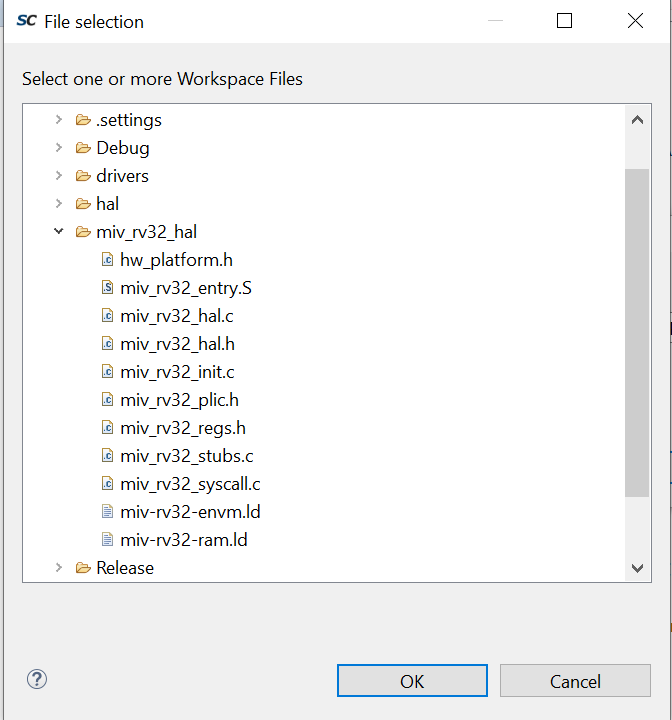
- The linker script is mapped as shown in the following figure.
Figure 3-22. Linker Script Default Mapping 
- Select the Do not use standard start files (-nostartfiles) option as shown in preceding figure.
- Select the and set Other Flags to
“--change-section-lma *-0x80000000”as shown in the following figure. This excludes the extended linear record in the first line of the hex file.Figure 3-23. RISC-V Flash Image Settings 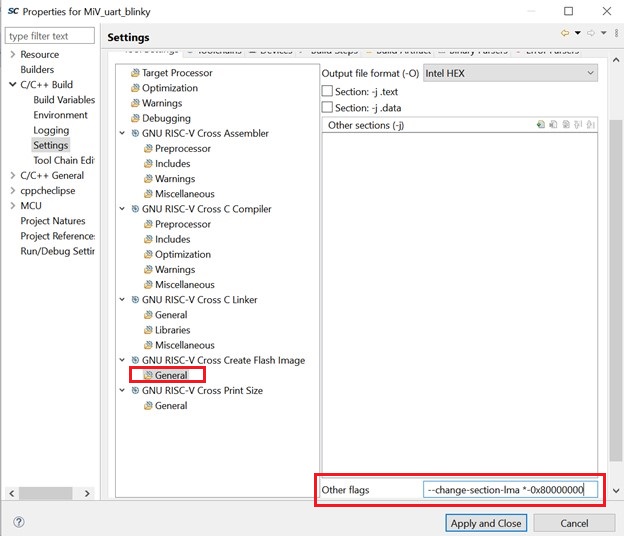
- Click Apply and when prompted to rebuild, choose Yes.
- Then click Apply and Close.
The firmware drivers and linker script are successfully mapped. Notice that the header files are now resolved in the main.c file.