
4 Quick Start
Overview
This guide provides initial instructions and the sequence of steps for the secure boot provisioning process.
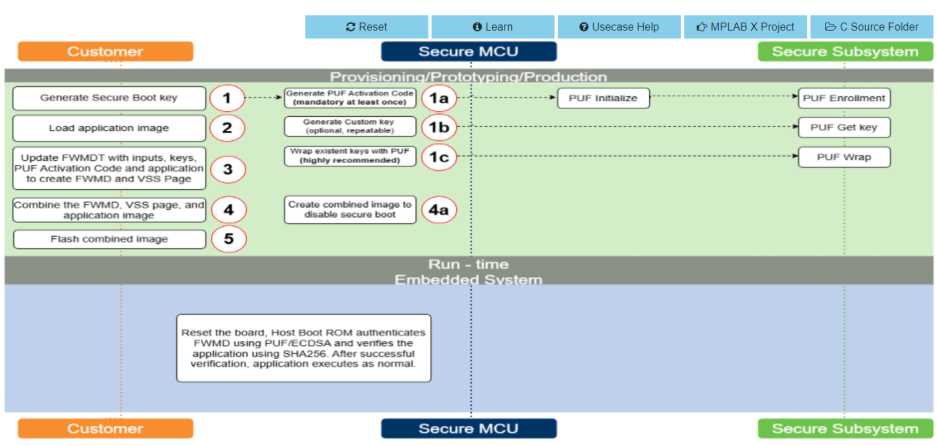
The provisioning process consists of four main phases:

Each phase must be completed before moving to the next. Within the Key Setup phase, follow the steps in the specified order (1>1a>1b>1c).
First-time Instructions
For the first run, follow the steps in order using default settings:
Step 1 --> Step 1a --> Step 1b (optional) --> Step 1c --> Step 2 --> Step 3 --> Step 4 --> Step 5
-
Connect the board using both USB ports.
-
Open TPDS and select Secure Boot>PIC32CMSG00.
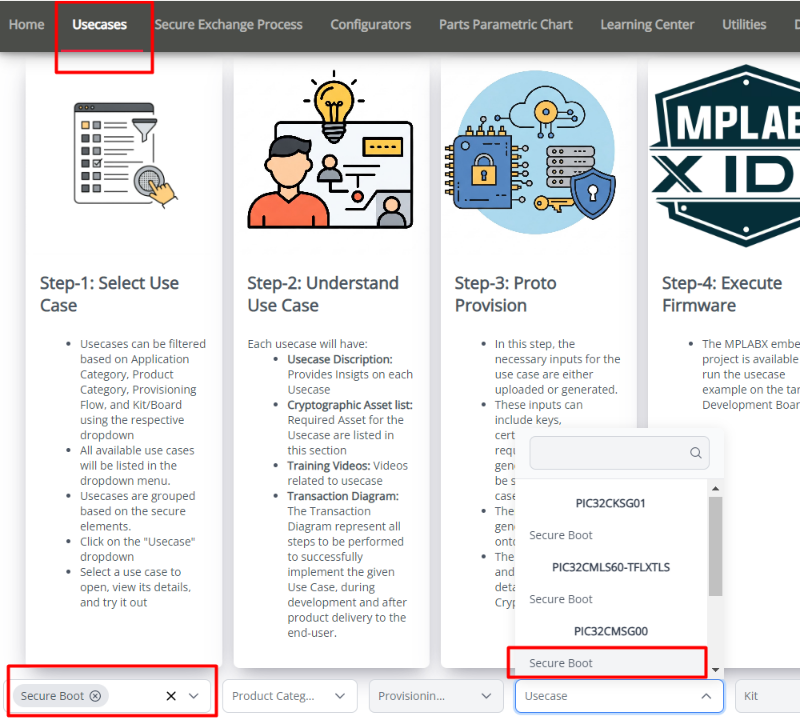
-
Click each Step button in the transaction diagram from 1 to 5.
-
Use default selections and inputs for the initial run.
-
In Step 2, choose the provided LED demo:
pic32cmsg_led_app.X.production.unified.hex. -
Open a serial terminal at 115200-8-N-1 to view the boot log after programming.
Minimum Flow (secure boot only, no extra keys):
Step 1 --> Step 1a --> Step 1c --> Step 2 --> Step 3 --> Step 4 --> Step 5
Full Flow (secure boot + additional user keys with PUF wrapping):
Step 1 --> Step 1a --> Step 1b (repeat N times) --> Step 1c --> Step 2 --> Step 3 --> Step 4 --> Step 5