
3 Running the Demo
(Ask a Question)This section describes how to run the 1G loopback demo. The procedure involves transmitting packets from the network card of the host PC to the board and verifying the packets transmitted to and received from the board using Cat Karat.
The following procedure assumes that:
- The PolarFire FPGA is programmed with the demo design programming file
(
.job). For more information, see Appendix 1: Programming the Device Using FlashPro Express - The Cat Karat software is installed on the host PC
To run the demo, perform the following steps:
- Ensure that the RJ45 cable is connected from the host PC to the J15 connector on the board.
- Power up the board using the SW3 slide switch.
- Confirm that LED 7 is glowing, indicating that the Ethernet PHY link is up and running.
- Open the Cat Karat software from the Start menu of the host PC. The Cat Karat Packet Builder window opens, see the following figure.
Figure 3-1. Cat Karat Packet Builder Window 
- From the Control Panel of
the host PC, note the name of the Ethernet network connection, see the following
figure. On a Windows 10 machine, this connection is Ethernet.
Figure 3-2. Ethernet Network Connection 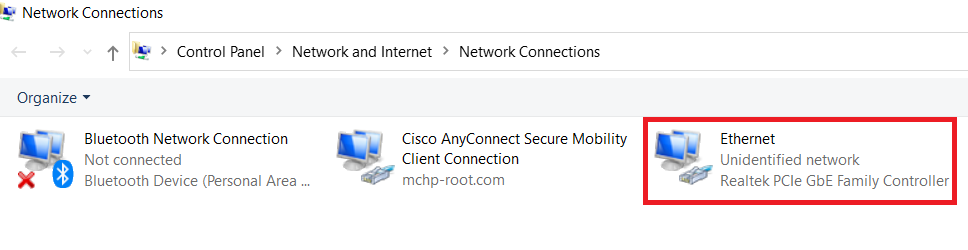
- Click Cat Karat Packet Builder >
Interfaces pane, and then double click Ethernet Network
connection, see the following figure.
Figure 3-3. Interface Selection 
- In the Packet Flow pane, select use RAW check box and IPv4 check box. In the Control tab, set Packets per Burst to 1 and the Data Pattern to 77, Packet Size to 128, see the following figure.
Figure 3-4. Packet Flow and View Settings 
- In the Ethernet tab, click Copy Source. MAC from NIC for source MAC and click Broadcast for Destination MAC, see the following figure.
Figure 3-5. Protocol View—Ethernet Tab 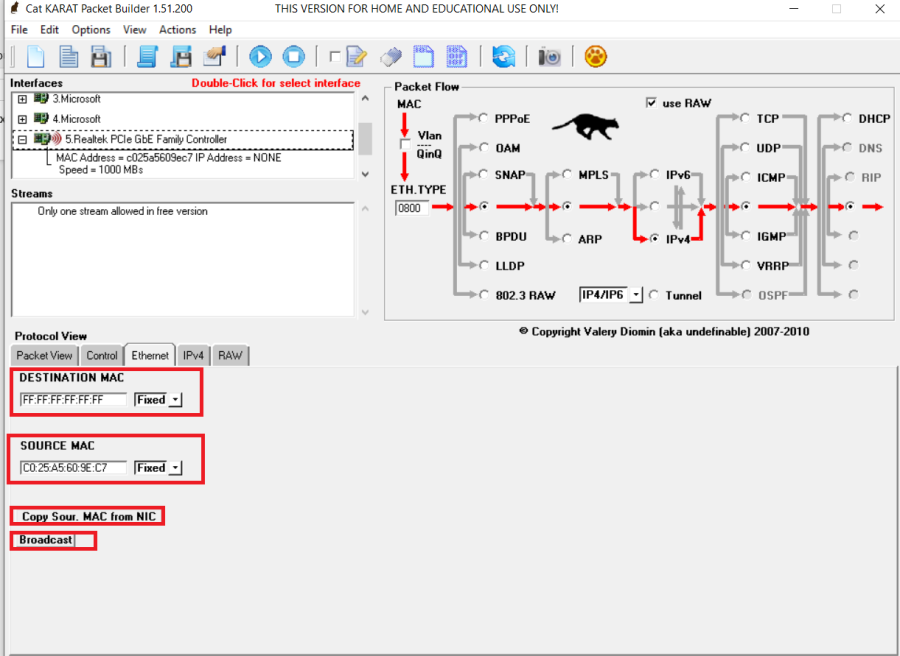
- In the IPv4 tab, retain the default settings.
- In the RAW tab, configure Offset, see the following figure.
Figure 3-6. Protocol View—Raw Tab 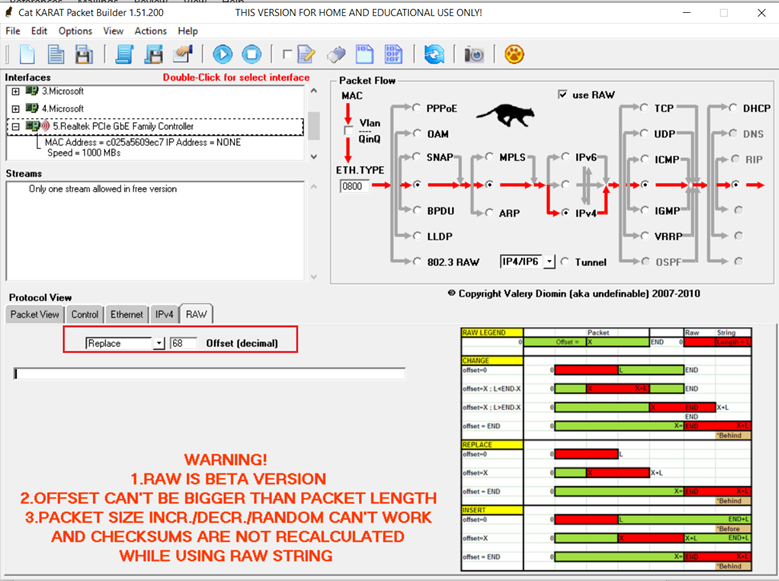
- Launch Packet Capture Tool to monitor the transmitted and received packets, see the following figure.
Figure 3-7. Packet Capture Tool 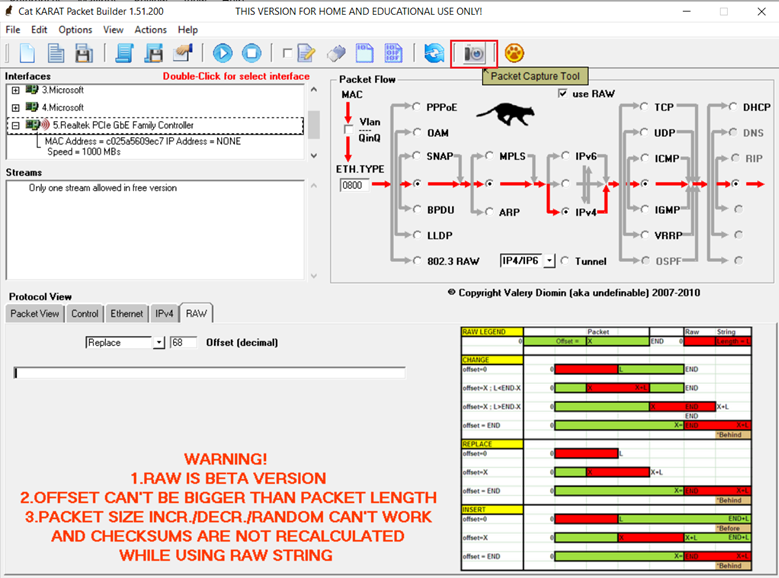
- Monitor the transmitted and received packets on
the Incoming Packet Capture Tool window. In Incoming Packet
Capture Tool, select an interface in the
Interfaces pane, see the following figure.
Figure 3-8. Incoming Packet Capture Tool—Interfaces Pane 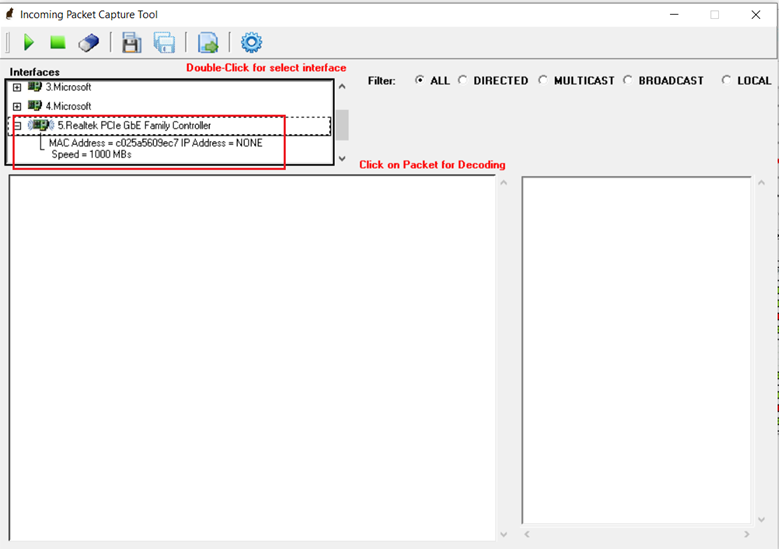
- Before transmitting, in the Packet View tab, check the packet being transmitted, see the following figure.
Figure 3-9. Packet View Tab 
- In the Cat Karat window, click Start Transmit (as highlighted in the following figure) to transmit one packet from the host PC to the board.
Figure 3-10. Cat Karat Window—Start Transmit 
- Click Start Capture (as highlighted in the following figure) to monitor the transmitted and received packets.
Figure 3-11. Incoming Packet Capture Tool—Start Capture 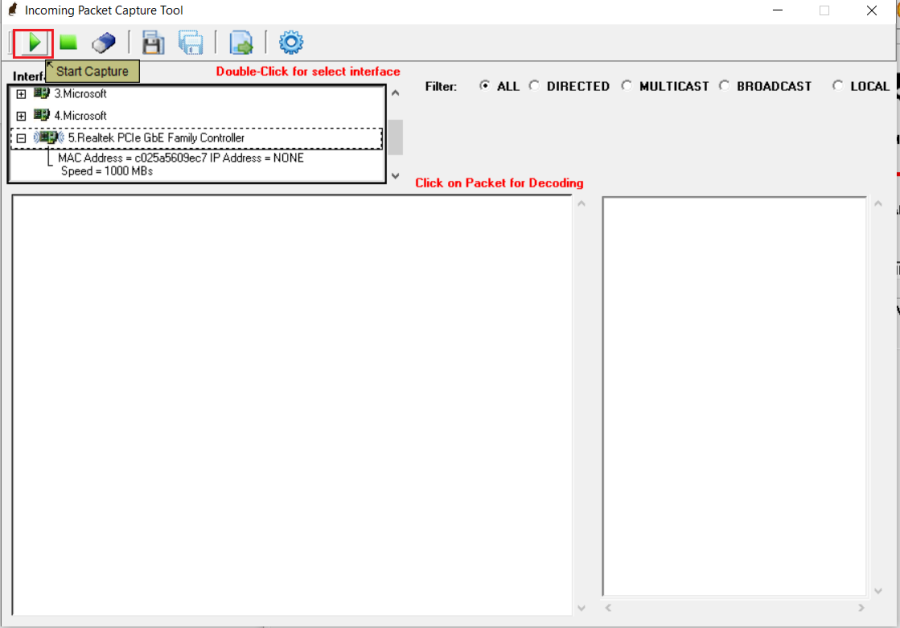
- After clicking Start Capture, you see the
transmitted and received packets, as shown in the following figure.
One packet was transmitted from the host PC to the board. The same packet was looped back at the CoreTSE IP and was sent back to the host PC. All packets transmitted from the host PC network are looped back in the same way.
Figure 3-12. Transmitted and Received Packets 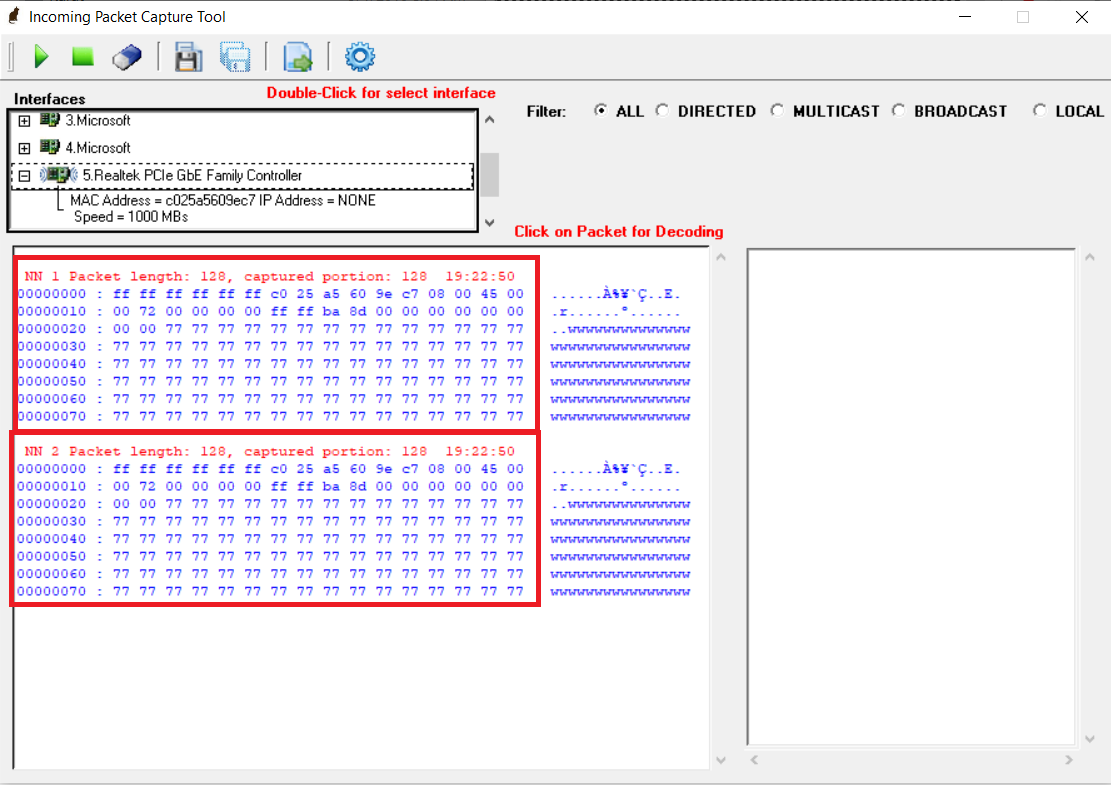
- Select different burst rates, data patterns, and transmit packets to the board.
- Power-down the board and close the Cat Karat software.
You have successfully run the demo.