
Installing X2C Library
Pre-requisites
Before proceeding with the installation, ensure you have the following software installed:
Installation Steps for X2C Library
Follow these steps to install the X2C Library:
Download X2C Library
Visit the X2C download page and download X2C v6.3 or above.
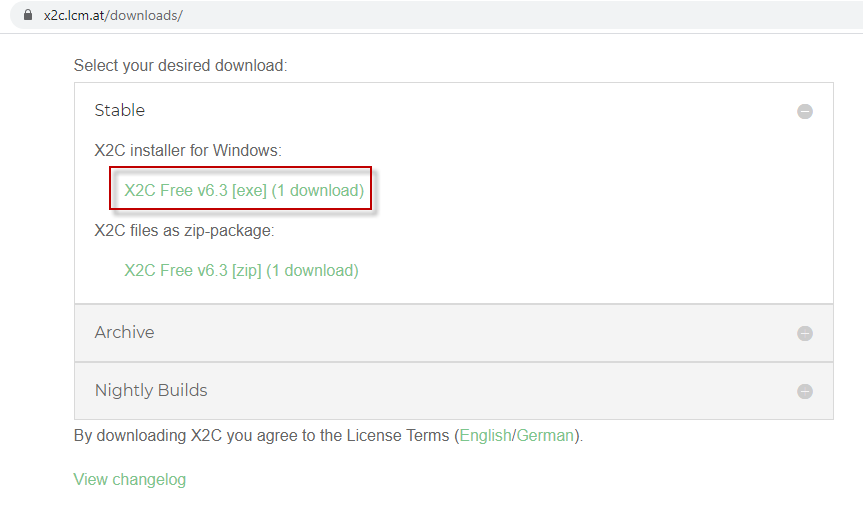
Selecting X2C Installer
Run the X2C Installer
Execute the downloaded X2C Installer and follow the on-screen instructions.
Select Installation Components
At the "Select Components" menu, choose "Compact Installation with Microchip Support" and click "Next".

Components Selection
Configure Harmony 3 Path
Certain library files from X2C need to be copied to your local MPLAB Harmony 3 X2C installation folder. The X2C Installer can handle this automatically if you provide the local Harmony 3 installation path. This step is crucial for adding Scilab/Xcos + X2C model-based development support in the MPLAB Harmony 3 environment.
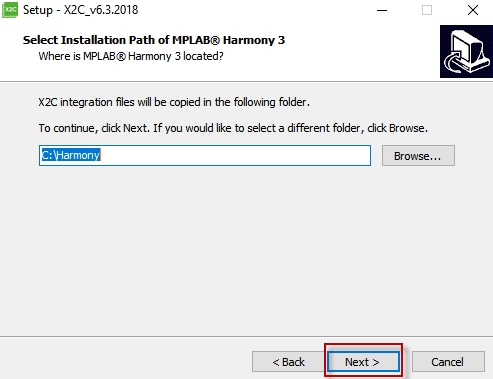
Set Harmony 3 Path
This is an important step that integrates Scilab/Xcos with the X2C model-based development support in the MPLAB Harmony 3 environment.
Complete the Installation
Follow the remaining self-explanatory installation instructions to complete the X2C installation.
The X2C Installer will also download and install the requisite version of Scilab/Xcos if it is not already installed.
By following these steps, you will successfully install the X2C Library and integrate it with the MPLAB Harmony 3 environment, enabling model-based development using Scilab/Xcos.