3.6.1 Debug an Application Executed from the Serial Flash on MPLAB X IDE
Before debugging, ensure that the harmony.bin file in your project directory is flashed in the serial Flash offset. Refer to the sections SAM-BA Installation on Windows Host and Device Set-Up to Flash Using SAM-BA for initial device setup and tool installation procedure.
- Erase the serial Flash:
- sam-ba -p j-link -b <board> -a qspiflash -c erase
- Program the application starting from serial Flash offset of 0x40000:
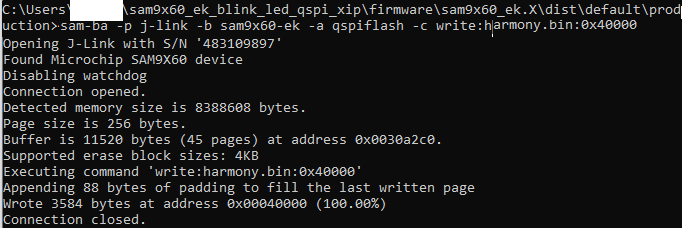
- sam-ba -p j-link -b <board> -a qspiflash -c write:harmony.bin:0x40000
- Reset the board.
The screenshot below illustrates step 2 performed on the SAMA9X60-EK (<board> set to sam9x60-ek).

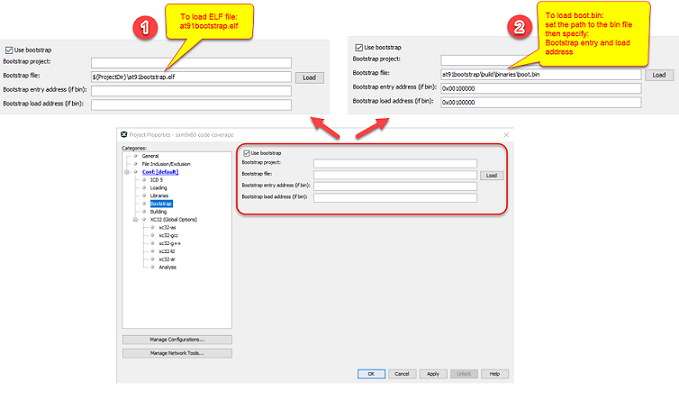
To debug the Harmony application executed from the serial Flash on MPLAB X IDE, use either at91bootstrap.elf or boot.bin file generated in Configure at91bootstrap to Debug Harmony Applications Executed from Serial Flash on MPLAB X IDE in the Harmony application project properties. If boot.bin is used, the boot entry address and boot load address must be added in the project properties as illustrated in the following screenshot.

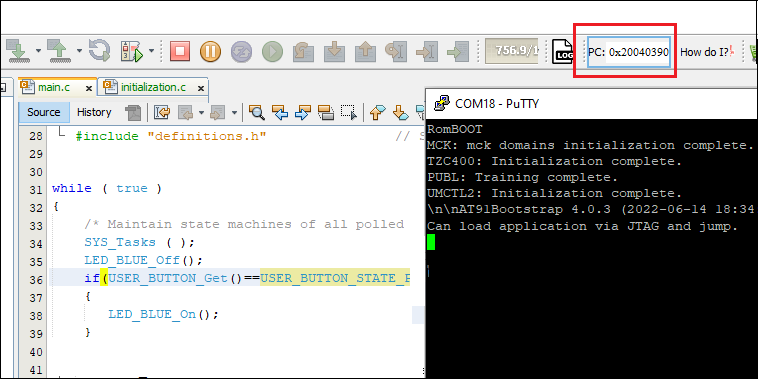
Start debugging the application on MPLAB X IDE. The user can observe the program counter and see that the Harmony application is executed from the serial Flash memory.
With the serial connection established between the board and host PC, open the serial console to monitor debug messages.
An example screenshot is shown below:

