3.4.2.1 Configure at91bootstrap to Debug Harmony Applications Executed from Serial Flash on MPLAB X IDE
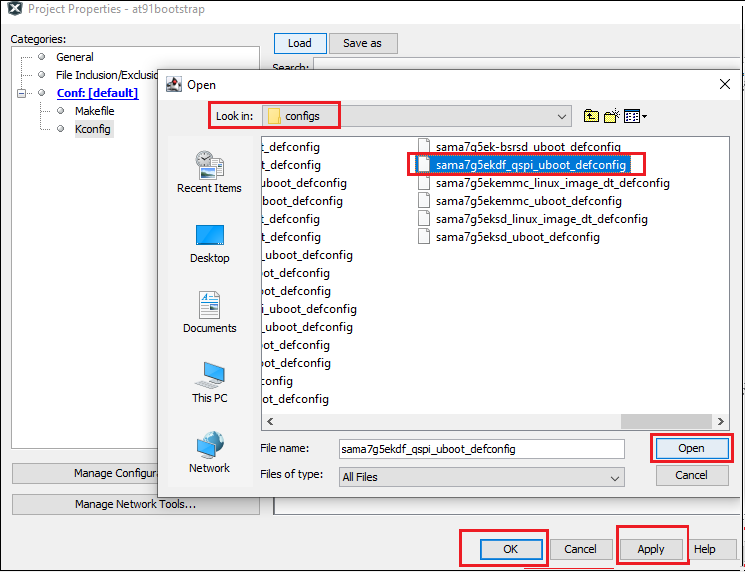
- Go to Project>Properties>Kconfig>load.
- Select the appropriate project directory, then select configs.
- In the configs folder, select <board>df_qspi_uboot_defconfig.
- Click Open, then Apply, then OK.

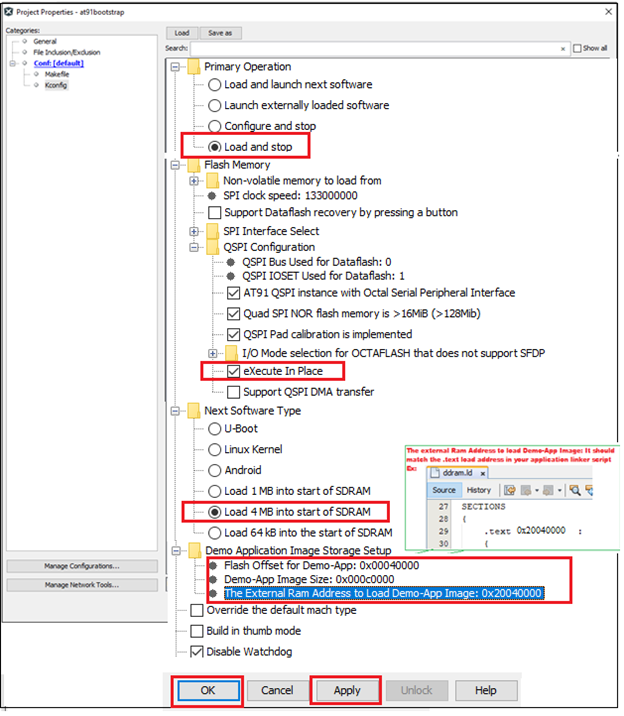
Then perform the following changes:
- Under Primary Operation, select Load and Stop.
- Under Flash Memory, expand QSPI Configuration, then select eXecute In Place.
- Under Next software type, select Load 4 MB into the start of SDRAM.
- Under Demo application image storage
setup:
- Flash offset is the QSPI offset where a user wants to flash the application.
- Demo app image size is the size of the app image.
- External RAM address to load Demo-App image is the QSPI starting address of the application. It should match the .text load address in your application linker file. The linker file can be found in the user application project folder, Eg: ddram.ld file)
- Click Apply, then OK.
Note: The table below provides the external QSPI address for the
boards. For details, refer to the product data sheet.
| Board Name | QSPI Start Address | QSPI End Address |
|---|---|---|
| SAM9X60-EK (DT100126) | 0x70000000 | 0x708000000 |
| SAMA7G54-EK (EV21H18A) | 0x20000000 | 0x280000000 |
An example configuration for SAMA7G54-EK is shown below. 
Now clean and build at91bootstrap.
Note: The boot file (at91bootstrap.elf) generated by using this
Kconfig can be used to debug the Harmony application executed from the serial Flash on
MPLAB X IDE.
