
10.1.5 Changing Constraints and Observing Results - 32-Bit Shift Register Example
You can use the Constraints Editor to change your constraints and view the results in your design. The following procedure describes how.
-
Open the Constraints Editor (Constraints Manager > Timing Tab
> Edit Constraints with Constraint Editor > Edit Timing Verifications
Constraints).
The Constraints Editor shows the clock constraint at 250 MHz you entered earlier.
Figure 10-21. Clock Constraint Set to 250 MHz 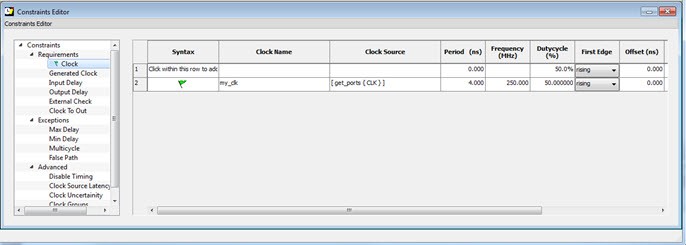
-
Select the second row. Right-click and choose Edit Clock
Constraint.
The Edit Clock Constraint dialog box appears.
- Change the clock constraint from 250 MHz to 800 MHz, and then click the green check mark to continue.
- Click Open SmartTime > Open Interactively.
- Choose Maximum Delay Analysis View to view the max delay analysis.
- In the Maximum Delay Analysis window, expand my_clk.
-
Click Register to Register to observe the timing
information. The slacks decrease after you increase the frequency. You may see
the slacks go negative, which indicates Timing Violations. Negative slacks are
shown in red.
Note: The actual timing numbers you see may be slightly different.
Figure 10-22. Maximum Delay Analysis After Setting Clock Constraint to 800 MHz 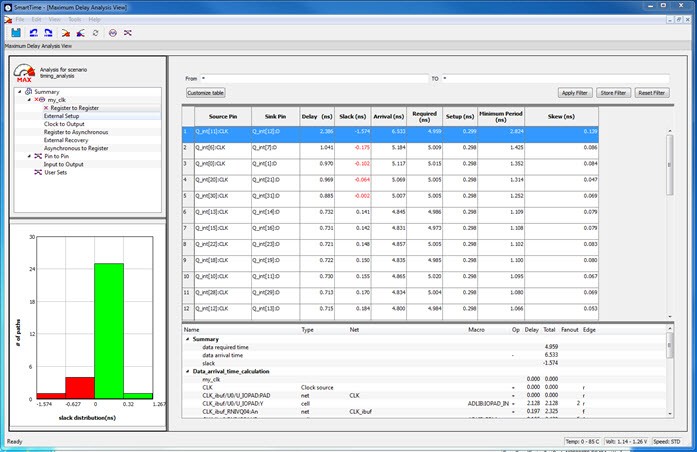
- Close SmartTime. When prompted to save changes, click No.