10.1.1 Add a Clock Constraint - 32 Bit Shift Register
To add a clock constraint to your design:
-
In the Design Flow window, double-click Manage
Constraints.
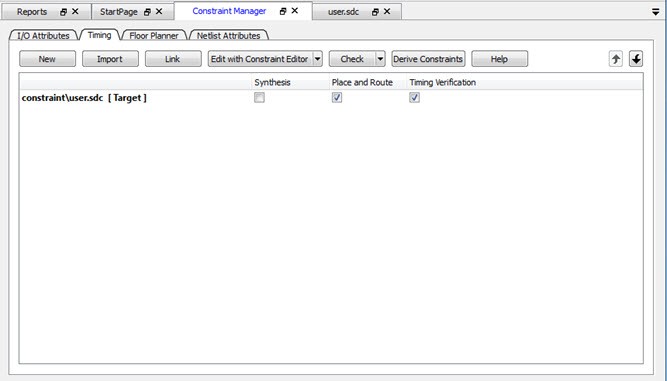
The Constraint Manager appears.
Figure 10-7. Constraint Manager 
- Click the Timing tab.
-
Click Edit with Constraints Editor > Edit Place and Route
Constraints.
Figure 10-8. Constraints Editor – Add Clock Constraint 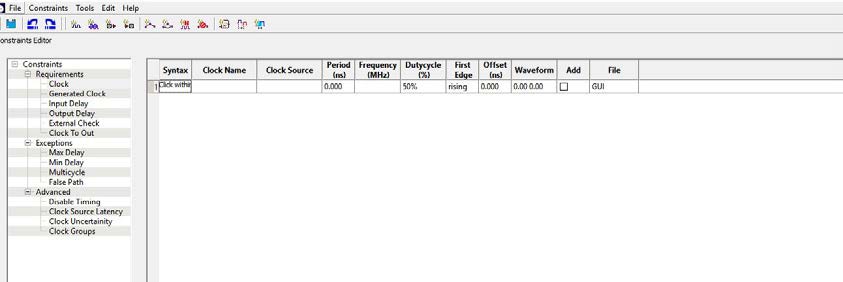 The Constraints Editor appears.
 -
In the Constraints Editor, right-click Clock under
Requirement and select Add Clock
Constraint.
The Create Clock Constraint dialog box appears.
Figure 10-9. Create Clock Constraint Dialog Box 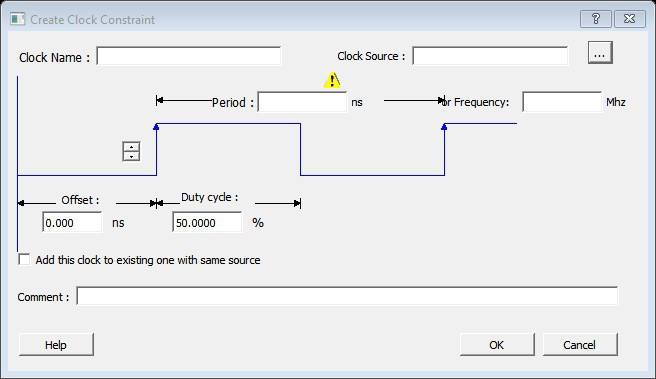
- From the Clock Source drop-down menu, choose the CLK pin.
- In the Clock Name field, type my_clk.
-
Set the Frequency to 250 MHz (as shown in the following
figure) and accept all other default values.
Figure 10-10. Add a 250 MHz Clock Constraint 
-
Click OK to continue.
The clock constraint appears in the SmartTime Constraints Editor.
Figure 10-11. 250 MHz Clock Constraint in the Constraint Editor 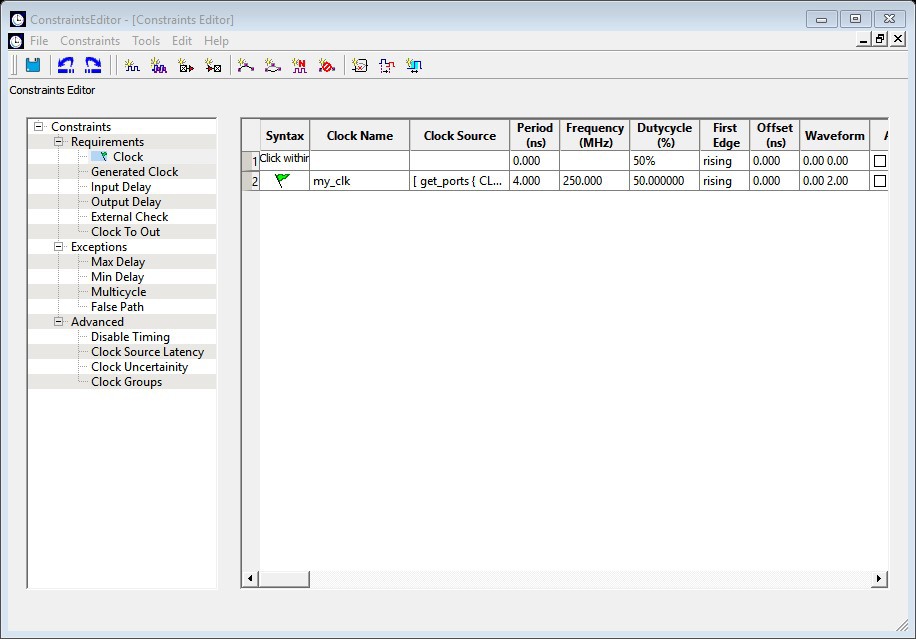
- From the File menu, choose Save to save the constraints.
-
From the SmartTime File menu, choose
Exit to exit SmartTime.
Libero creates a constraint file to store the clock constraint. This file appears in the Constraint Manager. It is named user.sdc and designated as Target.Note: A target file is used to store newly added constraints from the Constraint Editor. If you invoke the Constraint Editor with no SDC timing constraint file present, Libero SoC creates the user.sdc file and marks it as Target to store the timing constraints you create in the Constraint Editor.
-
In the Constraint Manager, check the check boxes under Place and
Route and Timing Verification to
associate the constraint file to the tools. The constraint file is used for both
Place and Route and Timing verification.
Figure 10-12. SDC Constraint File and Tool Association