
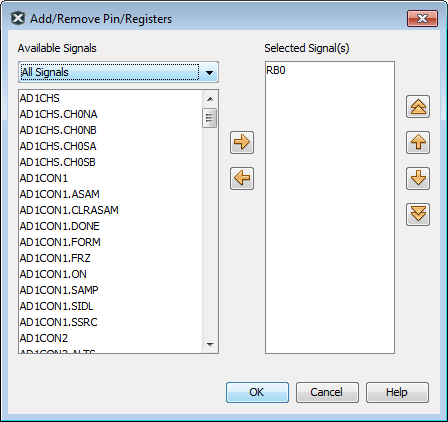
3.4.6 Add/Remove Pin/Registers Dialog
This dialog (see figure below) opens when you click on “Click here to Add Signals” column heading on either the Pin/Register Actions tab or the Advanced Pin/Register tab. Use this dialog to add or remove pins, registers or other signals to which you will apply stimulus. These selections will become the titles of the columns in the associated Pin/Register tab.
To Add a Signal:
- From the “Available Signals” drop-down box, select a type of signal, either “SFR and Bitfield”, “Pin Only” or “All Signals”.
- In the list below, either:
-
- Click on a signal and then click Add to add the signal to the “Selected Signals” list.
- Double click on a signal to add it to the “Selected Signals” list.Note: Multiplexed pins that support peripheral I/O (e.g., CCP2) that are configured through the configuration bits to use (e.g., RB3 or RC1) will only be listed by the digital I/O name RB3 or RC1.
- Click OK.
This signal will now appear as a column head on the associated Pin/Register Actions or Advanced Pin/Register tab.
To Delete a Signal:
- In the “Selected Signals” list, either:
- Click on the signal and then click Remove to remove the signal from this list.
- Double click on the signal to remove the signal from this list.
- Click OK.
This signal will no longer appear as a column head on the associated pin/register tab.
To Change the Order of Signals on the Pin/Register Tab:
- Click on the signal from the “Selected Signals” list.
- Click either Move Up or Move Down to change order of this signal in the list.
- Click OK.
Its location will now be reflected in the order of the column heads on the associated pin/register tab.