4.3.5.2.3 Create Example Project
Select File>New Project or the New Project icon
 to
open the Project wizard. Follow the steps below to create your project. Click
Next to move to the next step.
to
open the Project wizard. Follow the steps below to create your project. Click
Next to move to the next step.
- Choose Project: Click on the “Microchip Embedded” category and then the “Standalone Project” project.
- Select Device (and Tool): Enter the device “AVR128DA48.” Then enter the tool “AVR128DA48 Curiosity Nano-SN: MCHPL#” where the tool serial number (SN) contains the prefix “MCHP” followed by a multi-digit number.
- Select Compiler: Under Compiler Toolchains>XC8, select the version used in this example or the most-current version.
- Select Project Name and Folder: Name your project. For example, “Hello World Debug GPIO.” For Windows OS, the default project folder is C:\Users\<UserName>\MPLABXProjects.
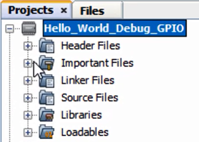
After clicking Finish, the project tree should appear in the Projects window.