1.1.13 Testing Model Results
After you build a model, it is useful to test the model performance before flashing it to a device. The MPLAB® Machine Learning Development Suite has a useful feature that enables you to see model performance on your dataset before flashing it to a device.
How to Test a Model in the MPLAB® Machine Learning Development Suite
TheMPLAB® Machine Learning Development Suite allows you to test the model on any project files, and check how the model performs before flashing it to a device It gives insight about your model performance by showing the confusion matrix, ground-truth-versus-prediction results, and the feature vector heat map.
Select a model in the Test Model page.
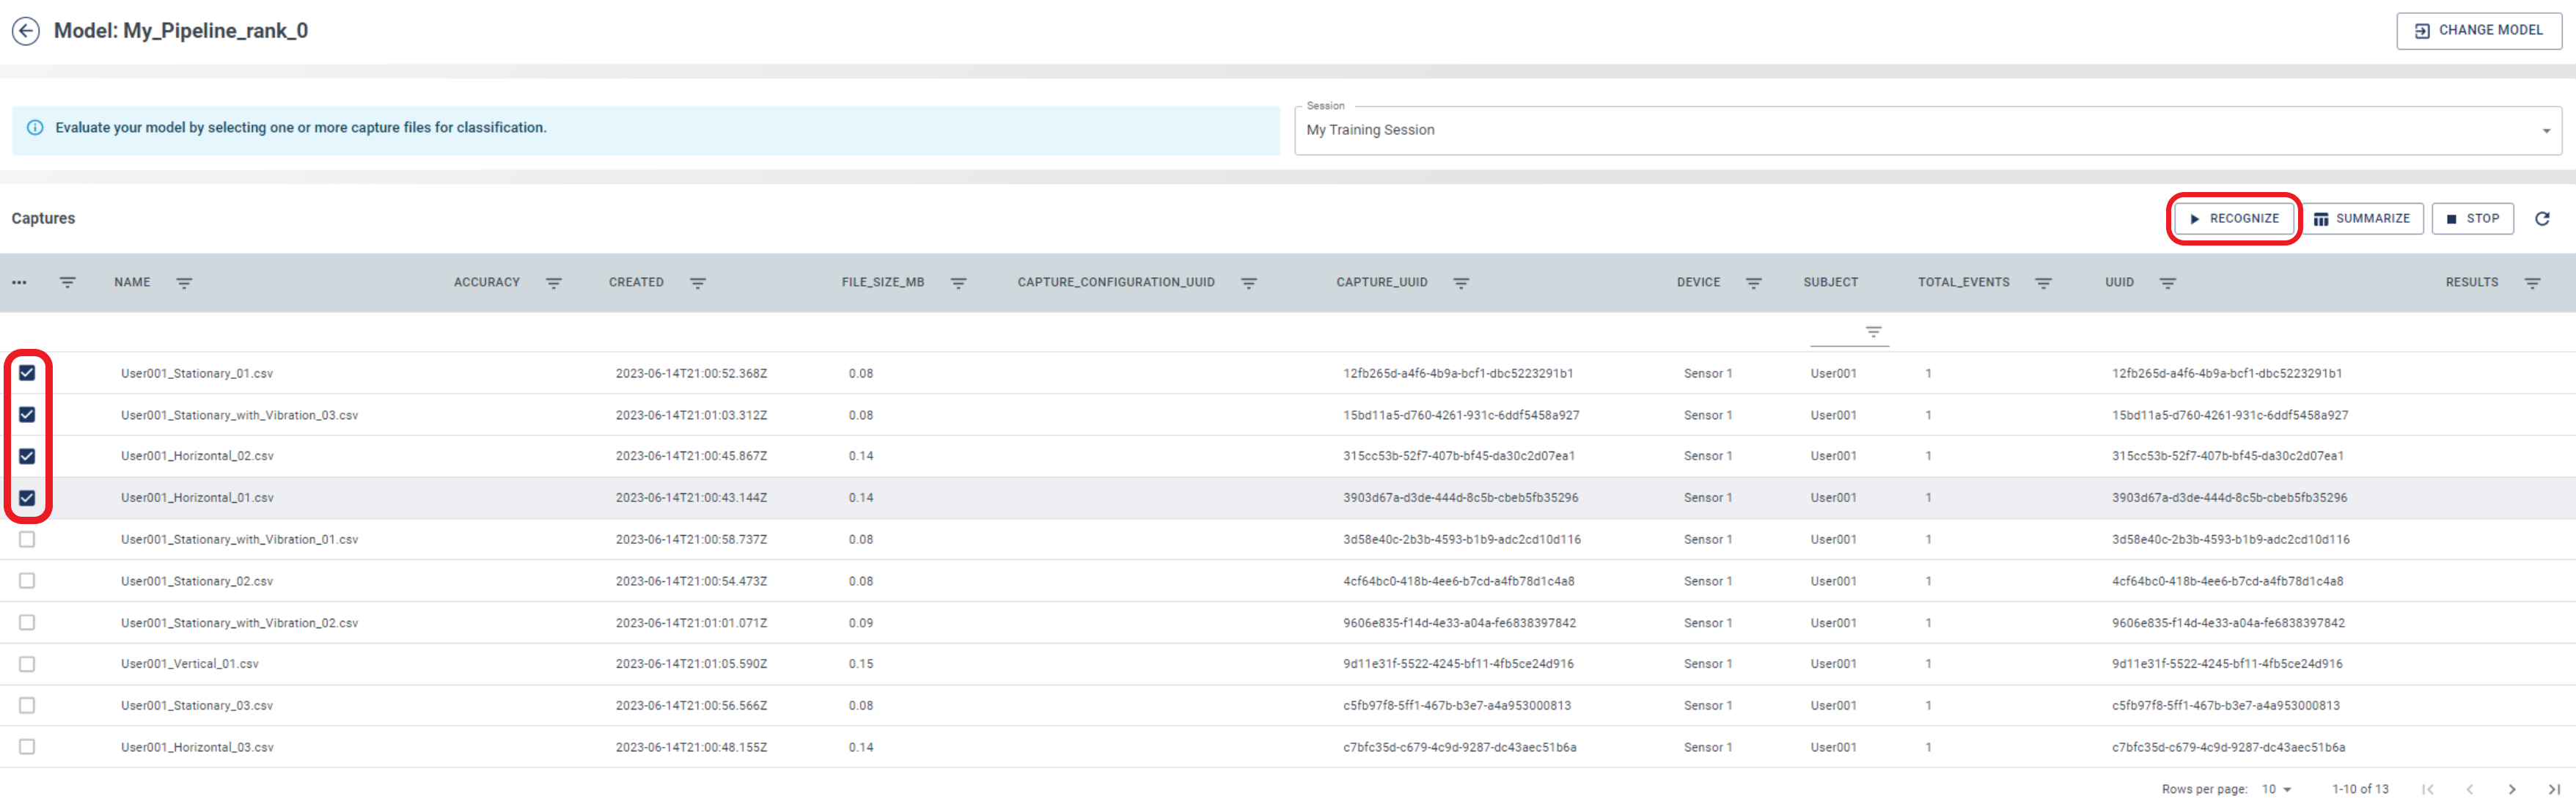
Select one or more of the capture files. Click the Compute Accuracy button to validate it against the test data. To generate the model results, the server emulates the firmware model classifications on the selected sensor data. This provides a bit-accurate view over the performance of the deployed model to an edge device.
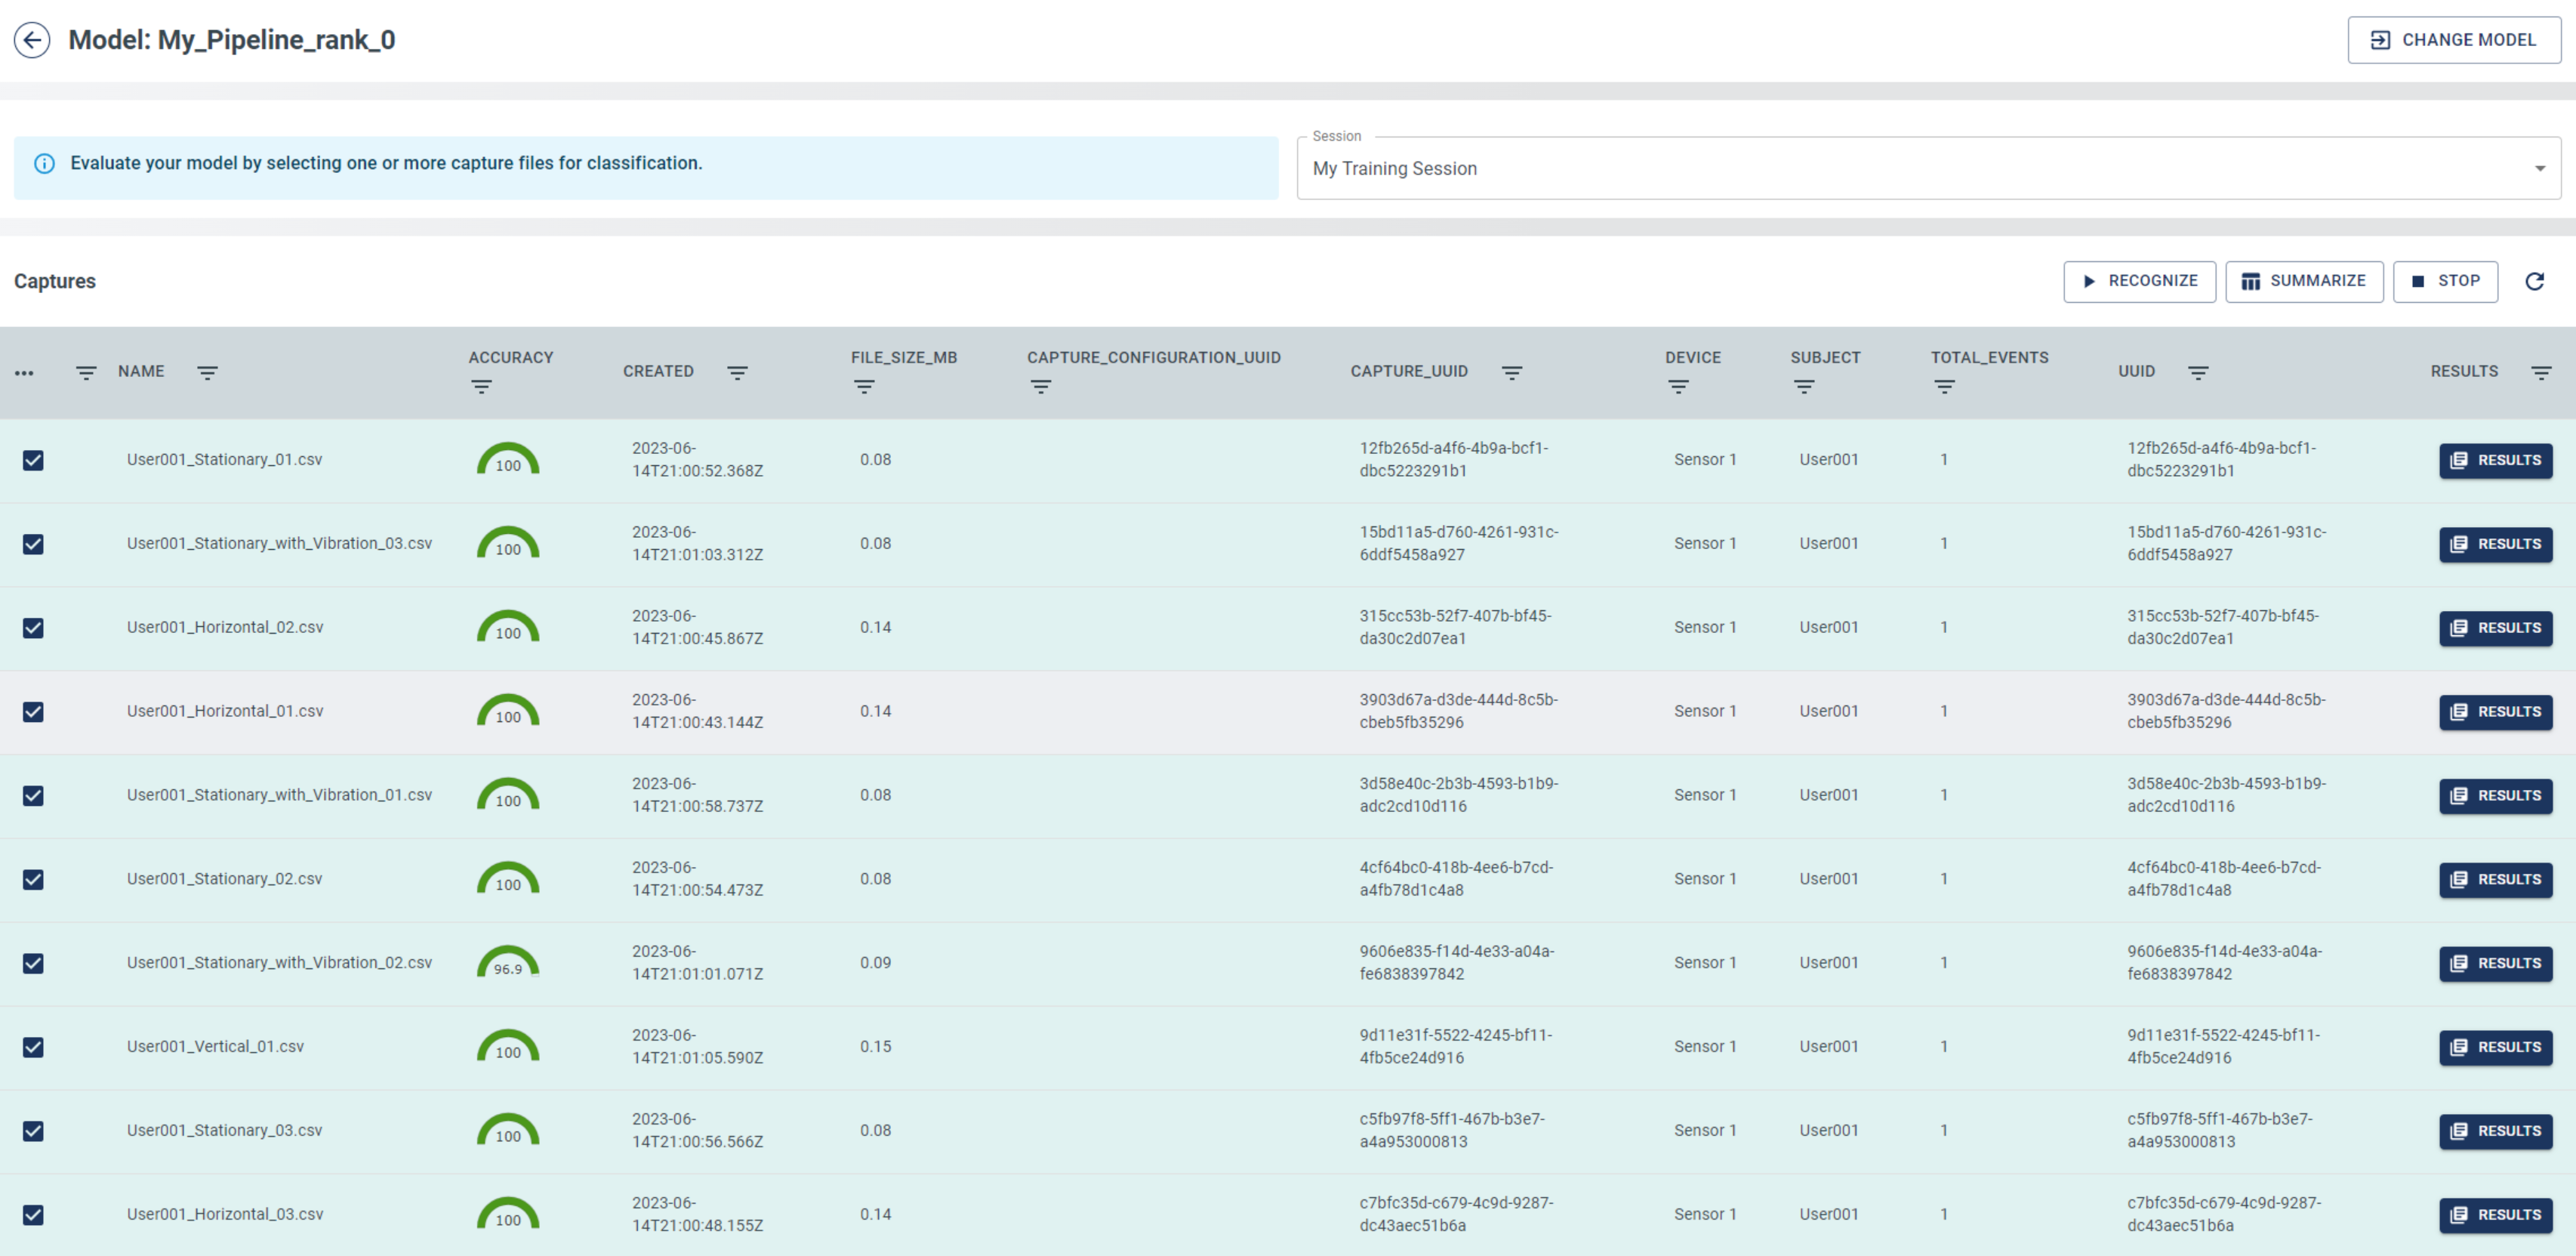
When the results are finished, click the Compute Summary button to see how the confusion matrix performs across all the tested files. The ground truth for the confusion matrix is generated based on the labels added to your files. You can switch which session is used to compute the ground truth as well.

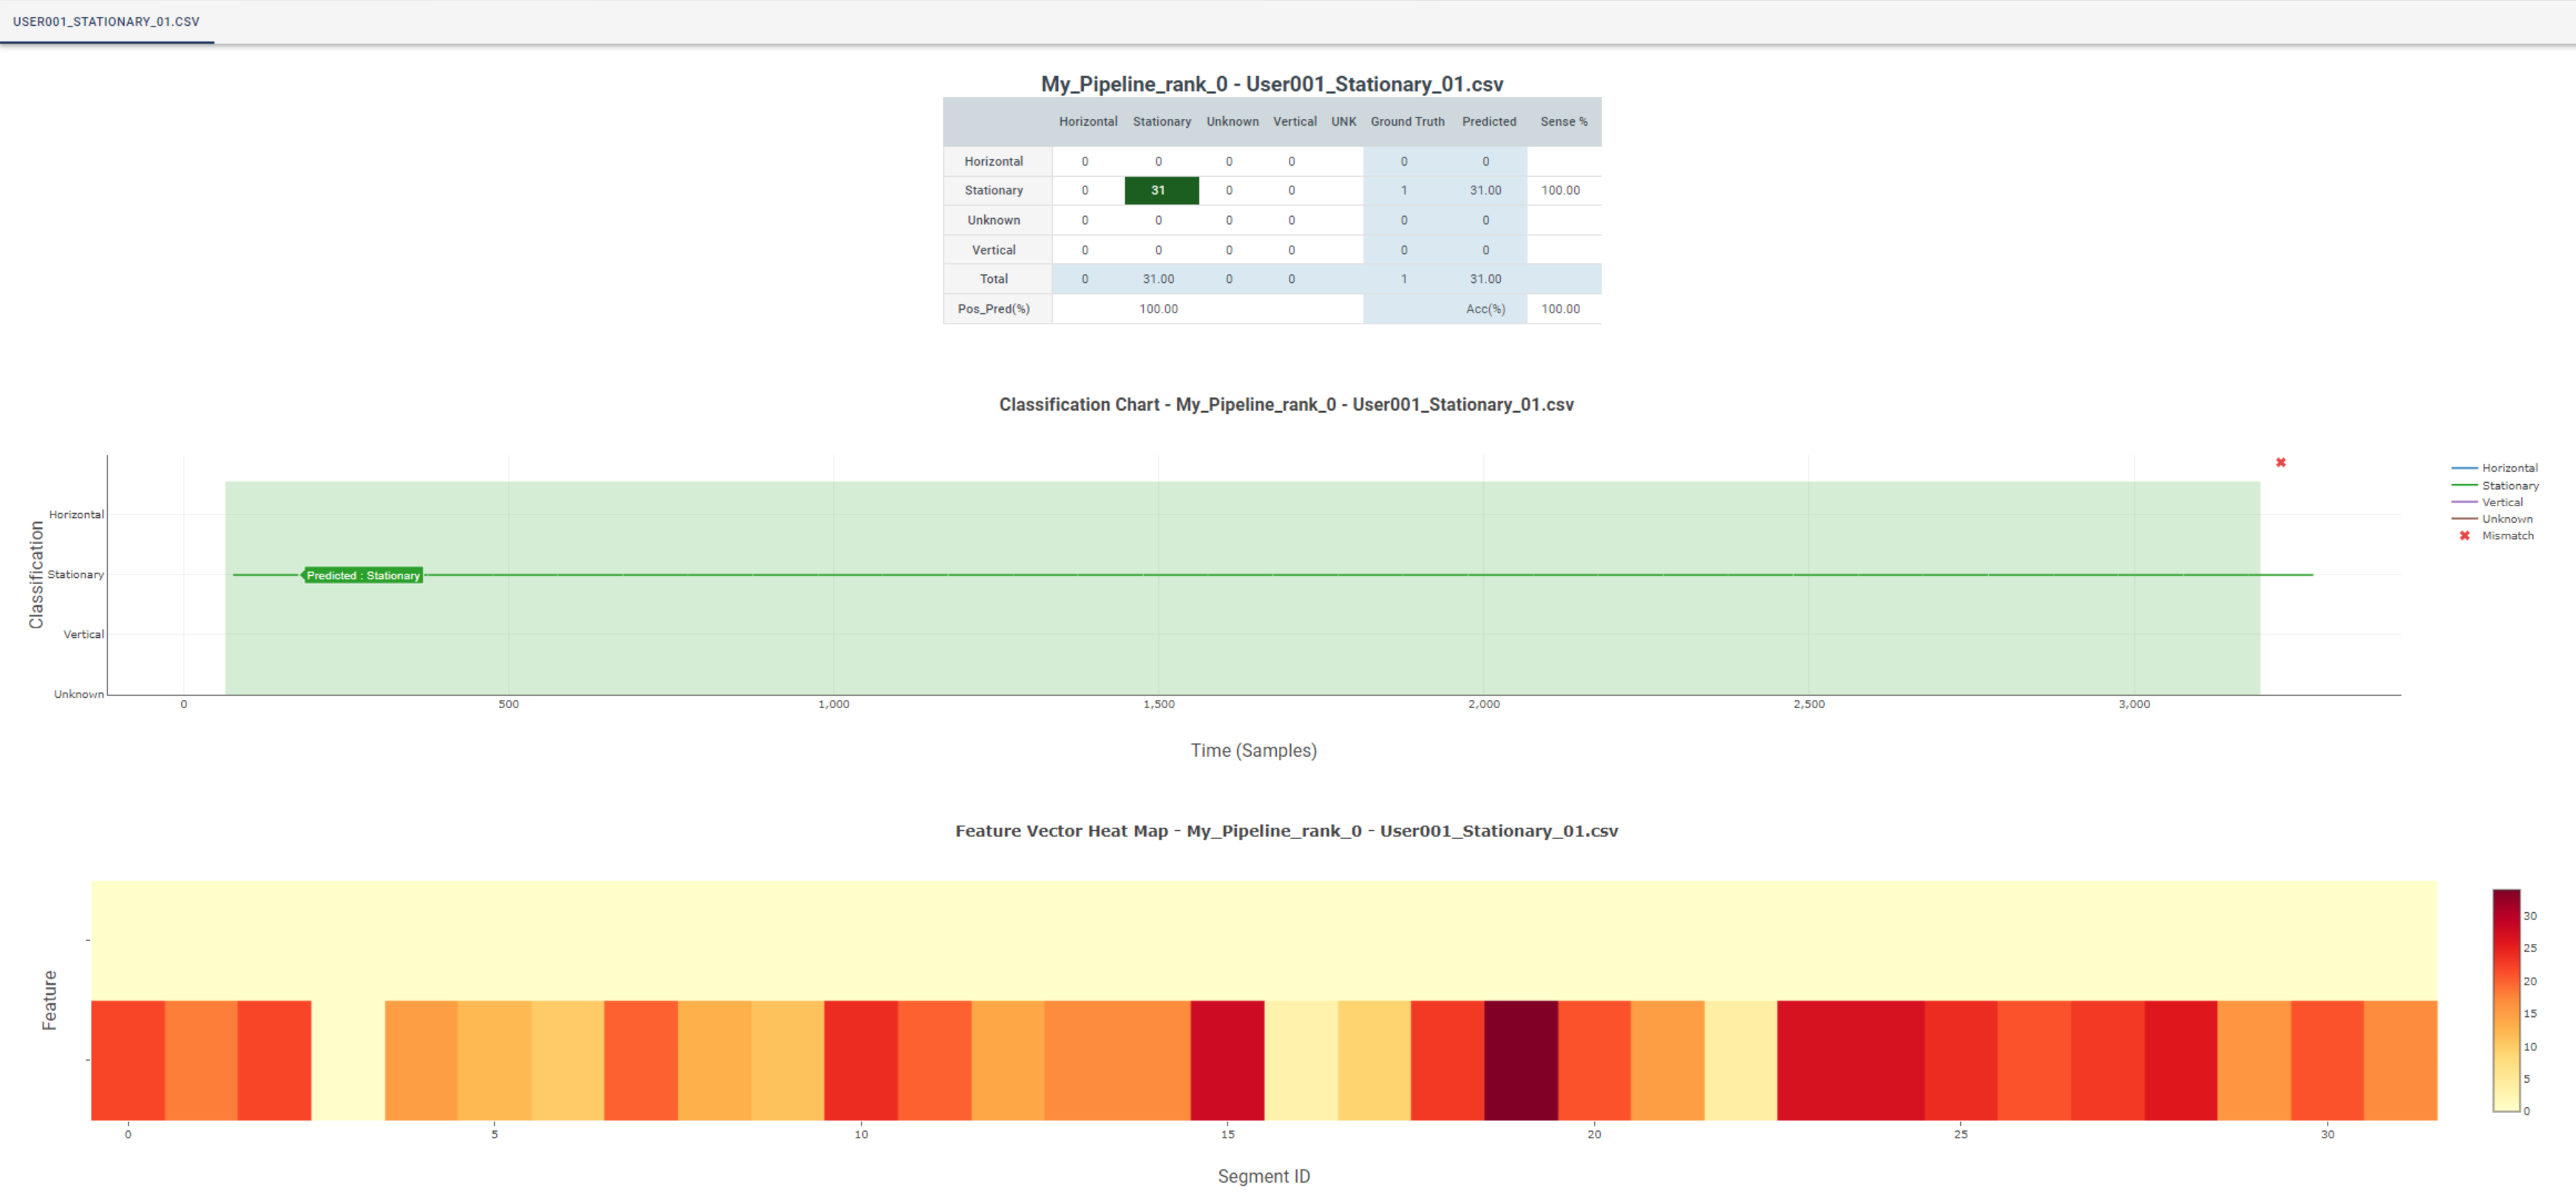
Click the Results icon for one of your capture files. The results are summarized as actual-prediction-versus-ground-truth labels. In the Classification Chart (top), the Y-axis indicates the classification name and the X-axis indicates the sample number or time. Classifications are generated by the model at the interval you selected for windowing segmentation. Locations where the ground truth and classification do not match are marked by a red X. The Feature Vector Heat Map (bottom) visualizes the features that are generated by each segment prior to being fed into the classifier as a heat map. The values for features are always scaled to a single byte prior to classification.