6.3.6.1 New Project - User Makefile
For ways to open the New Project wizard, see Launch New Project Wizard.
The wizard will launch to guide you through new project setup.
Step 1. Choose Project: Select the Microchip Embedded category and choose from the project type User Makefile Project.
Step 2. Select Device (and Tool): Select the device used in your project from the Device drop-down list. To narrow your selection list, choose a Family first.
Select the development tool you will be using to debug your application from the list. If you do not see the tool you want, it is not supported for the selected device. Try updating the device pack. See Work with Packs.
Step 4. Select Plugin Board: This step will appear if a plugin board is available for your selected device and MPLAB REAL ICE™ in-circuit emulator.. Drop down the list under Supported Plugin Board to see what it available.
Step 5. Select Project Name and Folder: Select a name and location for your new project. See the first table below.
- Forward (/) slashes are recommended in your path. However, you may use backward (\) slashes instead, though you may need to escape them (\\).
- A path and file name without spaces is recommended. However, if you do have spaces, use escape spaces (backward slash before the space) when you enter a path and file name in this window. GNU Make is known to cause weird issues with spaces as spaces are their separators.
Step 7. Finish: The new project will open in the Projects window.
Change Makefile project settings in the Project Properties window, Makefile category, after the project is created.
For information on exporting a project as hex, see Project Menu in Projects Window.
| Item | Description |
|---|---|
| Project Name | Specify a name for your project. |
| Project Location | Enter or browse to a location for your project. |
| Project Folder | View the
folder location based on the Project Name and Project Location. For information on the relation of the project folder to the working folder, see User Makefile Project Folder and Working Folder. |
| Set as main project | Set project created as the main project. Checked by default. |
| Overwrite existing project | If project name has been used already, this check box will be active. |
| Also delete sources | If project exists already and contains source code, this check box will be active. |
| Use project location as the project folder | Create the
project in the same folder as the project location. This is useful if you are importing an MPLAB IDE v8MPLAB IDE v8 project and want to maintain the same folder for your MPLAB X IDE project (as when you want the build to be the same). MPLAB X IDE uses a folder to store a project information whereas MPLAB IDE v8 uses an .mcp file. Therefore you can only have one MPLAB X IDE project share a folder with an MPLAB IDE v8 project (.mcp file). |
| Encoding | By default set as ISO-8859-1. There is usually no need to change this setting. |
| Item | Description |
|---|---|
| Working Directory | Specify the
location of the external project. This is the default location from
where the build, debug build, and clean commands will be executed. For information on the relation of the project folder to the working folder, see User Makefile Project Folder and Working Folder. Browsing to the directory is recommended as this will take care of formatting issues for you*. |
| Build command | When the
command to Run is requested in MPLAB X IDE (icon or menu), perform the build according to
this command instead. Build path*: For Windows, use quotes. For Linux or macOS, any spaces must be escaped. |
| Debug build command | When the
command Debug is requested in MPLAB X IDE (icon or menu), perform the debug build according
to this command, instead. Debug build path*: For Windows, use quotes. For Linux or macOS, any spaces must be escaped. Also see: microchipdeveloper.com/mplabx:work-outside-compile-for-debug |
| Clean command | When the
command to Clean is requested in MPLAB X IDE (icon or menu), perform the clean according to
this command, instead. Clean path*: For Windows, use quotes. For Linux or macOS, any spaces must be escaped. |
| Image name | Enter the
path and name of the production image file (hex). Image path*: Any spaces must be escaped. |
| Debug image name | Enter the
path and name of the debug image file (ELF or COF). Debug image path*: Any spaces must be escaped. |
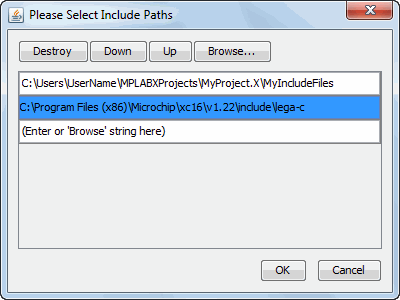
| User Include Paths | Enter or browse to user include file(s). Manage include paths in the dialog (see the first figure.) |
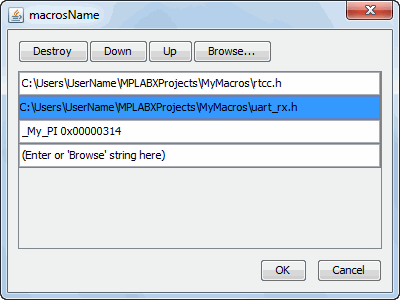
| User Macros | Add or
parse-and-add macros. Edit: Enter a macro or browse to a file containing one. Manage macros in the dialog (see the second figure.) Parse: Automatically parse a macro (MPLAB XC compilers only). Follow the instructions on the dialog. Once complete, choose to Replace any current macro(s) listed or Append to any current list of macros. See Example of a Makefile Project for an example of how to use this dialog. |