4.3.5.1.2 Create Example Project
MPLAB X IDE requires a project for development of application code.
Preliminaries
Before creating the project ensure:
- You have installed the compiler and MPLAB X IDE can detect it. If not, go to Tools>Options>Embedded>Build Tools to view the Toolchain list. If the compiler is not there, click Add to browse and add it.
- You have plugged the Xplained Pro board into your computer with the USB cable.
Create Project
Select File>New Project or the New Project icon  to open
the Project wizard. Follow the steps below to create your project. Click Next to
move to the next step.
- Choose Project: Click on the “Microchip Embedded” category and then the “Standalone Project” project.
- Select Device (and Tool): Enter the device “ATmega4809”. Then enter the tool “ATmega4809 Xplained Pro-SN: ATML#” where the tool serial number (SN) contains the prefix “ATML” followed by a multi-digit number.
- Select Compiler: Under Compiler Toolchains>XC8, Select the most-current compiler version.
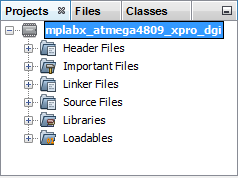
- Select Project Name and Folder: Name your project. For example, “mplabx_atmega4809_xpro_dgi”. For Windows OS, the default project folder is C:\Users\<UserName>\MPLABXProjects.
After clicking Finish, the project tree should appear in the Projects window.

