
4.1 Programming On-board SPI Flash Using Libero
(Ask a Question)Libero SoC Design Suite supports the on-board SPI Flash programming using JTAG. For more information about the SPI Flash programming modes, see PolarFire FPGA and PolarFire SoC FPGA Programming User Guide .
The external SPI Flash can also be programmed through FlashPro Express software. For more information, see Appendix 2: Programming the Device and External SPI Flash Using FlashPro Express.
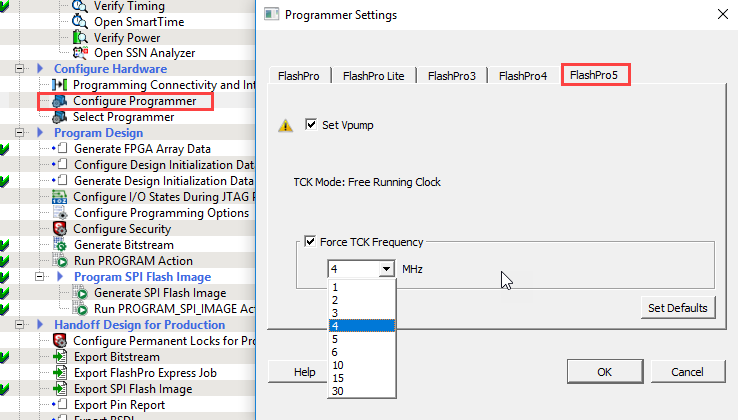
To optimize the SPI Flash programming time, change the TCK frequency value under Configure Programmer, as shown in the following figure.
To program the SPI Flash using JTAG, perform the following steps:
- Ensure that the jumper settings on the board are the same as those listed in Table 2-3 (for Evaluation board).
- In the Design Flow window, select Program Design, and then double-click Configure Design Initialization Data and Memories.
Figure 4-4. Configure Design Initialization Data and Memories Option 
- In the Design and Memory Initialization page, click the SPI Flash tab, see Figure 4-5.
- In the SPI Flash Clients pane, click Add SPI Bitstream Client to add the required programming images (
.spiimages), and click Apply. These images are provided at \mpf_an4660_df\host_pc_tool_pf\images.Figure 4-5. SPI Flash Tab 
- To get the SPI Flash programmed with the programming images, double-click Generate SPI Flash Image, and then double-click Run PROGRAM_SPI_IMAGE Action, see the following figure.
Figure 4-6. SPI Flash Programming 
At this point, the on-board SPI Flash device is programmed with the images.