
13.9.2 Instantiating a Designer Block in Libero IDE
You must have two projects in order to instantiate your Designer Block in Libero IDE: one to create and publish your Designer Blocks, and another in which to instantiate your Designer Block. This topic and the flow shown in the figure below describe how to instantiate your Designer Block in the Libero IDE. See Creating a Designer Block in Libero IDE for information on how to create a Designer Block. You can also import your Designer Blocks into SmartDesign.
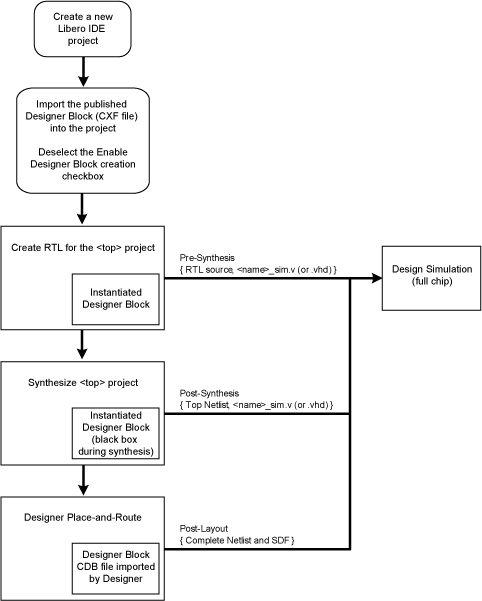
To instantiate (import) a Designer Block in Libero IDE, import your design netlist and CXF file(s). The CXF file imports all the files you need for your Designer Block. After you import your files, the design flow is the same as
regular Libero IDE designs. There is no limit to the number of CXF files you can import, but you cannot import the same Designer Block more than once, and the family and device for your imported block must match your project.
After you import the CXF file, the Project Manager displays the imported files in the Design Hierarchy tab.
The Designer Block(s) you instantiate must have the same family and die (and package, if it contains I/Os) as your current <top> project. If the family, die, and package do not match, Libero IDE asks if you want to change the current setting to match the one from the Designer Block.
The Project Manager passes all the Designer Block files to Designer automatically.
- Disable Designer Block creation when you import a component into your <top> project. If you are using a Designer Block component to create another Designer Block, leave it enabled.
- If you already have an HDL component with the same name as the one you imported, the new Designer Block component is not be used by default. You must and right-click the Designer Block component in the Project Manager and choose Use this file to make it use your Designer Block.