
13.16.2 Display Panel
You can use the fields in the Display panel to manage content. To add or remove a field, right-click the field title (such as Instance in the image below) and from the right-click menu choose Fields. New fields appear to the right of the fields already shown. To filter the list of nets or instances in the Display panel, use the Custom Filter.
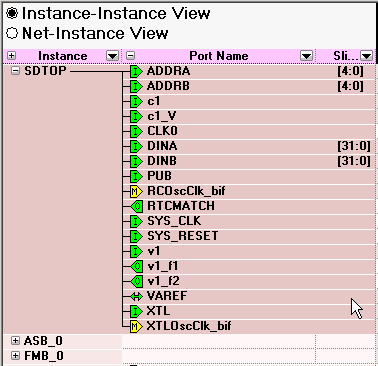
The Display panel may list the following fields:
- Instance: Displays instances in the current design.
- Direction: Displays the port direction and bus interface type. Port directions are defined as IN, OUT and INOUT, bus interfaces are shown as MASTER, SLAVE, and SYSTEM.
- Port Name: Lists port names for all instances. Also displays an icon that indicates if the port is connected (green), disconnected (white), partially connected (green and white), input (I), output (O), master (yellow M), INOUT (small horizontal arrows), a system bif, or slave (S).
- Slice: Displays bit order (i.e. [7:0]) of busses and slices. Slice is not available for scalars and bus interfaces.
- Width: Displays the size of the bus for any bus port. One for a scalar and zero for a bus interface port.
- Net: Identifies the net for each instance connection.
Click the plus button ![]() to expand the information listed for the selected instance or direction. Click the minus button
to expand the information listed for the selected instance or direction. Click the minus button
![]() to collapse the information displayed for the selected instance or direction. You can add and remove fields to meet your needs.
to collapse the information displayed for the selected instance or direction. You can add and remove fields to meet your needs.
Use the filter button ![]() to filter the contents of each column. To sort the content of a column, click the Filter button and select Sort Ascending or Sort Descending. Choose Custom Filter to open the Custom Filter dialog box. You can use the Custom Filter dialog box to choose the nets, instances and slices you wish to display.
to filter the contents of each column. To sort the content of a column, click the Filter button and select Sort Ascending or Sort Descending. Choose Custom Filter to open the Custom Filter dialog box. You can use the Custom Filter dialog box to choose the nets, instances and slices you wish to display.
Right-click the column heading and choose Fit This Column To Data to expand (or shrink) the column to match the column width to the size of the field name.