1.11 Component Configuration
The demo implementation requires several MPLAB Harmony components. In this section, we will configure these necessary components.
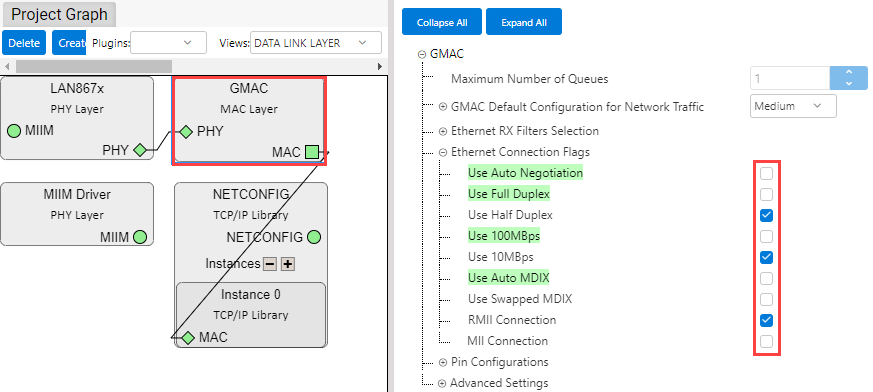
- In the “Project Graph” window, select “DATA LINK LAYER” from the “View” drop-down menu.
- Select “GMAC”.
Configuration options will appear on the right-hand side.
- Set the GMAC to operate in 10BASE-T1S mode.
- Make the selections as shown
below.
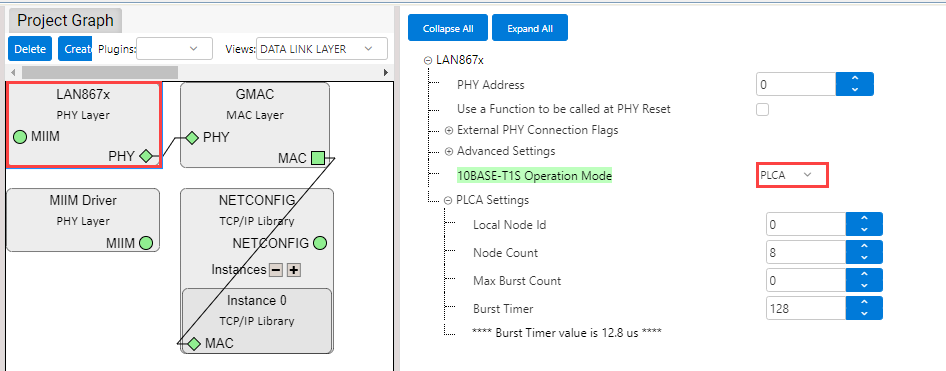
- To configure the operation mode of
the PHY,
- select “LAN867x” and
- configure the PHY to operate
either in PLCA or CSMA/CD mode, as preferred. If using PLCA mode, set “Local
Node Id” and “Node Count” as shown below.Note: The “Local Node Id” must be unique for each node. In the example below, the “Node Count” is 8, meaning the “Local Node Id” must be in the range of 0...7.
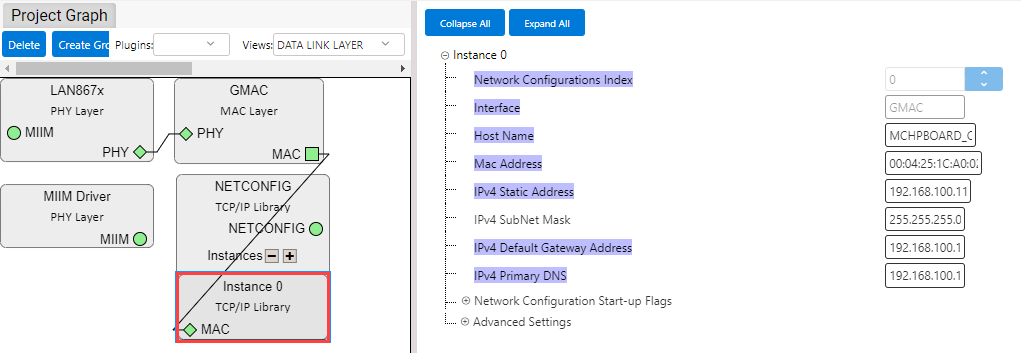
- To modify the IP address or MAC
address,
- select “NETCONFIG” and
- choose “Instance 0 –
MAC”.
In the Configuration window, you can view the IP Addresses and MAC Address. Modify them as needed. Ensure IP Addresses and MAC Address are unique, at least within the local network. An example is provided below.
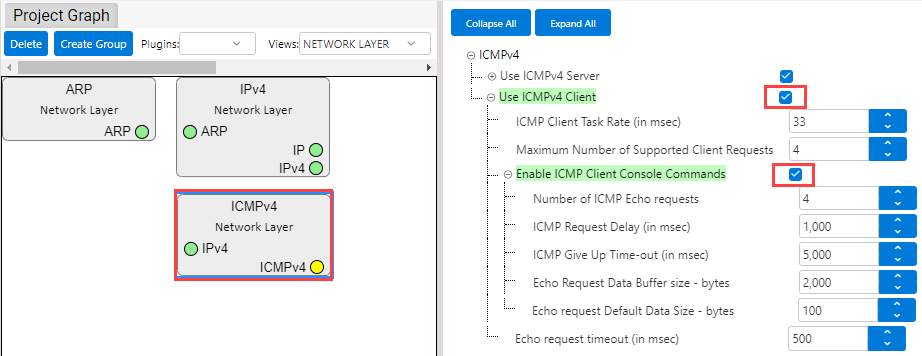
- To enable ping operation from the SAM E54 Curiosity Ultra Development Board [4],
- in the “Project Graph” select “NETWORK LAYER” from the “View” drop-down menu,
- select “ICMPv4” and
- make the settings as shown
below.
- Configure “SERCOM1”.
- In the “Project Graph” select “Root” from the “View” drop-down menu.
- Select “SERCOM1”.
- Make the settings as shown
below.

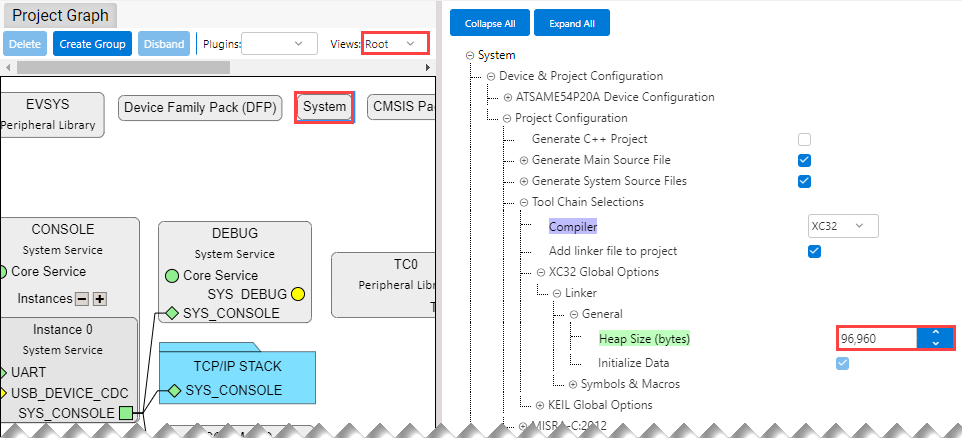
- In the “Project Graph” window, select “System”.
- Set the “Heap Size (bytes)” to
“96,960” as shown below.