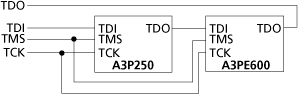
9.5.4 Multiple Programmer and Multiple Device Serialization Chain Programming
This tutorial demonstrates step-by-step instructions on how to parallel program two chains using
two programmers, each with two Actel Devices (A3P250 with Serialization and A3PE600). See the
figure below for an illustration.Figure 9-86. APA Device Tutorial Example
You should already be familiar with the basic features of the FlashPro®
software before you begin this tutorial. The STAPL file for the A3P250 device contains 10
serialization data.
Note: This tutorial does not provide software installation instructions. Please have FlashPro
already installed before you begin.
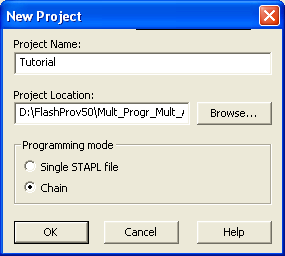
Click the New
Project button in FlashPro.
From the New Project
dialog box, type “Tutorial” in the Project Name field.
Check the Chain box.Figure 9-87. New Project Dialog Box
If necessary, change the default location
of your project in the Project Location field.
Click OK. The
FlashPro main window and the Programmer List window displays your updated programmer
information.
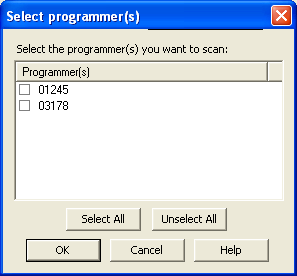
From the Programmers
menu, choose Scan Chain (or select the programmer in the
Programmer List window, right-click, then choose Scan
Chain). The Select Programmer(s) dialog box appears.Figure 9-88. Select Programmer WindowThe Programmer List window shows the Scan Chain Test was passed
and how the devices are ordered in the chain. In this example, A3PE600 will be programmed
first in the chain since it is connected directly to TDO.Figure 9-89. Scan Chain Order in the Log Window
Click the Configure
Chain button . The Chain Configuration window appears.Figure 9-90. Chain Configuration Window
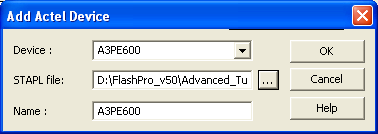
In the Chain
Configuration window, click the Add Actel Device button
to add devices to the chain. The Add Actel Device dialog box
appears.
Choose A3PE600
device from the Device drop-down menu.Figure 9-91. Add Actel Device Dialog Box
In the STAPL file
field, use the Browse button to locate the A3PE600.stp file.
In the Name field,
leave A3PE600 as default. The A3PE600 device is added into the Chain
Configuration window.
Repeat the steps above to add the A3P250.
After finished adding all devices in the chain, the Chain
Configuration window updates.Figure 9-92. Chain Configuration Window for all Devices
In the Chain
Configuration window, check the Enable Serial box.
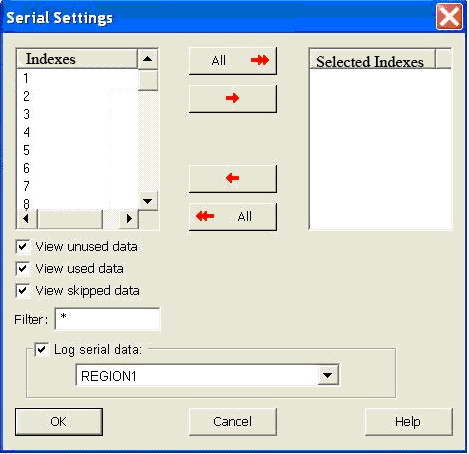
Click Select in the
Serial Data column. The Serial Settings
dialog box appears.Figure 9-93. Serial Settings Dialog Box
From the Serial
Settings dialog box, click the All button to select all
the serial data.
Click OK.
Once all the devices have been added to the
chain in the correct order and serialization has been selected, click the
Run button to program the chain.
When programming is complete, the
Programmer List window updates.Figure 9-94. Programmer List Window Done
Congratulations! You have just completed the FlashPro Multiple Programmer and Multiple Device Serialization Chain Programming tutorial.