
13.5.9 Stimulus File Organization
Use the Organize Stimulus dialog box to manage the stimulus files in your project.
Before you can run simulation, you must associate a testbench. If you attempt to run simulation without an associated testbench, the Project Manager asks you to associate a testbench or open ModelSim without a testbench. You can use the Organize Stimulus dialog box to set associate your testbench for simulation.
- From the Project menu, choose . This opens the Organize Stimulus dialog box.
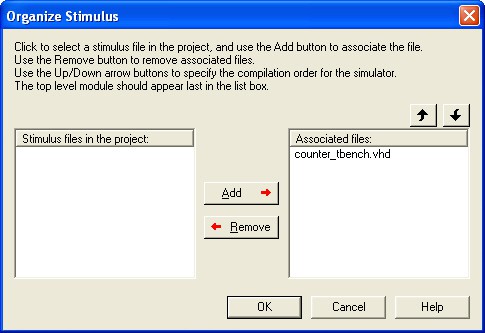
- In the Organize Stimulus dialog box, all
the stimulus files in the current project appear in the Stimulus Files in the Project list
box. Files already associated with the block appear in the Associated files list box.
In most cases you will only have one testbench associated with your block. However, if you want simultaneous association of multiple testbench files for one simulation session, as in the case of PCI cores, add multiple files to the Associated Files list box. To add a testbench: Select the testbench you want to associate with the block in the Stimulus Files in the Project list box and click
Add to add it to the Associated Files list.
To remove a testbench: To remove or change the file(s) in the Associated Files list box, select the file(s) and click Remove.
To order testbenches: Use the up and down arrows to define the order you want the testbenches compiled. The top level-entity should be at the bottom of the list.
- When you are satisfied with the Associated File(s) list, click OK. The stimulus buttons in the Project Manager Project Flow window turn green to alert you that a testbench has been associated with the block.