
7.12 Creating a SmartDesign Testbench
(Ask a Question)After importing or creating and generating your design, create testbenches to simulate your design. You can create testbenches for your design in either of the following ways.
7.12.1 Creating a SmartDesign Testbench
(Ask a Question)To create a SmartDesign testbench using the SmartDesign canvas, perform the following steps:
- Launch the Create New SmartDesign
Testbench dialog box in either of the following ways:
- On the menu, click .
- On the Design Flow tab, double-click Create SmartDesign Testbench.
Result: The Create New SmartDesign Testbench dialog box appears.
Figure 7-34. Create New SmartDesign Testbench Dialog Box 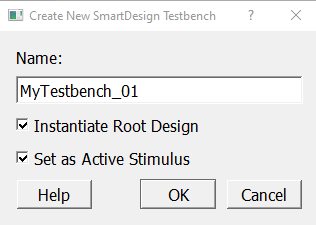
- Enter an appropriate and unique name for your design file in the Name box.
- By default, the root design is instantiated in the testbench and is set as the active stimulus for the design.
- If you do not want to instantiate the root design in the testbench, deselect the Instantiate Root Design option. When you deselect the Instantiate Root Design option the Set As Active Stimulus option is automatically deselected and disabled.
- If you do not want the testbench to serve as the active stimulus, deselect the Set As Active Stimulus option.
- Click OK to create the
testbench. The newly created testbench appears in the Stimulus
Hierarchy tab along with other testbenches and is displayed in the central tab
of the IDE main window.
Result: The testbench file is saved in a folder with the same name as that of the testbench itself and is placed in your <project>\component\work\ folder.
7.12.2 Creating a SmartDesign HDL Testbench Using the IDE
(Ask a Question)To create a HDL testbench using the IDE, perform the following steps:
- Launch the Create New HDL Testbench
file dialog box in either of the following ways:
- On the menu, click .
- On the Design Flow tab, double-click Create HDL Testbench.
Result: The Create New HDL Testbench File dialog box appears
Figure 7-35. Create New HDL Testbench file Dialog Box 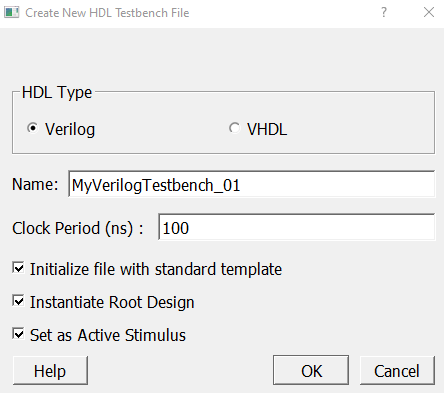
- By default, the preferred language to write the testbench file is set to Verilog. If you choose to use VHDL, select the VHDL option.
- Enter an appropriate and unique name for your testbench file in the Name box.
- Enter the clock speed you want to set for the testbench in nanoseconds (ns) in the Clock Period (ns) box. By default, the value is set to 100ns.
- By default, the testbench is initialized with the built-in standard testbench file template, the root design is instantiated in the testbench, and the testbench is set as the active stimulus for the design.
- If you choose to not use the default standard template, deselect the Initialize file with standard template option.
- If you choose to not use the testbench to serve as the active stimulus for your design, deselect the Set As Active Stimulus option.
- If you choose to not instantiate the root design in the testbench, deselect the Instantiate Root Design option. When you deselect the Instantiate Root Design option the Set As Active Stimulus option is automatically deselected and disabled.
- Click OK to create the testbench. The newly created SmartDesign HDL testbench appears in the Stimulus Hierarchy tab along with other testbenches and is displayed in the central tab of the IDE main window.
Result: The newly created SmartDesign HDL testbench is copied to your <project>\hdl\ folder.