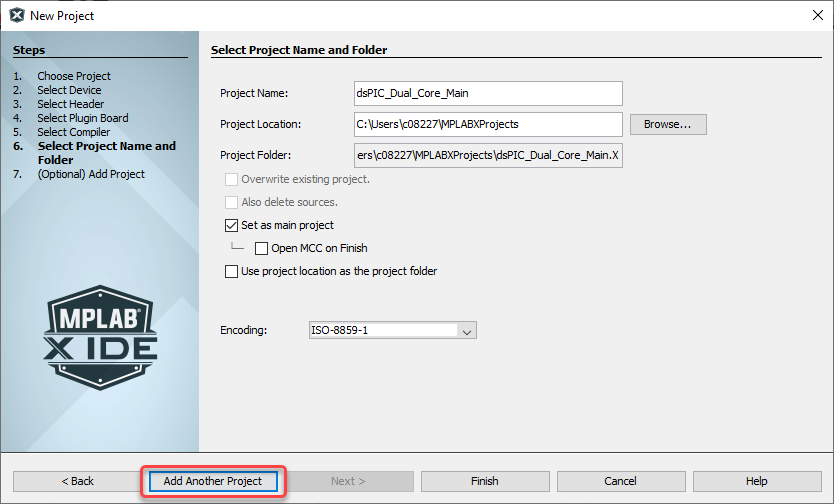
5.1.7 Step 6: Select Project Name and Folder

In the dialog above, a dsPIC dual core main project is specified. Click Add Project to proceed to the next dialog to set up and specify the dual core secondary project. Then click Finish to create both projects.
| Project Name | Enter the project name. The name will be appended with .X by convention. See the Project Folder text box. |
| Project Location | Browse to a folder location. You can create a new project folder if
you need one. By default, projects will be placed in:
|
| Project Folder | The project folder consists of the project location (path) and project name. |
| Overwrite existing project | If the Project Folder matches an existing
project folder, this selection will become active. Check to overwrite the existing project with the new project. Uncheck to display a warning and not allow project completion until a new project folder - project name and/or location - has been selected. |
| Also delete sources | If Overwrite existing project is checked, this
selection will become active. Check to delete previous project’s source files. Uncheck to leave previous project’s source files. |
| Set as main project | Specify this project as your main project |
| Open MCC on Finish | Open project in MPLAB Code Configurator when created. |
| Use project location as the project folder | Create the project in the same folder as the project location. This is useful if you are importing an MPLAB IDE v8 project and want to maintain the same folder for your MPLAB X IDE project (as when you want the build to be the same). MPLAB X IDE uses a folder to store
project information whereas MPLAB IDE v8
uses a |
| Encoding | Select the encoding for the project. The default is ISO-8859-1 (Latin
1) character set. This selection will specify the code syntax coloring, which can be edited under ( for macOS), Fonts and Colors button, Syntax tab. |
| Add Project | If your project will require another project for Application
development, click Add Project to proceed to the
next dialog. Use this dialog when you need to create two projects as,
for example:
|
| Finish | If your project is a standalone Application, click Finish to complete new project creation. |
