
5.1.8 Step 7: (Optional) Add Project
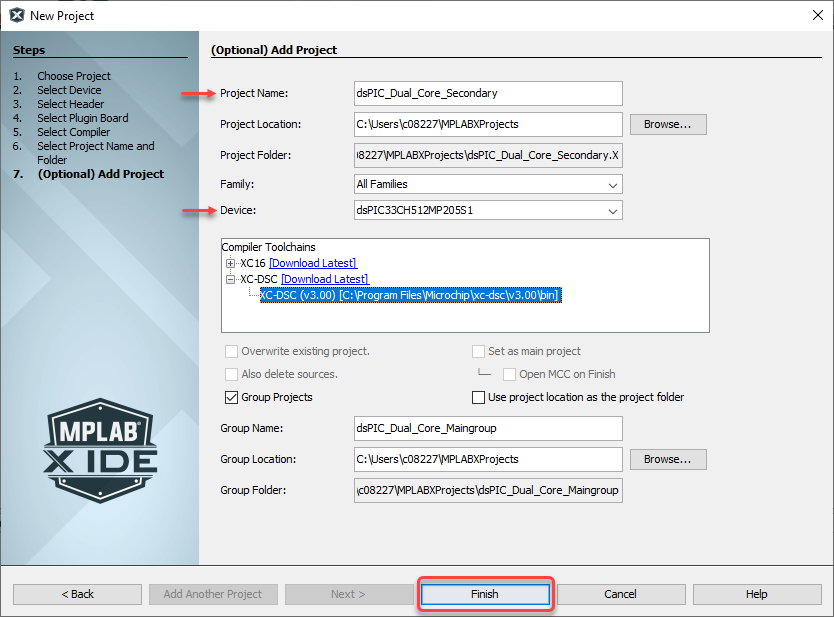
| Project Name | Enter the additional project name. The name will be appended with .X by convention. See the Project Folder text box. |
| Project Location | Browse to a folder location. For more information, see Step 6: Select Project Name and Folder. |
| Project Folder | The project folder consists of the project location (path) and project name. |
| Family | To narrow down Device selection, choose a device family from the drop-down list. |
| Device | Choose a device from the drop-down list. For Dual-Core secondary
projects, select the “S1” version of the device. For more information, see Step 2: Select Device (and Tool). |
| Compiler | Select the language tool, either a C compiler or an assembler. For more information, see Step 5: Select Compiler. |
| Overwrite existing project | If the Project Folder matches an existing
project folder, this selection will become active. Check to overwrite the existing project with the new project. Uncheck to display a warning and not allow project completion until a new project folder - project name and/or location - has been selected. |
| Also delete sources | If Overwrite existing project is checked, this
selection will become active. Check to delete previous project’s source files. Uncheck to leave previous project’s source files. |
| Set as main project | Specify this project as your main project |
| Open MCC on Finish | Open project in MPLAB Code Configurator when created. |
| Group Projects | Place this project and the previous one into a Group of Projects. See Group of Projects. |
| Use project location as the project folder | Create the project in the same folder as the project location. This is useful if you are importing an MPLAB IDE v8 project and want to maintain the same folder for your MPLAB X IDE project (as when you want the build to be the same). MPLAB X IDE uses a folder to store
project information whereas MPLAB IDE v8
uses a |
| Group Name | Enter the name of the group. This group will consist of the projects from Step 8 and 9. |
| Group Location | Browse to a folder location. |
| Group Folder | The group folder consists of the group location (path) and group name. |
When you are done, click Finish to create two new projects.