13.15.1 Canvas Overview
The SmartDesign Canvas is like a whiteboard where functional blocks from various sources can be assembled and connected; interconnections between the blocks represent nets and busses in your design.
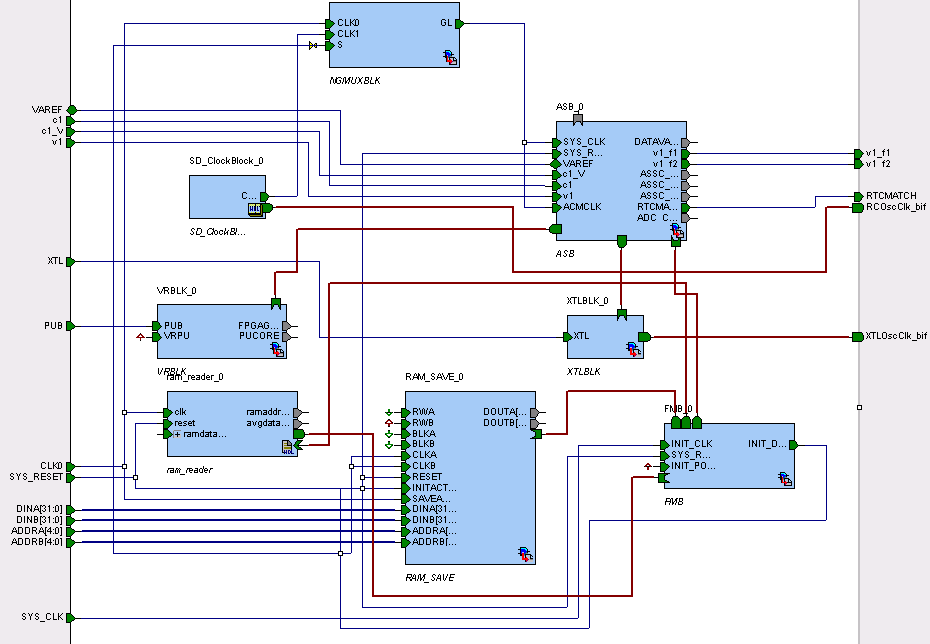
You can use the Canvas to manage connections, set attributes, add or remove components, etc. The Canvas displays all the pins for each instance (as shown in the figure below).
The Canvas enables you to drag a component from the Hierarchy, Files list, or a core from the Catalog and add an instance of that component or core in the design. Some blocks (such as Basic Blocks) must be configured and generated before they are added to your Canvas. When you add/generate a new component it is automatically added to your Hierarchy.
To connect two pins on the Canvas, select any two pins on the Canvas (Ctrl + click to select a pin), right-click one of the pins you selected and choose Connect. The Connect is disabled if you attempt to illegally connect two pins.
Click the Maximize Work Area button ![]() to hide the other windows and show more of the Canvas. Click the button again to return the work area to the original size.
to hide the other windows and show more of the Canvas. Click the button again to return the work area to the original size.
The Canvas displays bus pins with a + sign (click to expand the list) or - (click to hide list). If you add a slice on a bus the Canvas adds a + to the bus pin.
Components can be reconfigured any time by double-clicking the instance on the Canvas. You can also add bus interfaces to instances using this view. In the Canvas view, you can add graphic objects and text to your design.
Inputs and bi-directional pins are shown on the left of components, and output pins are shown on the right.