
21.6.4 Adding an Output Delay Constraint
To add an output delay constraint, perform the following steps:
- Click the Add Output Delay Constraint
icon
 in the SmartTime toolbar. The Set Output Delay Constraint dialog box appears.
Figure 21-7. Set Output Delay Constraint Dialog Box 
- In the Show by field, select Clock-to-Output.
- Click the Browse button in the Output Port field to select the ports for the output delay constraint. The Select Ports for Output Delay dialog box appears and displays the output ports in the design (as shown below).
- Click Add All to select all the output ports. SmartTime moves the output pins from the Available Pins list to the Assigned Pins list.
- Click OK to
close the Select Ports for Output Delay dialog box.
Figure 21-8. Select Ports for Output Delay Dialog Box 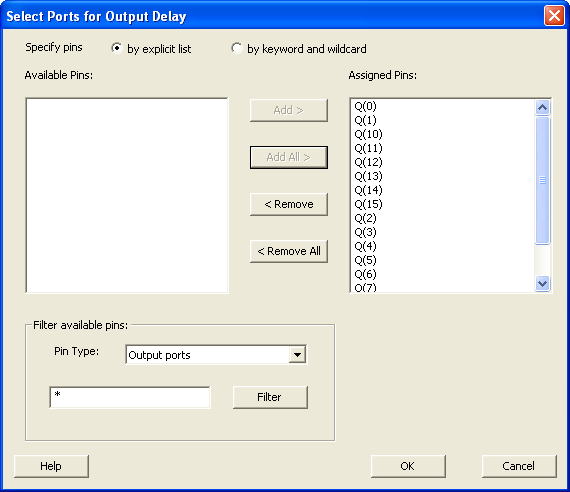
- Select Clock from the Clock Port drop-down list.
- Enter 10 in the Maximum Delay field and 8 in the Minimum Delay field.
- Click OK to
close the Set Output Delay Constraint dialog box. After the dialog
box closes, the clk-to-out delay constraints appear in the SmartTime Constraint
Editor (as shown below).
Figure 21-9. SmartTime Constraints Editor with Output Delay Constraint 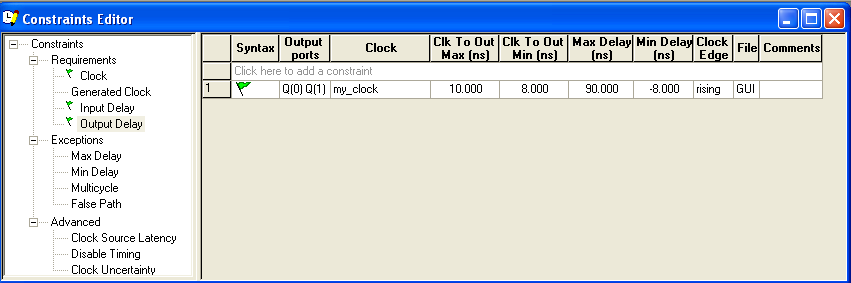
You must commit your changes in SmartTime before you can analyze timing in your design. Click the
Commit icon ![]() in the SmartTime toolbar to save your constraints.
in the SmartTime toolbar to save your constraints.
You are ready to analyze your design.